ComNav P4 Installation and Operation Basic Operations
Document PN 29010100 V1r0 - 126 -
To exit a particular operating mode menu, double-press the associated button again,
or wait
about 10 seconds. The display will then revert to the active display of
whatever mode the
autopilot is operating in.
You can access any mode’s menu whether of not the autopilot is currently operating
in that
mode.
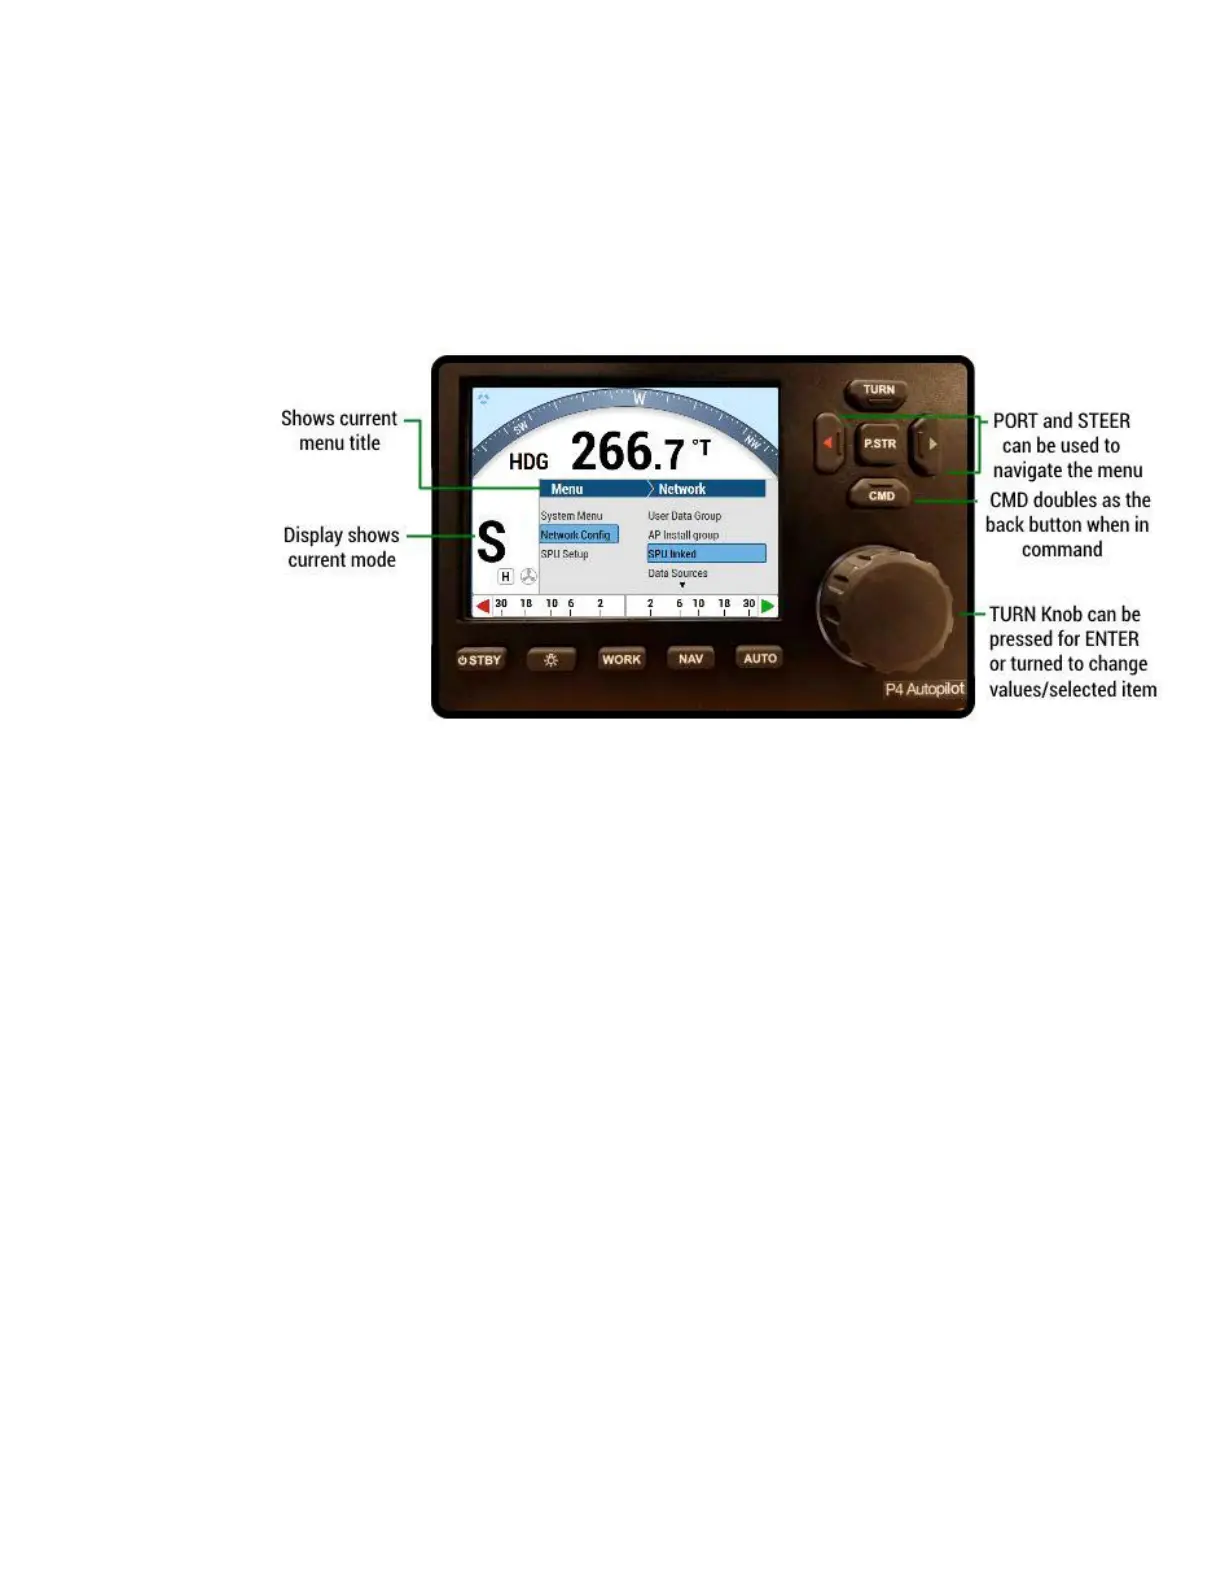
Figure 53 – A Typical Menu
All menus are arranged with parameter names on the left side of the screen, and the current
value for each parameter on the right side.
In each menu, one line is always highlighted in a contrasting colour – it indicates which
parameter
is currently selected (for example, see the “Network Config” - “SPU Linked” lines
in Figure 53).
You can move the highlight to other lines on the menu by pressing the PORT button (moves
the highlight up) or STARBOARD button (moves it down).
Some menus have more lines than can be shown on a single screen. In this case, when the
highlight has been moved to the last line on a screen, each subsequent press of the
STARBOARD button will cause the menu to scroll up by one line, revealing a new
highlighted line.
Similarly, when the highlight has been moved to the first line on a screen, each subsequent
press of the PORT button will scroll the menu down one line. These long menus are arranged
in a circular fashion, so that the scrolling action can be carried on indefinitely.
Use the COURSE CHANGE knob to change the value of the currently highlighted parameter.
For
parameters with numbered values, a clockwise turn of the knob will increase the value;
counter-clockwise movements will decrease the value. Non-numerical values are generally
arranged in a circular list for ease of use. In general, changes made with the knob are
effective immediately.
Caution! For safety reasons, a few items do not take effect until the highlight is moved
to the
next or previous line, or the menu is exited.