ComNav P4 Installation and Operation Getting Started
Document PN 29010100 V1r0 - 90 -
7. Press Enter to acknowledge the alarm
8. Press the CMD button to take control
9. For first time compass set-up, it is not important to have a valid compass reading (it
may be from N2K network)
10. Press Menu to bring up the System Menu
11. Select SPU Setup
12. Select Setup (it only works when in “S” STANDBY mode
13. Note that the “S” has changed to “D” (Dockside Setup Menu)
14. Select Compass Setup
15. Select Analog Compass to Mag
16. It will display “Magnetic sensor found”
17. After Dockside, the screen returns to “Compass”
18. Select “Exit” on the Dockside Setup Menu, DO NOT use the MENU button to go to
the previous screen.
19. Select “Exit” to go back to STANDBY mode
20. From the STANDBY mode screen, the compass reading will now show “CPS
XXX.X°M” where XXX.X is the Magnetic compass reading.
Connect Fluxgate compass to the SPU
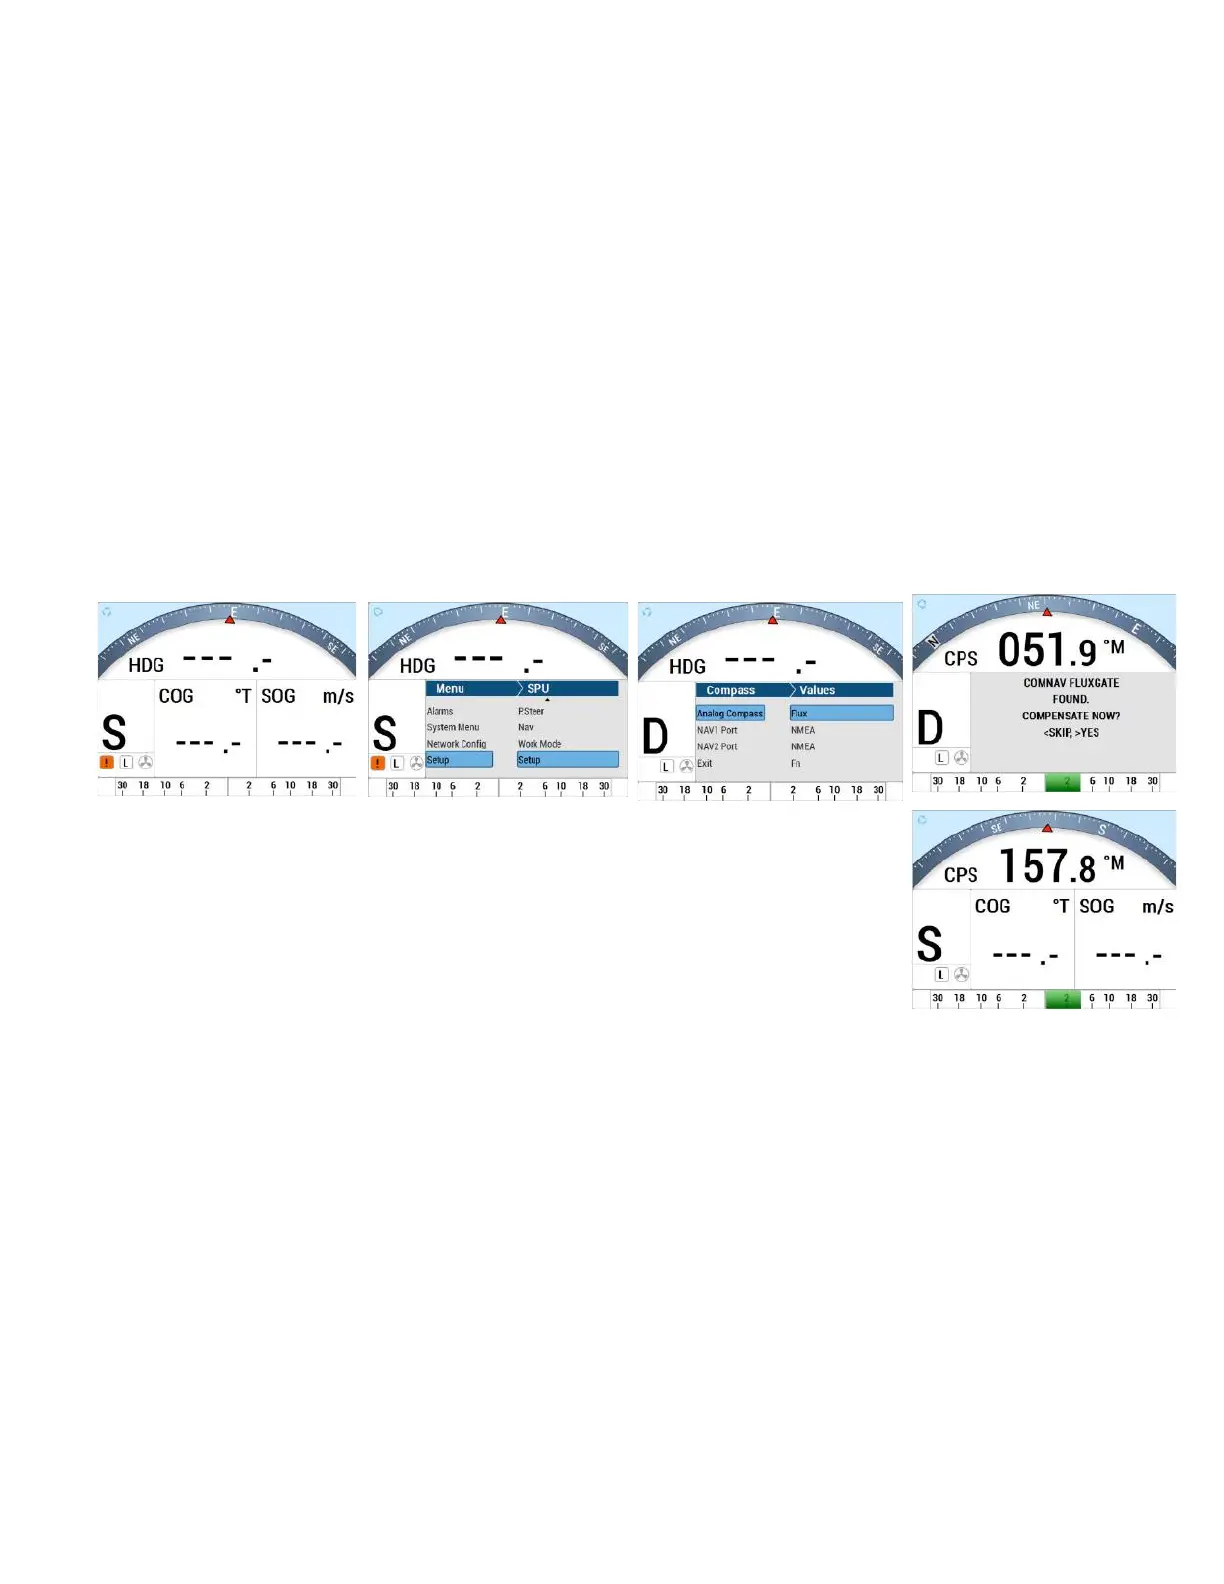
1. Press Enter to acknowledge alarm
2. Press the CMD button to take control
3. For first time compass set-up, it is not important to have a valid compass reading (it
may be from N2K network)
4. Press Menu to bring up the System Menu
5. Select SPU Setup
6. Select Setup (it only works when in “S” STANDBY mode
7. Note that the “S” has changed to “D” (Dockside Setup Menu)
8. Select Compass Setup
9. Select Analog Compass to Flux
10. It will display “ComNav Fluxgate found”
11. After Dockside, the screen returns to “Compass”
12. Select “Exit” on the Dockside Setup Menu, DO NOT use the MENU button to go to
the previous screen.
13. Select “Exit” to go back to STANDBY mode
14. From the STANDBY mode screen, the compass reading will now show “CPS
XXX.X°M” where XXX.X is the Magnetic compass reading.