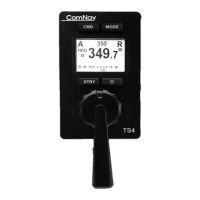
ComNav P4 Installation and Operation Getting Started
Document PN 29010100 V1r0 - 82 -
Note that every time a menu is accessed, there is a little icon at the top of the display that
looks like the COURSE CHANGE knob, but with a line drawn through it. This is a reminder
that the COURSE CHANGE knob is not available for its normal function of changing the
vessel’s course, because the knob is now being used to change parameter values.
All menus (except Dockside Setup) have a time-out feature that is triggered after about
10 seconds of inactivity. If no button presses or movements of the COURSE CHANGE knob
are detected during that interval, the menu will time-out.
When a menu times out, the display simply reverts to the previously active display, just as
though you had double-pressed the menu button again.
Alarm Clear
Whenever an alarm or error message occurs on the P4, an audible alert will sound, both at
the SPU and at the Control Head. A message will also be displayed on the LCD.
The alert will remain activated until the condition that caused it is remedied, or the alarm/error
is cleared manually.
To clear the alarm/error manually, press the ENTER button once. If the condition that caused
the alert remains, the alert will reappear after approximately 20 seconds.
System Set-up
For the P4 Autopilot system to work properly, it requires two main items; a Heading Source
and/or Navigation Source, plus a Rudder Follower Unit or Interface.
The Heading can be obtained from several different Heading sources; a ComNav N2K GNSS
GPS Compass on N2K network, a ComNav Magnetic Compass, a Fluxgate compass, an
Airmar Rate Compass or GNSS compass through the SPU. The Feedback or Interfaces
(Pumps, Motor, Solenoids and Thrusters) to the P4 Autopilot must be wired to the SPU.
Check the System Overview for details.
In order to connect the Heading Source and Feedback, the P4 system needs two parts, the
P4 Control Head and the P4 SPU.
For Analog compasses such as Magnetic and Fluxgate, a NMEA 0183 compass such as an
Airmar, and NMEA 0183 Navigation devices such as a plotter, these get connected through
the P4 SPU with a specially designated wiring diagram to either “Compass” connector on the
P4 SPU or “Nav I/O” connector on the P4 SPU.
You can also power up the P4 Control Head and SPU simply by connecting to a N2K network
through a drop cable. To access the Main Menu, be familiar with the button combinations as
follows:
To access the Menu, double click the CMD (Menu) button.
To go back the previous Menu screen, press the CMD (Menu) button.
To scroll through items on the Menu, adjust the TURN KNOB.
To select the item on the Menu, press down the TURN KNOB (aka ENTER)
To select the take control from the repeater (remote), long press the CMD
button.
After the wiring installation, the system setup is done as follows:
Setting up requires getting into the Main Menu Screen by pressing the CMD
(Menu) button, this will drop down four choices.