3.7 Installation 163
Control Devices
3.7 Installation
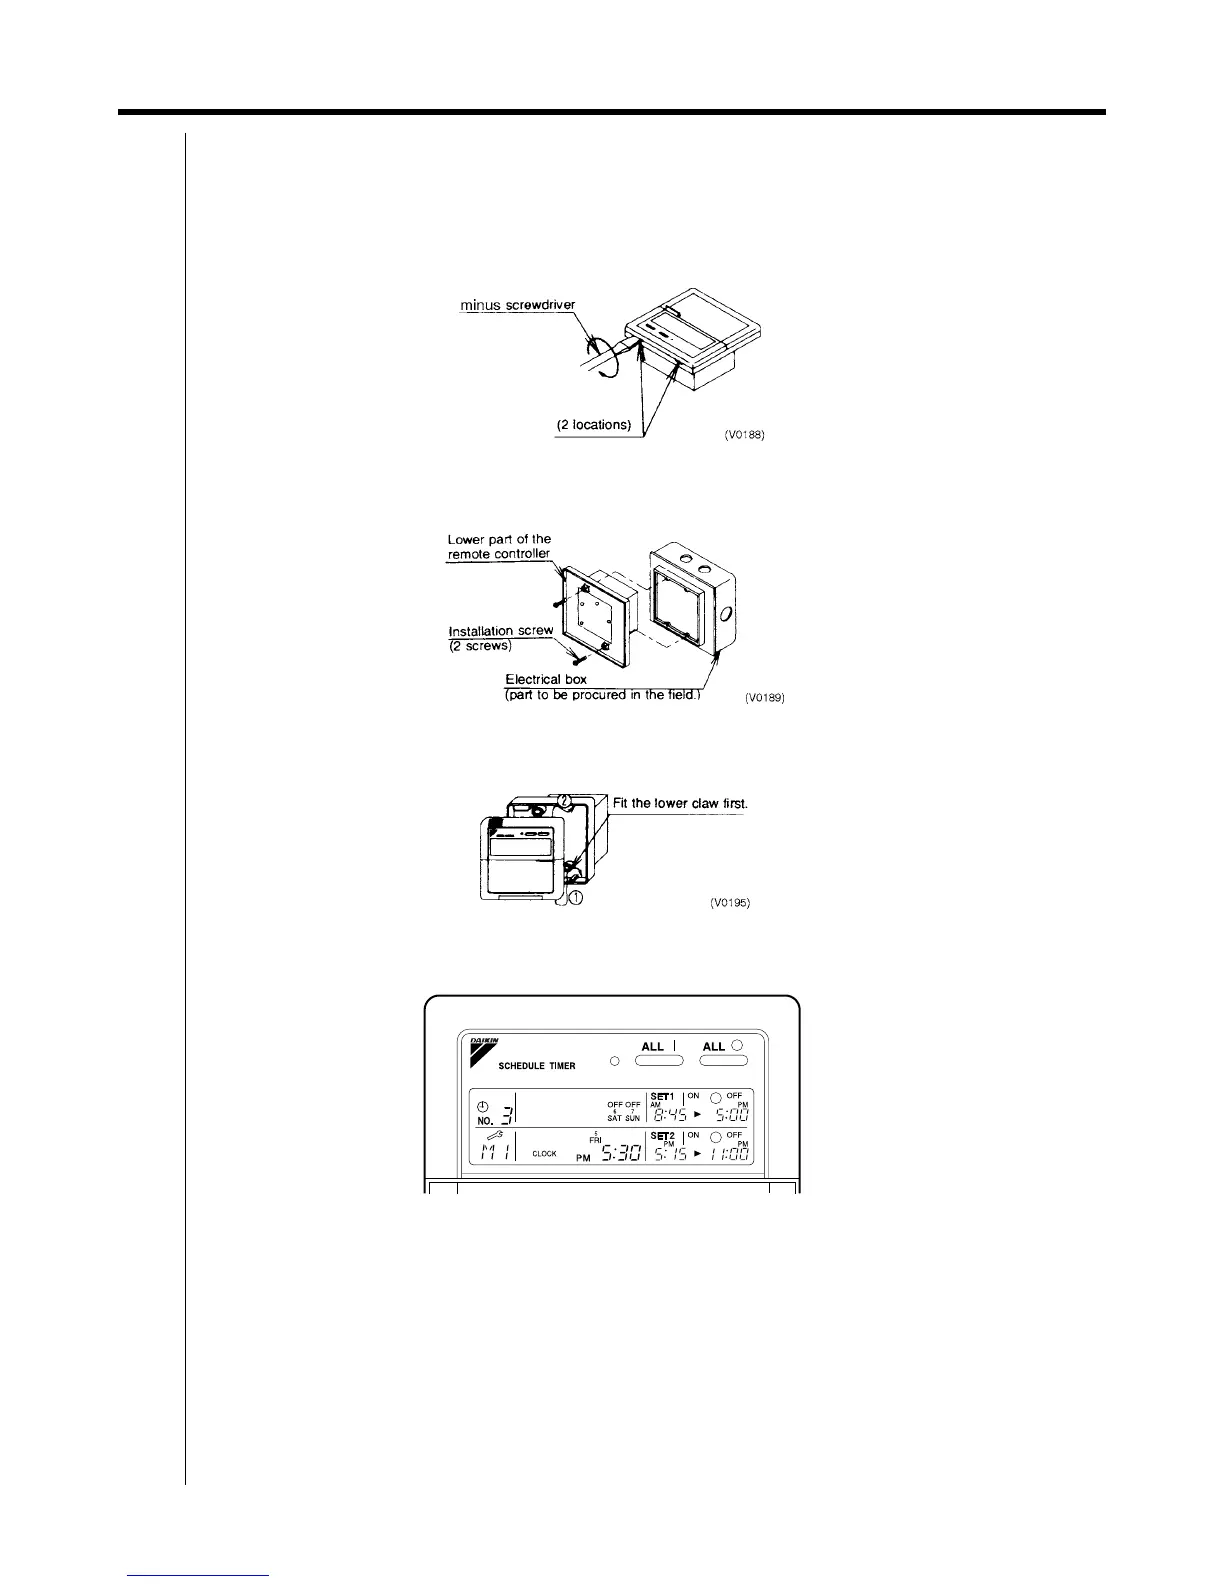
Remove the upper part of the remote controller.
Insert a minus screwdriver (2 locations) into the recess between the upper part and the lower part of the remote
controller and twist the screwdriver lightly.
(The PC board is attached with the upper part of the remote controller. Do not damage electric parts with a
screwdriver, etc.)
Attach the lower part to the electrical box (part to be procured in the field) with the provided installation screws.
(Select a flat face as an installation place. Do not tighten the installation screws excessively not to damage the lower
part of the remote controller.)
For part to be procured in the field electrical box, use KJB211A (optional accessory).
C: 3P162015A
Install the Upper Part of the Remote Controller as before.
C: 3P162015A
3.8 Error Diagnosing Function
This schedule timer is provided with the malfunction diagnosing function. The malfunction code flashes if there occurs
any malfunction in communication, etc. between and among the optional controllers for centralized control. In addition,
the operation lamp also flashes if there occurs any malfunction in communication with the indoor unit. Check the contents
of the display and contact your DAIKIN dealer because the signals give you the idea of the trouble area.