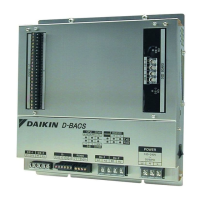
320 1.7 Ai Unit (DAM101A51)
Adaptor
1.7 Ai Unit (DAM101A51)
1.7.1 Function
Various analog inputs are allowed.
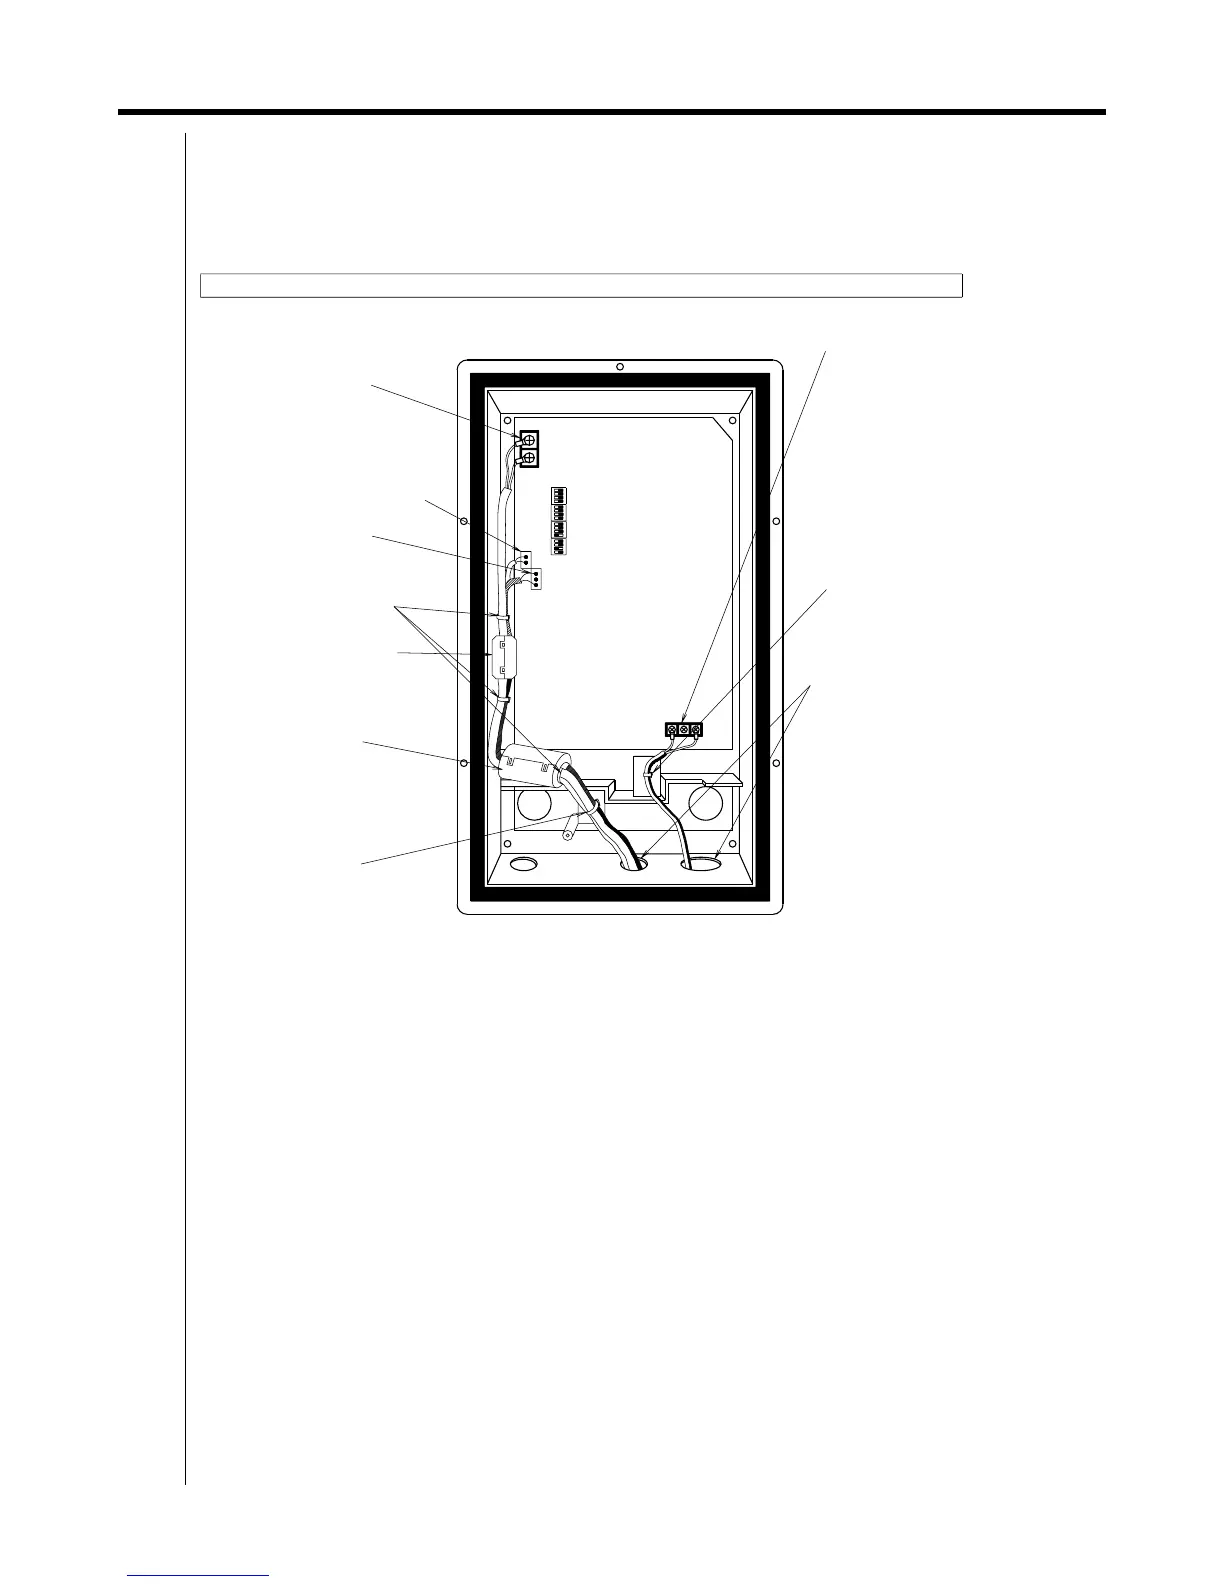
1.7.2 Part Names and Functions
Power supply AC 200 - 240V
Terminal block (X1M)
(Terminal size M3)
Do not connect anything to
the middle of
the three terminals.
Always use ring type crimp
style terminal.
Connecting and clamping the wiring (Be sure not to force screws. This may break them.)
X2A
Outside air thermistor
connector (X1A)
(Use the included thermistor.)
DS1
X1M
PC board ASSY
DS4
Names and functions of each part
Multi-purpose connector (X2A)
Secure the DIII-NET
communication line,
outdoor temperature
thermistor,
and multi-purpose sensor lines
using the included clamp
material with snaps.
Only secure the DIII-NET
communication line using
the included ferrite core
(small).
DS3
Secure the DIII-NET
communication line,
outdoor temperature
thermistor, and
multi-purpose sensor lines
using the included ferrite core.
1. Knock this part from
outside the case using
a screwdriver handle.
2. Attach the included
hole bushing to the knocked
out hole.
There are large and
small hole bushings,
so choose one that
is the right size.
3. As shown in
the figure above,
pull the power wiring
through the right hole and
the other wiring through
the left hole.
DS2
X1A
Secure using the included
clamping material.
Secure the power line
using the included
clamping
material with snaps.
X2M
DIII-NET Communication
Terminal block (X2M)
(Terminal size M3)
Always use round
pressure terminals
for wiring. (No polarity)