42 6.4 Setting Group No. for Centralized Control
Fundamental of DIII-NET
6.4 Setting Group No. for Centralized Control
Set the group number of each group of the indoor unit from the remote controller. (In case of no remote controller, also
connect the remote controller and set the group No. Then, remove the remote controller.)
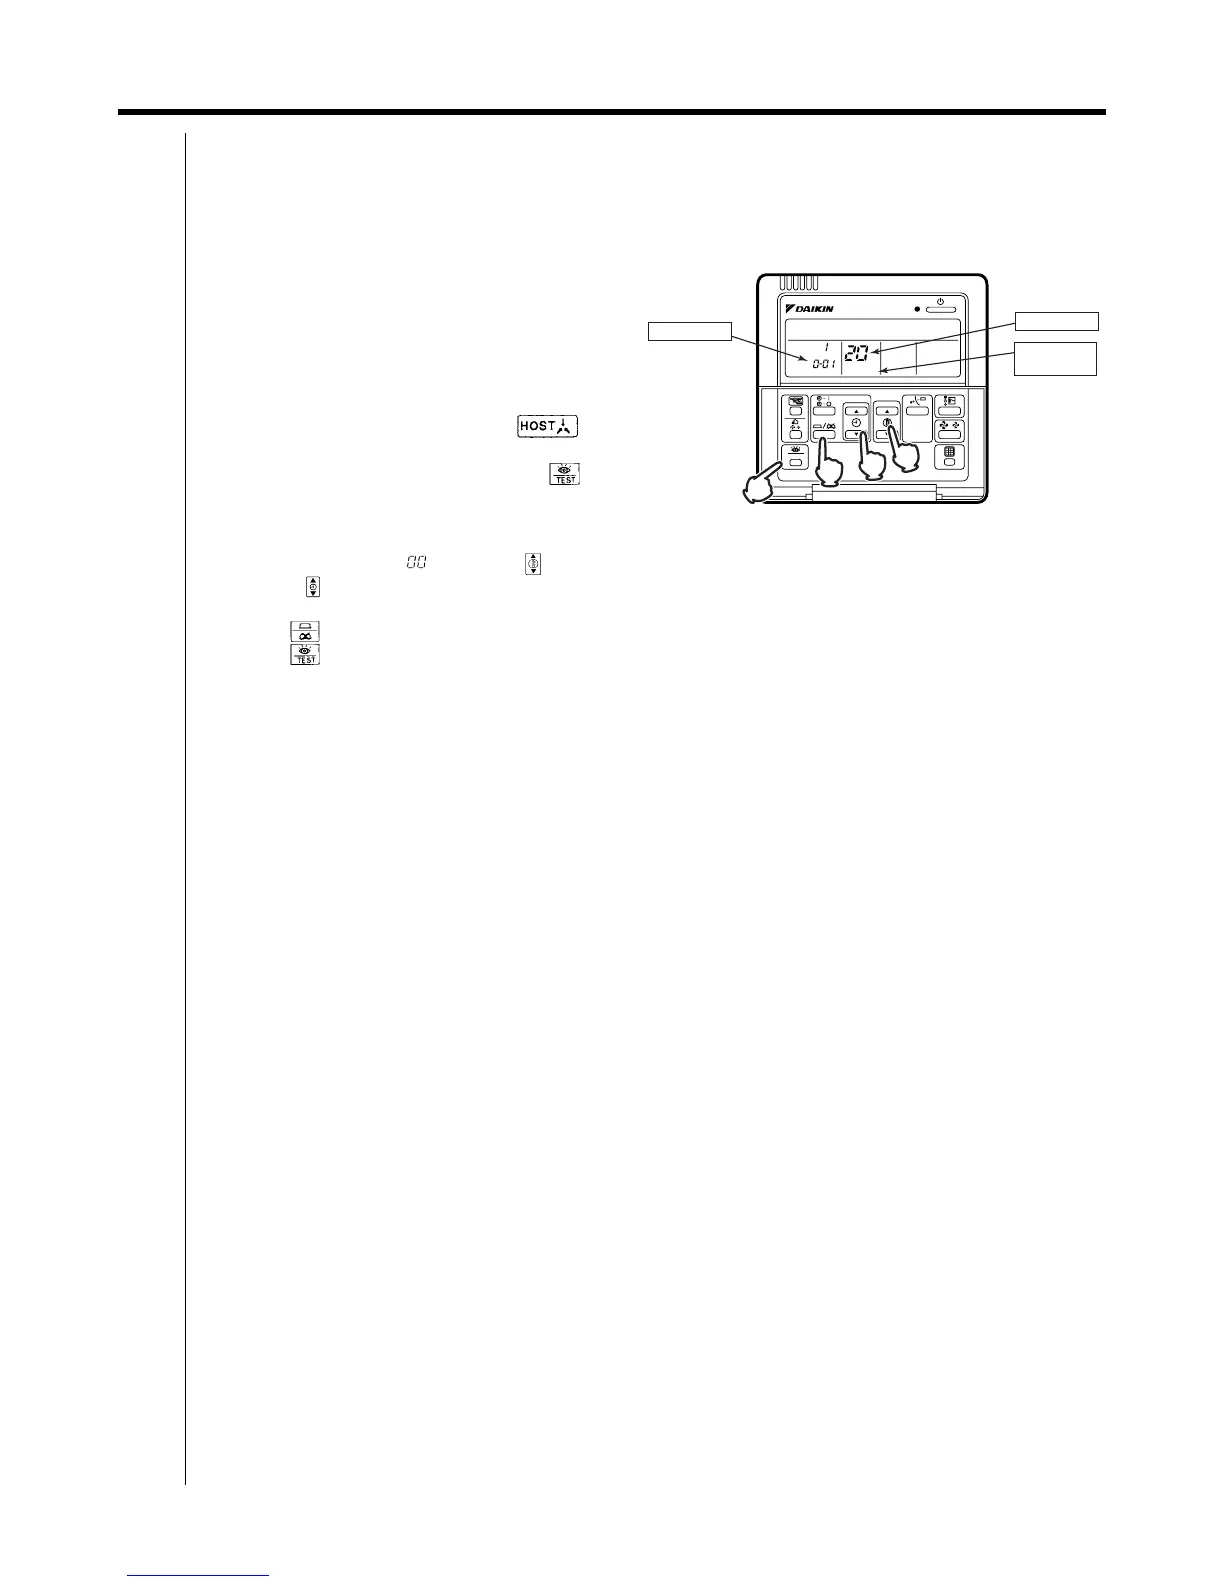
6.4.1 Wired Remote Controller <BRC1C62>
1. Turn ON the power of the indoor unit and unified ON/
OFF controller. (Unless the power is ON, no setting
can be made.)
Check that the installation and electrical wiring are
correct before turning the power supply ON.
When the power supply is turned ON, all LCD appear
once and the unit may not accept the operation for
about one minute with the display of “ ”
flashing (an interval of ON, ON, and OFF).
2. While in the normal mode, hold down the “ ”
button for a minimum of 4 seconds.
The remote controller will enter the FIELD SET
MODE.
3. Select the MODE No. “ ” with the “ ” button.
4. Use the “ ” button to select the group No. for each group.
(Group numbers increase in the order of 1-00, 1-01, ...1-15, 2-00, ... 8-15.)
5. Press “ ” to set the selected group No.
6. Press “ ” to return to the NORMAL MODE.
Note:
For simplified remote controller, see the installation table.
For setting group No. of HRV and wiring adaptor for other air conditioners, etc., refer to the instruction manual
attached.
NOTICE
Enter the group No. and installation place of the indoor unit into the attached installation table. Be sure to keep the
installation table with the operation manual for maintenance.
SETTING
TEST
UNIT NO.
5
2,6
4
3
GROUP NO.
MODE NO.
FIELD SET
MODE