6159930310_07_01/2016 - 35 -
7.11 - Synchro step
The «Synchro» step is used to synchronise the steps of
several tools driven by a common tightening unit (internal) or
by different controllers (I/O).
• To sync several controllers, program Synchro steps for
each controller and use the «Synchro in» and «Synchro
out» I/O events to connect physically the controllers
together (via 24 V I/O).
• Refer to "Appendix - Connections" to get more
information.
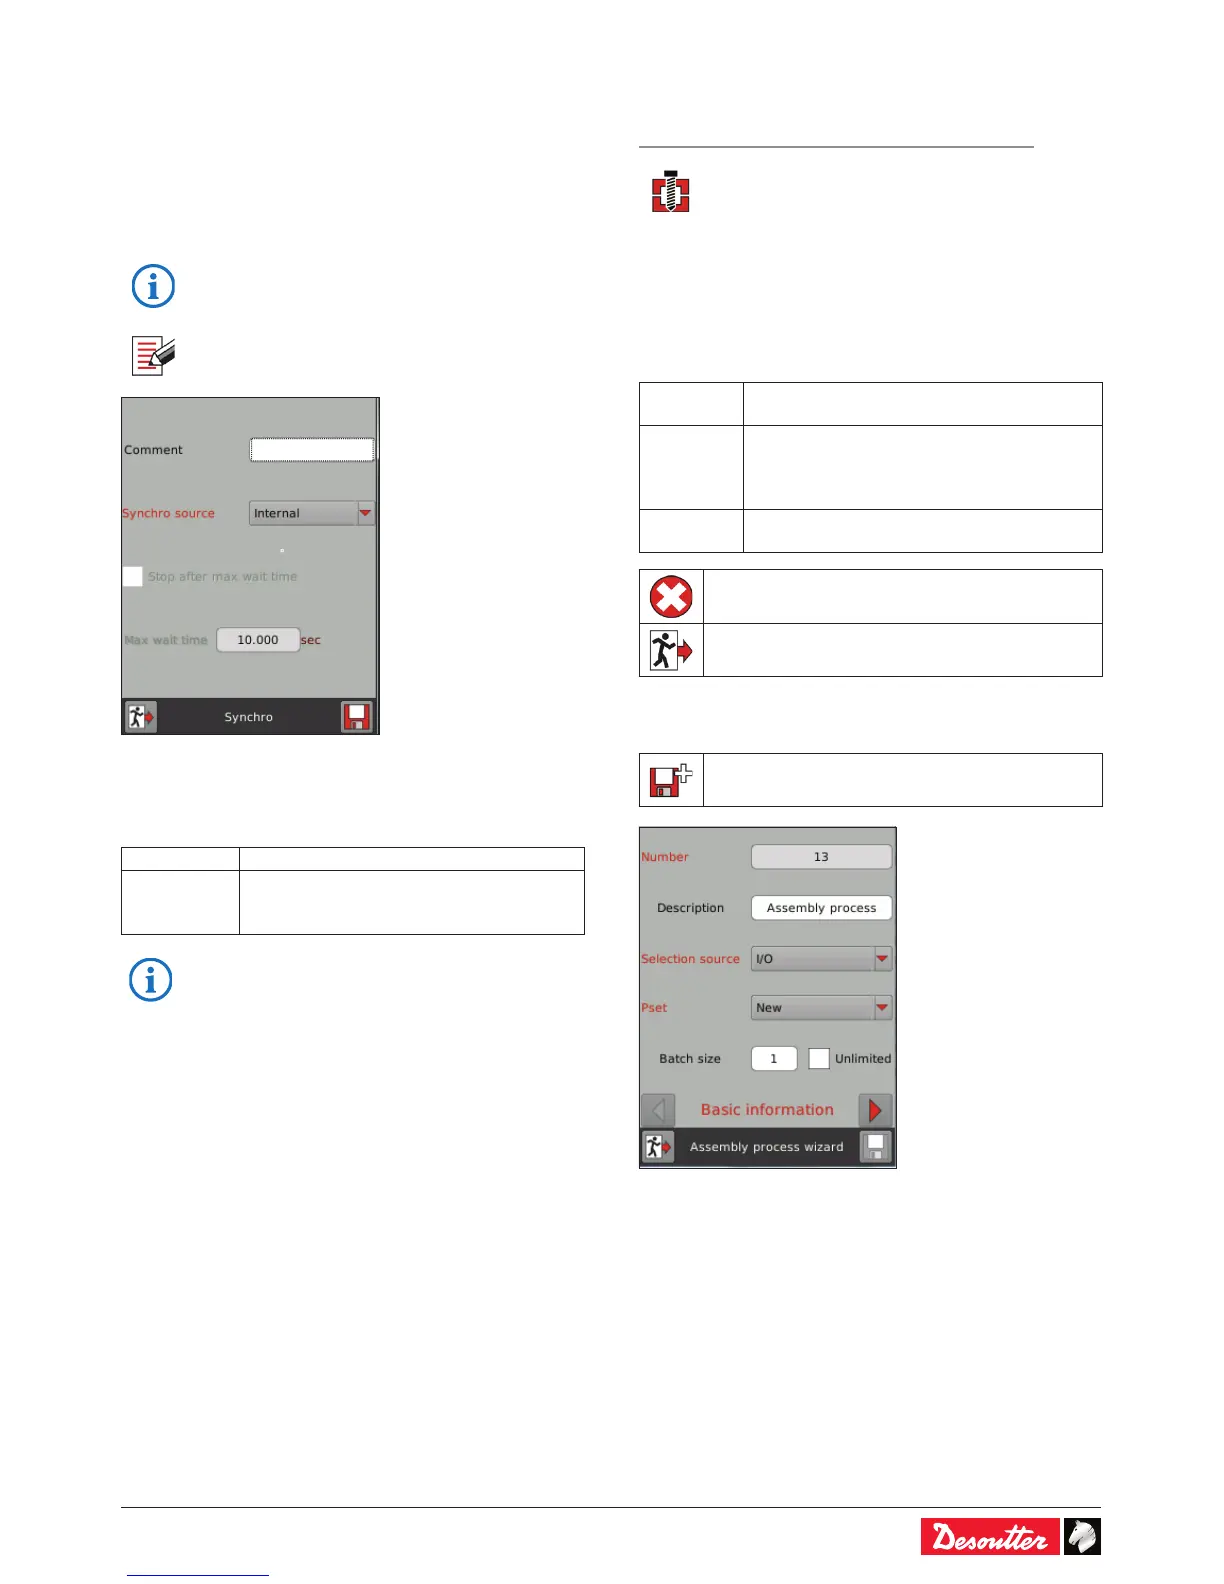
• Tap this icon to edit the step.
• Enter a comment (up to 100 characters).
• Enter the max. wait time of the Synchro step. When this
time is reached, the tools will stop and the report is NOK.
• Tick «Stop after max. wait time».
• Enter the synchro source:
between the tools of a tightening unit.
between the tools of a tightening unit and
with the other tools of other controllers (via
• For further information, contact your Desoutter
representative for support.
8 - ASSEMBLY PROCESS
Path: Main menu / Conguration / Assembly Process
An Assembly Process is commonly called AP and
shown by this icon.
An Assembly Process is the set of one or several assembly
actions to proceed in a dened order.
Each assembly action consists of a Pset to execute a certain
number of times called «batch».
The Assembly Process describes the workow to assemble
parts and has 3 phases:
Assembly Process selection by I/O, Fieldbus,
Open Protocol, etc...
Sequence of tightenings which is using Psets
as tightening recipes.
Assembly actions can be executed in a forced
sequential order or a free parallel order.
Post-processing actions are to be executed
when the AP is nished or aborted.
to delete an Assembly Process
to quit without saving
8.1 - How to create an Assembly Process
• Tap this icon to create an Assembly Process.
The AP number is automatically selected.
• Click the «Description» label to display the text keyboard.
• Enter a description (up to 40 characters).
• Select the source which will start the Assembly Process.
 Loading...