6159930310_07_01/2016- 46 -
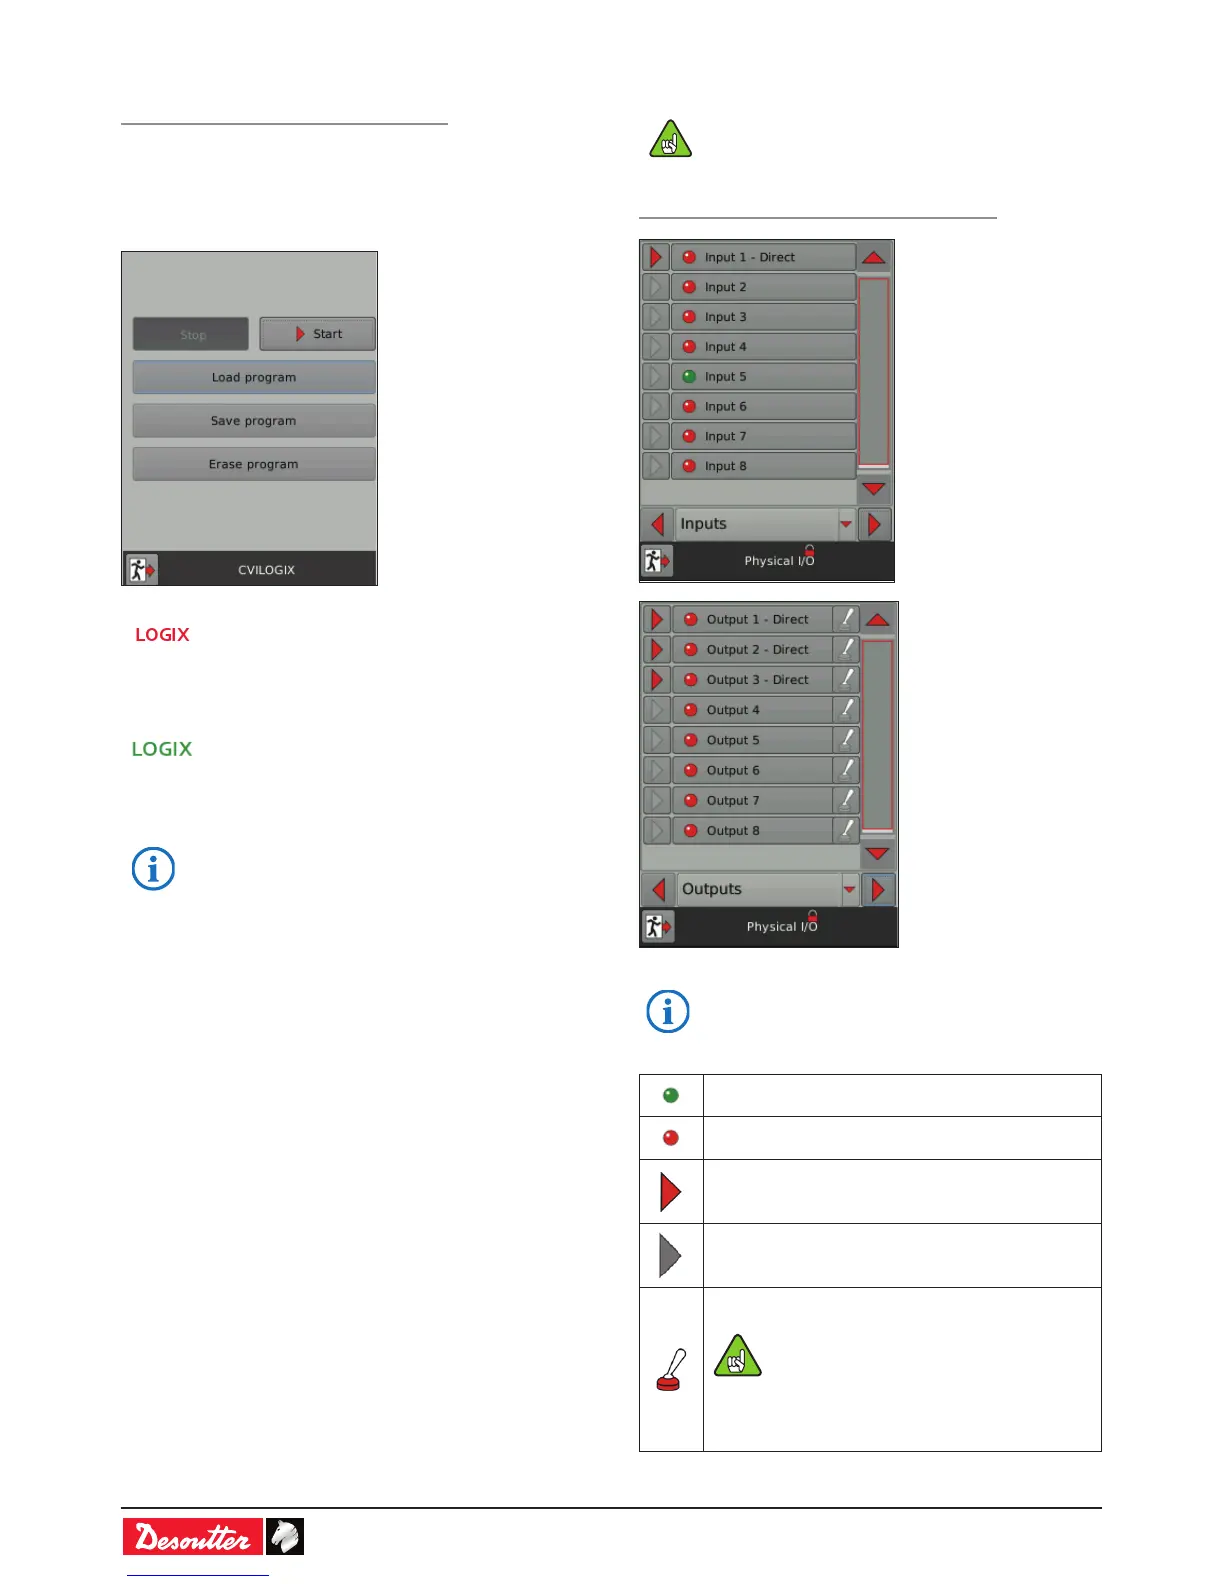
11.1.4 - CVILOGIX
Path: Main menu / Maintenance / Controller
Pre-requisite:
- ePOD including the CVILOGIX function
- USB key including your own CVILOGIX program.
• Plug in the ePOD to the bottom panel.
• Plug in the USB key to the front panel.
The CVILOGIX logo is activated and displayed on
the top left of the monitoring screen.
• Tap «Load program.
• Tap «Start» to launch the program.
The CVILOGIX program is running and the logo
turns green.
• Tap «Save program» to save the program on any USB stick
connected to the controller front panel.
• For further information, contact your Desoutter
representative for support.
11.1.5 - Physical I/O conguration
To activate these screens, you need to have a
USB stick with the right prole (congured with the
Desoutter CVIKEY software).
• If not, contact your CVIKEY manager for support.
Path: Main menu / Maintenance / Controller / IO
• For more information about how to assign events
to physical I/O, refer to the CVI CONFIG user
manual at http://resource-center.desouttertools.
com.
I/O ON
I/O OFF
I/O events are associated to physical I/O.
• Click to display the assignment.
I/O events are not associated to physical I/O.
To activate this function, you need to
have a USB stick with the right prole
(congured with the Desoutter CVIKEY
software).
• If not, contact your CVIKEY manager
for support.
• Click this icon to switch the signal.
 Loading...