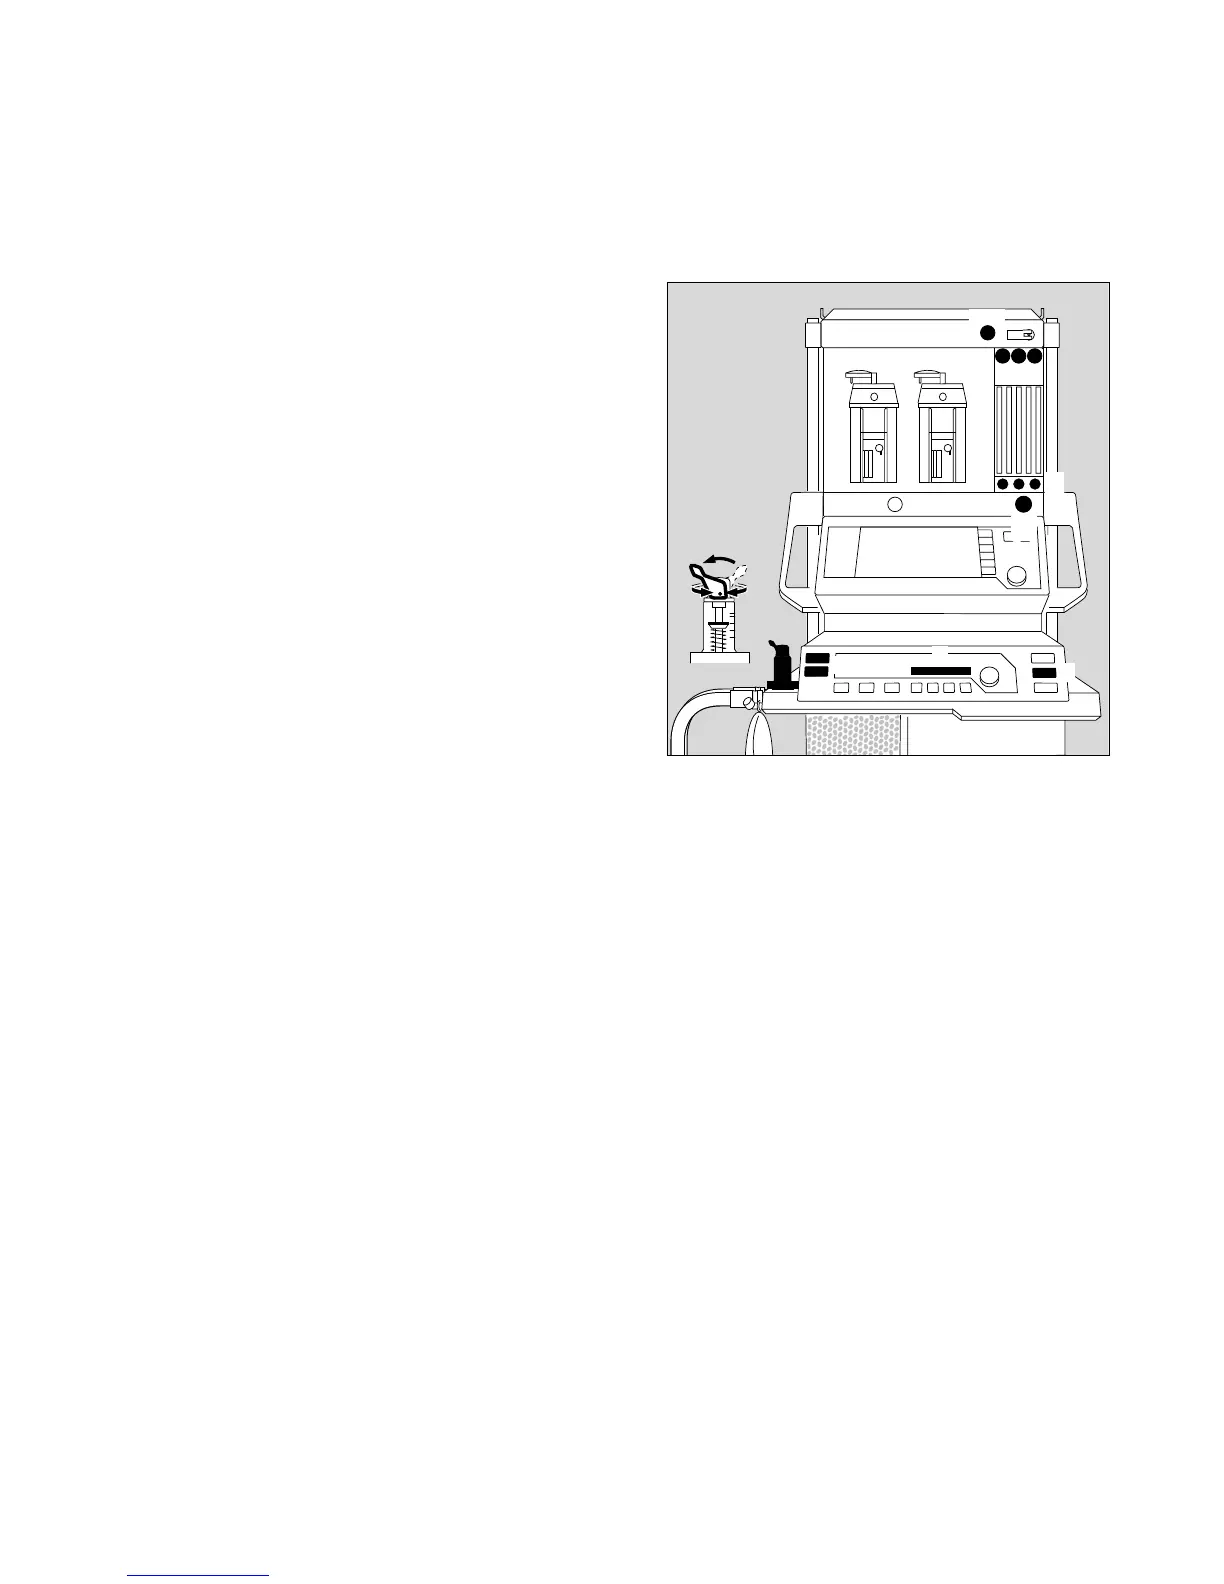
Quick start in an emergency
● Plug the gas connectors into the gas supply wall
sockets.
1 The O2, AIR and N2O pressure gauges must be in
the green range.
● Plug the power plug into the mains.
2 Press the master switch.
All the LEDs on the ventilator light up.
3 Press the key for the desired operating mode on the
ventilator –
Recommendation: hold down M for longer than
1 second.
4 The following message is displayed in the display
window of the ventilator:
Test 3 x discont (example)
Number of times that the self-test has been inter-
rupted for a quick start since it was last completed
successfully.
● Set the selector switch to »N2O« or »AIR«.
5 Deliver fresh gas.
6 Press O2 flush – if necessary –
to fill the system and the breathing bag rapidly.
7 Switch the pressure limiting valve (APL) to »MAN«.
8 Set maximum pressure. Turn the lever of the pressure
limiting valve clockwise until the indicator (plate)
stands at maximum pressure.
No more than ten consecutive quick-starts are allowed
between two complete self-tests. This maximum is only
permitted if the previous completed self-test revealed no
fault.
After the 10th consecutive quick-start, the following
message appears in the ventilator display window:
last cancel
If a further attempt is made to cancel the self-test and carry
out a quick start, the following message is displayed:
COMPLETE TEST
Quick-start not permitted.
A complete self-test must be carried out before start-
up is possible.
However, in all cases, manual ventilation is always
possible.
Quick-start can be started at any time, even while a self-
test is in progress.
D
1
7
8
6
2
5
3
4
3
Cato edition
7
Quick start in an emergency
00237224