Set-up instructions
Operating manual 867 Version 01.0 - 12/2012 93
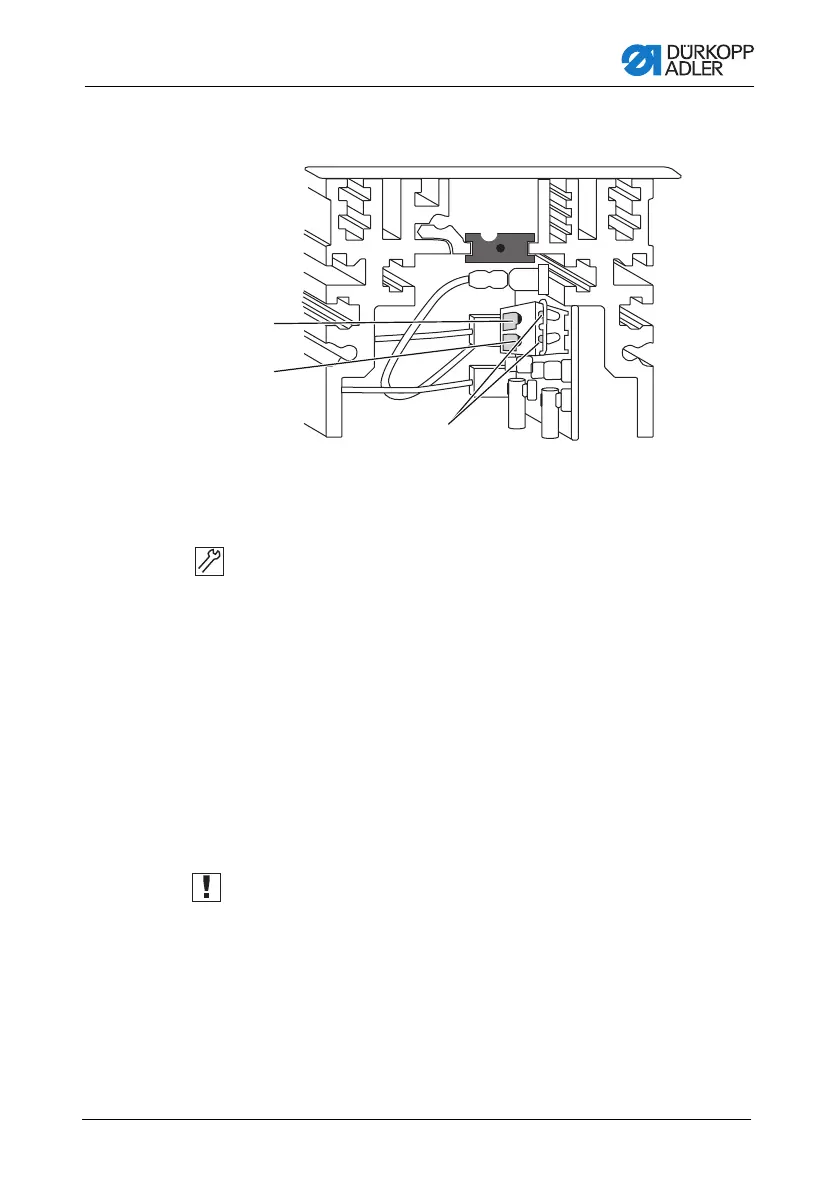
Connecting the sewing lamp transformer to the Efka controller
Figure 64: Connecting the sewing lamp transformer to the Efka controller
1. Remove all 4 screws from the controller front panel.
2. Remove the front panel.
3. Feed the cable from the rear through the cable duct (1) into
the controller.
4. Remove the black rubber guide (2).
5. Pierce the round opening of the rubber guide with a screw-
driver.
6. Feed the sewing lamp transformer cable through the resulting
hole in the rubber guide.
7. Replace the black rubber guide (2).
8. Press a narrow screwdriver into the terminal openings (5) to
open terminals (3) and (4).
Important:Do not press so hard that the board is pressed in.
9. Connect the blue cable to the upper terminal (3) and the brown
cable to the lower terminal (4).
10. Fasten the front panel with the 4 screws.
1
2
5
4
3
(1) - Cable duct
(2) - Rubber guide
(3) - Upper clamp
(4) - Lower clamp
(5) - Clamp opening
 Loading...