C8 Maintenance 5. Joint #1
C Series Maintenance Manual Rev.2 283
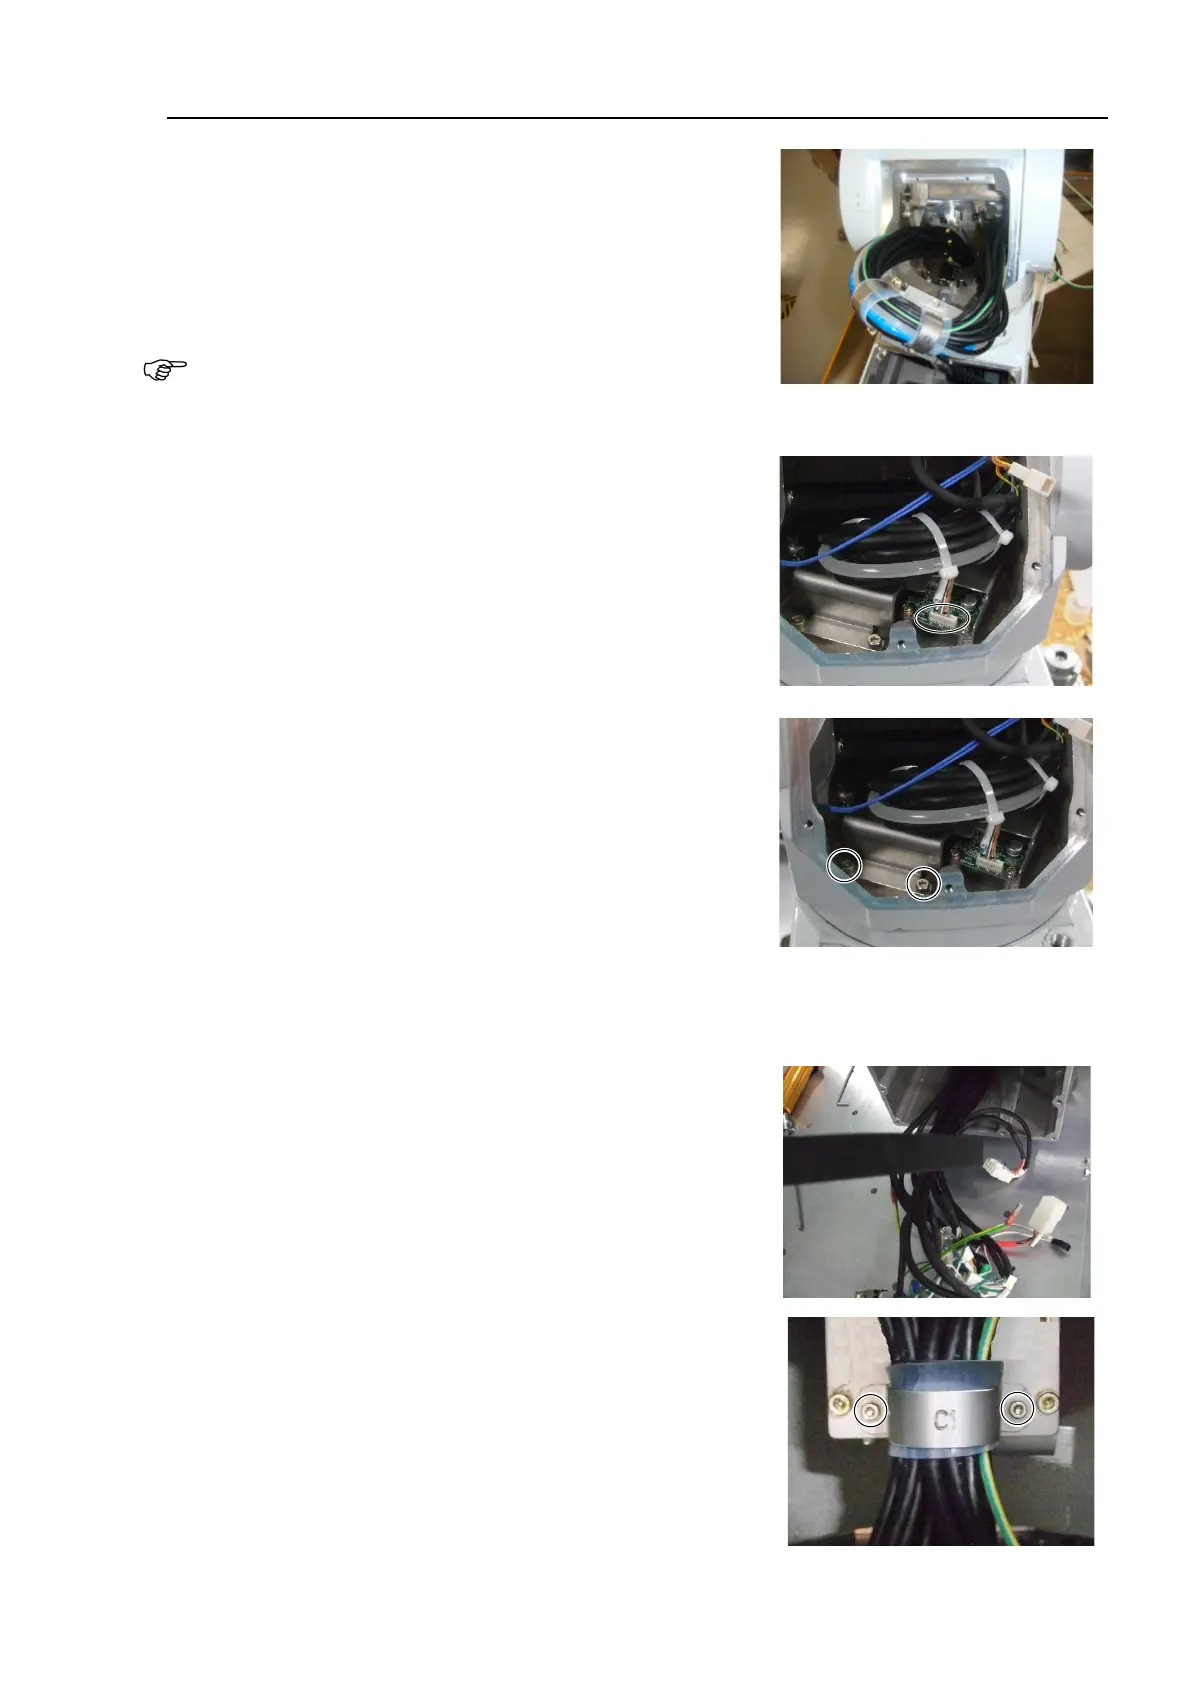
4. Pass the internal cables from the Arm #1 side to the base.
Protect the connectors with masking tapes.
- To protect the connector’s clips
- To avoid adherence of cable grease
Disconnect the cables one by one in order from the largest
connector to the smallest one.
Do not attempt to pull all connectors at once.
Doing so may damage the cables.
5. Connect the connector to the control board 1.
Connector: GS01
6. Install the Joint #1 cable bracket (Arm #1 side).
Hexagon socket head cap bolts: 2-M4×10
Tightening torque: 4.0 ± 0.2 N·m
7. Install the Joint #2 motor unit.
For details, refer to C8 Maintenance 6.1 Joint #2 - Replacing the Motor, Installation steps (4) to (9).
8. Pass the cables and the air tube inside the Joint #1 timing belt.
9. Mount the base cable bracket (C1).
Wrap the cables with the attached silicone sheet.
Use a cable bracket to fix the wrapped silicone sheet.
Hexagon socket head cap bolts: 2-M3×6
Tightening torque: 2.0 ± 0.1 N·m

 Loading...


