Overture Software Manual
Page 2-30
Revision 1.5 USING OVERTURE
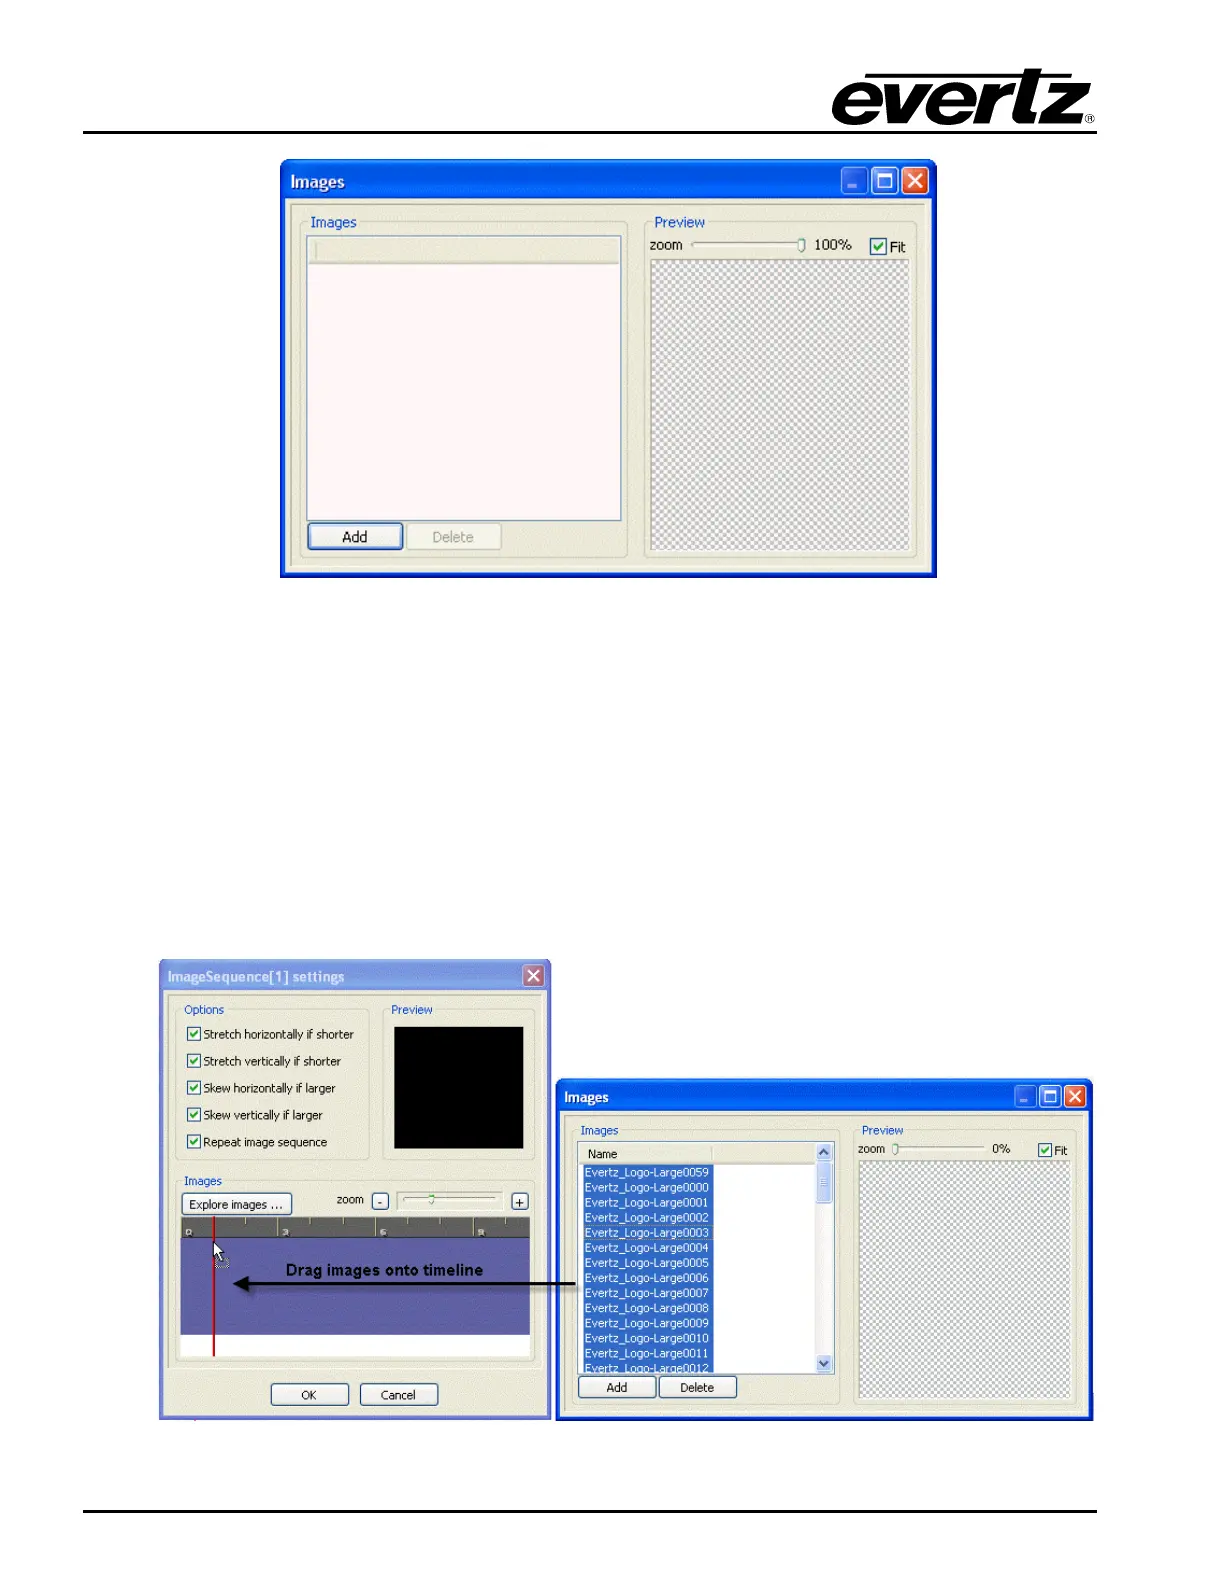
Figure 2-47: Images Window
2. Once the Images dialog box is open, click on the Add button to insert an image or series of
images. The Select Image File window will appear and the user will be prompted to select the
desired image(s).
3. Once the image(s) are selected, click on the Open button to insert the image(s). The inserted
image(s) will be listed in the Images panel and, when selected, can be viewed in the preview
panel. The user can remove the image(s) by highlighting the image name and selecting the
Delete button.
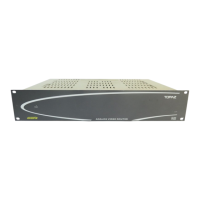
4. Once the images are loaded in the Images panel, select the desired image(s) and drag the
selection onto the timeline in the ImageSequence[x] settings editor (see Figure 2-48).
Figure 2-48: Transferring Images to the Image Sequence Timeline