Chapter 3 Cutting Function
14
Chapter 3 Cutting Function
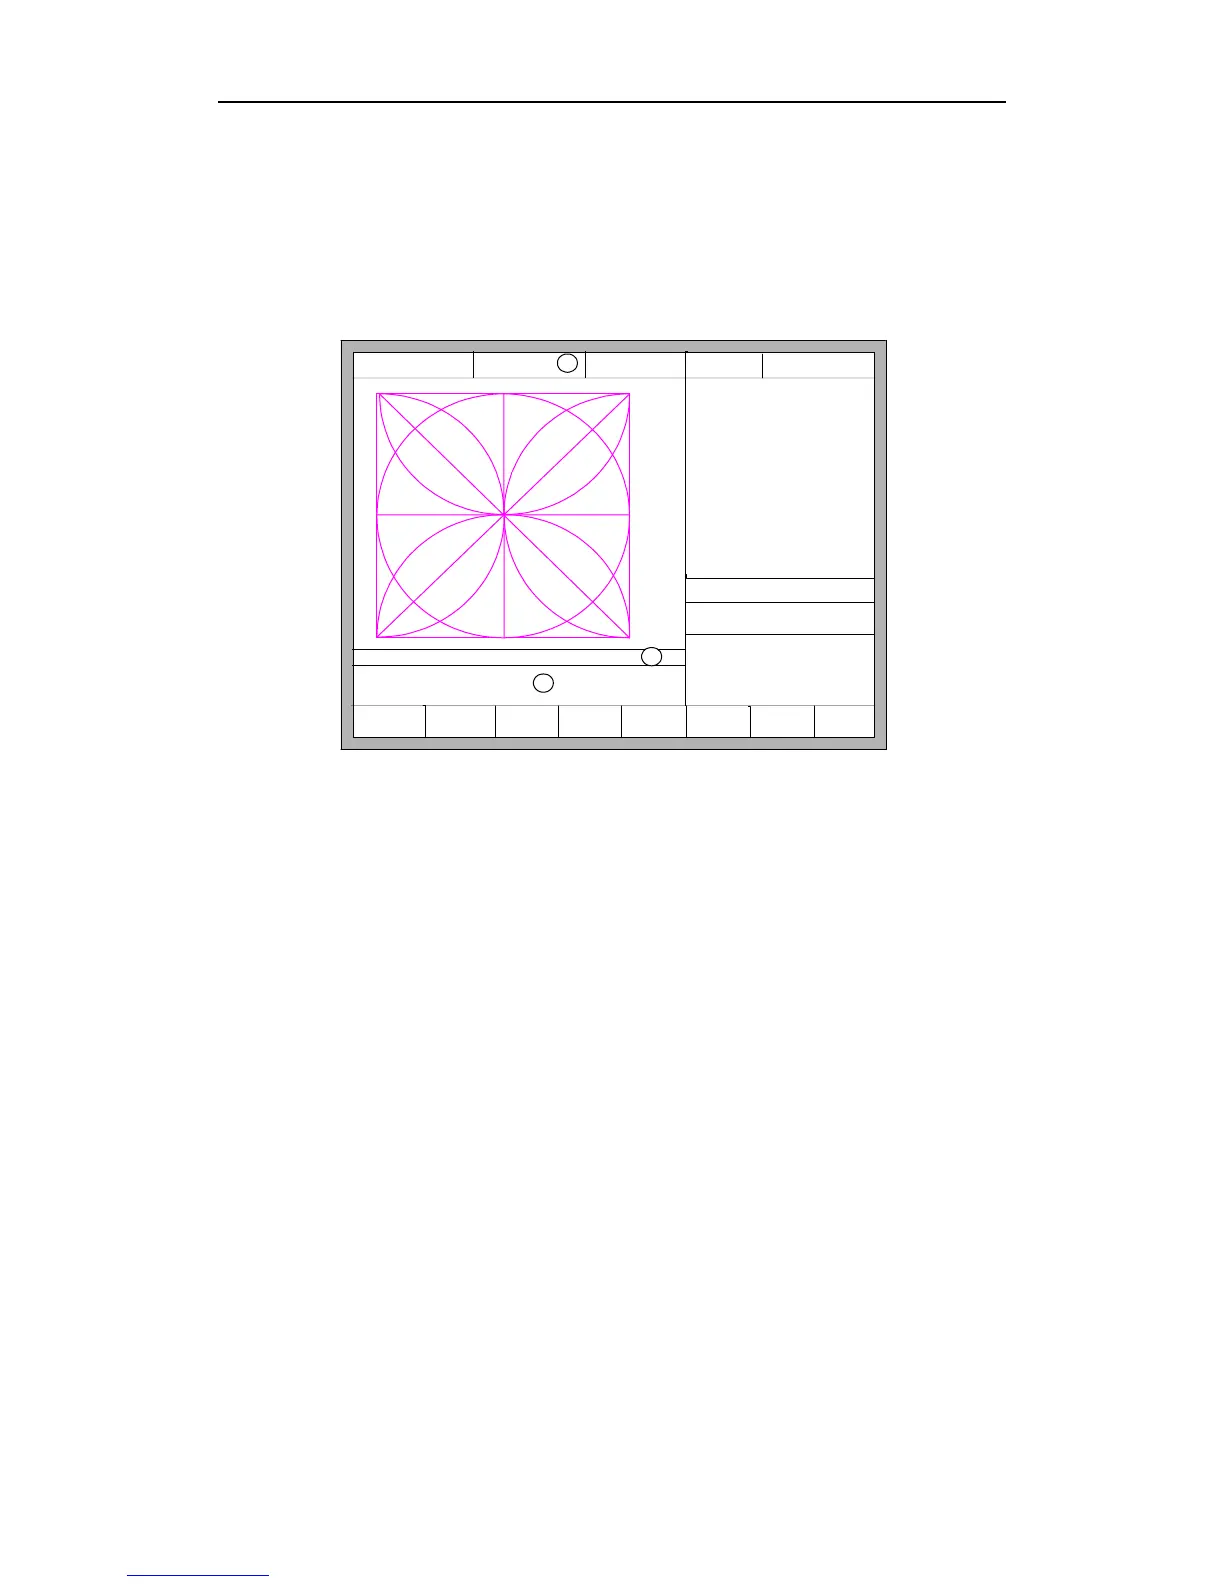
In the main interface, press the 【SPACE】to enter the cutting interface, shown as
follows:
F1 ShapeLib F2 Files
F3
PartOption
F4 Setups F5 Diagnose F6 ZoomIn
F7
ManualMove
F8 Zero
FLSK F2200T
Version 3.3.73.1
Speed:
00000
File:
SHAPE_43.TXT
Status:
Stop
Current Line/Hole:
00000/00000
+X:500.00 -X:0.00 +Y:500.00 -Y:0.00
1:(TEST PATTERN)
2:G92
X:+000000.0
Y:+000000.0
●Ignition s
●LowHeat s
●HighPreheat s
●Pierce1 s
●Pierce2 s
●Pierce3 s
●TorchUp s
●TorchDn s
●THC En
●Blow s
Manual 【F】 StepMov
StepDis【G】 5.00 Flame Cu 【M】
CutSpeed 【X】 300.00 Kerf【N】1.40
ManualSpd 【Y】3000.00 Angle 0.00
3
1
2
Fig 3.1 cutting function interface
①Shows the current workpiece's cutting path, including the slotted value.
②Shows the G-code being processed, shows the current and next line.
③Shows the current cutting speed, during processing, you can press the
keyboard's number keys 【1】 - 【9】 to achieve quick speed regulation. For example,
press the number【3】, the speed is automatically adjusted to 30%; press the number
【8】 the speed is automatically adjusted to 80%.
X shows the absolute coordinate of the torch in X direction.
Y shows the absolute coordinate of the torch in Y direction.
In the cutting interface:
Press 【X】: Modify the current cutting speed.
Press 【Y】: Modify the current speed manual shift car.
Press 【F】: Change the current manual method.
Press 【G】: Modify the current fixed-length fixed long-distance move.
【START】(【F9】): Start cutting.
【STOP】(【F10】): Parking, the system can suspend all ongoing actions.
【F1】:The torch move back along the cutting path(I / O port closed)
【F2】: The torch forward along the path (I / O port closed).