Section 8: Model 9500B — Routine Maintenance and Test 8-5
Final Width = 215mm
EXIT returns to the 'Select test' menu
screen.
PRINT prints out the results of the test.
Refer to Sub-section 8.4.
If failures were encountered, EXIT and PRINT
remain available. Also, the number of failures
is shown on the screen, and an extra selection
will be available:
VIEW FAILS
sets up a special screen for detailing the
parameters of the failures encountered
(described later in Paras 8.3.2.3).
8.3.2.3 Viewing the Test Results
By pressing the VIEW FAILS screen key,
each of the failed tests can be viewed in turn, on
a screen which shows the test number
(pathway), measured value, upper and lower
limits, and the value of the error. A brief
description of the test is also given in a box
beneath the values.
The screen for viewing the test results is shown
below. This can also appear when a test has
been aborted.
VIEW FAILS
sets up a special screen for detailing the
parameters of the failures encountered
(described later in Paras 8.3.2.3).
8.3.2.2
Selftest Runs to Completion
If the selftest is not aborted, it will run to
completion, and if the test is successful with no
failures, a screen will appear:
TODAY'S DATE TIME
EXIT
Selftest
Aborted Base Test
Test ABORTED with X FAILURES
PRINT
VIEW
FAILS
If failures were encountered during the test,
the 9500B will display a completion screen.
For example:
TODAY'S DATE TIME
EXIT
Selftest
Base Test
Test completed with X FAILURES
PRINT
VIEW
FAILS
N.B. If the cause of failure is not immediately
obvious, and it is intended to consult
your Fluke Service Center, please ensure
that you either: copy the details from the
screen for all the reported failures, or:
print out the results.
NEXT FAILURE
Once the details of the first failure have been
noted, the next failure in the list can be viewed
by pressing the NEXT FAILURE screen key.
The list of failures remains in memory until the
next selftest is started, and the PREV
FAILURE screen key can be used to help scan
the list one at a time. Once the last failure in the
list is on the screen, and the NEXT FAILURE
screen key is pressed, the following error
message will appear in the top right of the
screen:
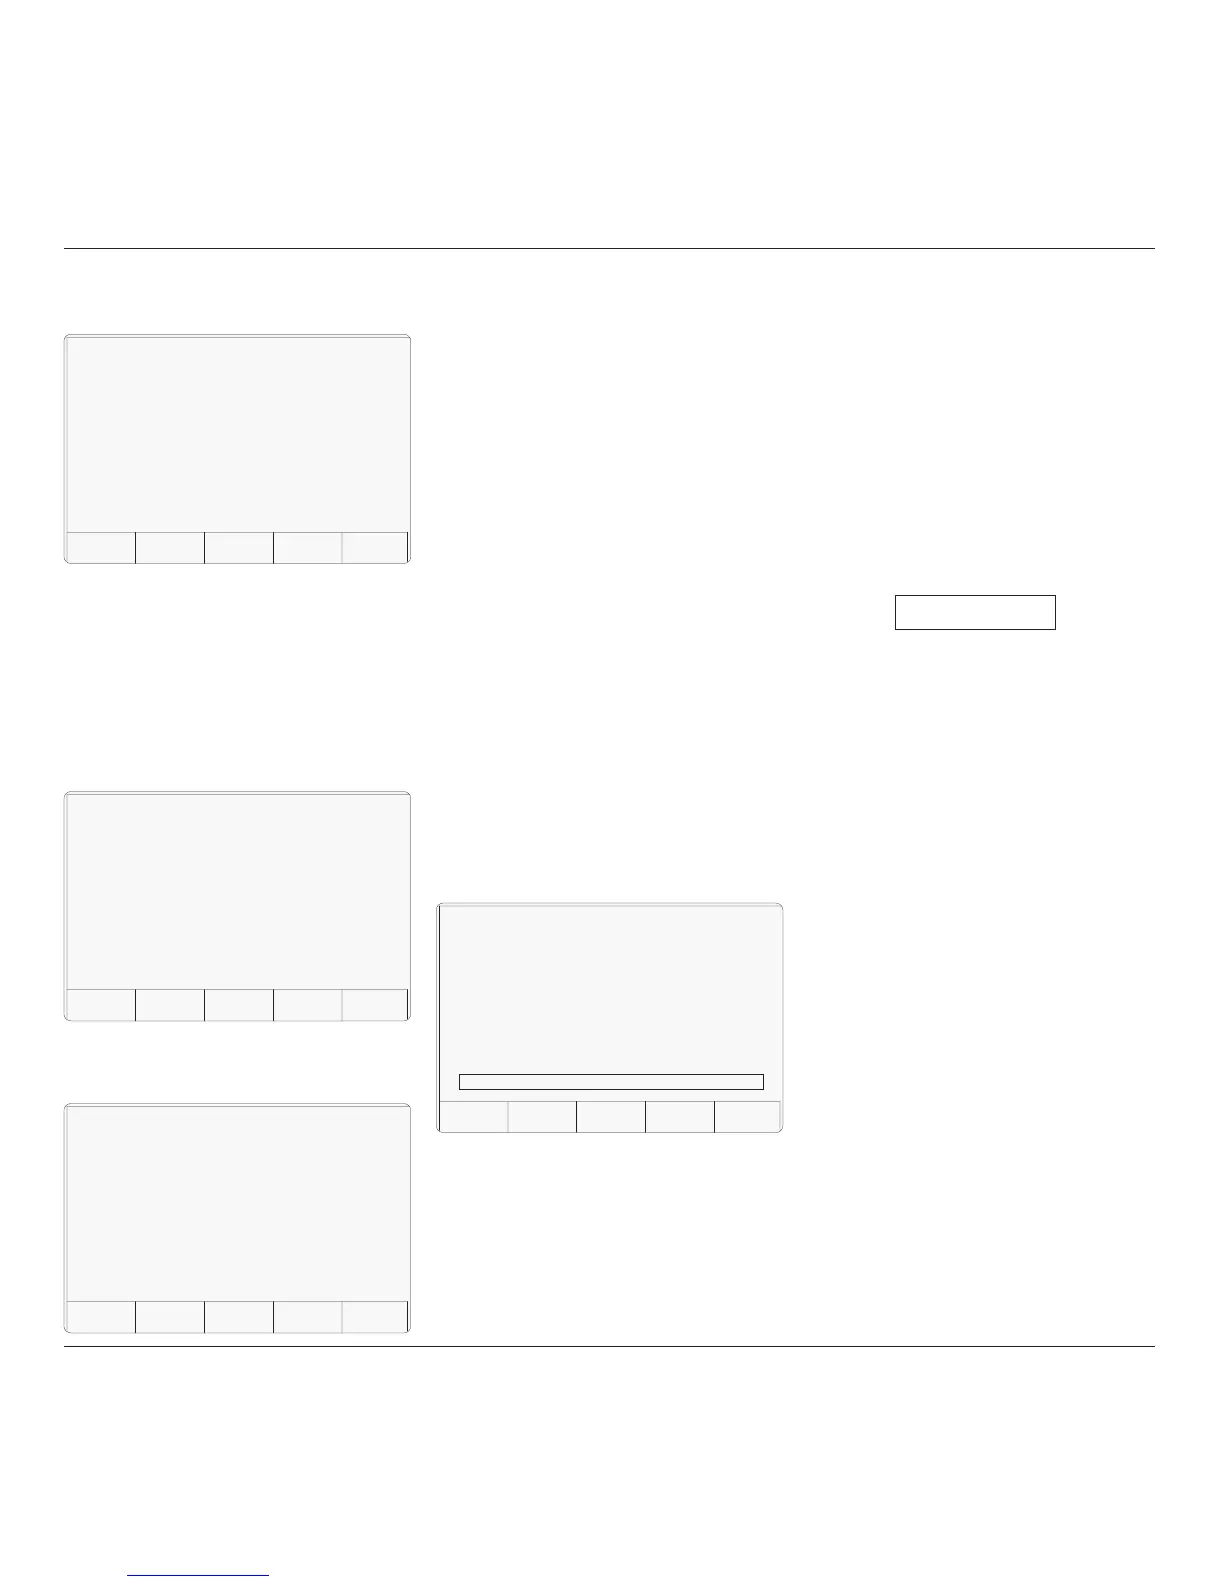
TODAY'S DATE TIME
EXIT
Selftest
Test Path no: XXX.XXX
Measured value XXXXXXX
Nominal value XXXXXXX
Upper Limit XXXXXXX
Lower Limit XXXXXXX
Error XXXXXXX
NEXT
FAILURE
(Description of Test)
PREV
FAILURE
Continued Overleaf
→
Pressing the NEXT FAILURE screen key will
have no further effect.
8.3.2.4 Printing the Test Results
The PRINT screen key is present on the
'ABORTED' or 'completed' screens after the
test has run to completion or has been aborted.
Pressing the PRINT key will print out all the
available results.
Printing will only be possible if a suitable
printer is set up, connected and on line. Refer
to Sub-section 8.4.
No more failures
to view
TODAY'S DATE TIME
EXIT
Selftest
Base Test
Test completed with no failures
PRINT