Job Assembly
103
Copy
3
z
Side 2 Only
The setting is applied to only to Side 2 of the document.
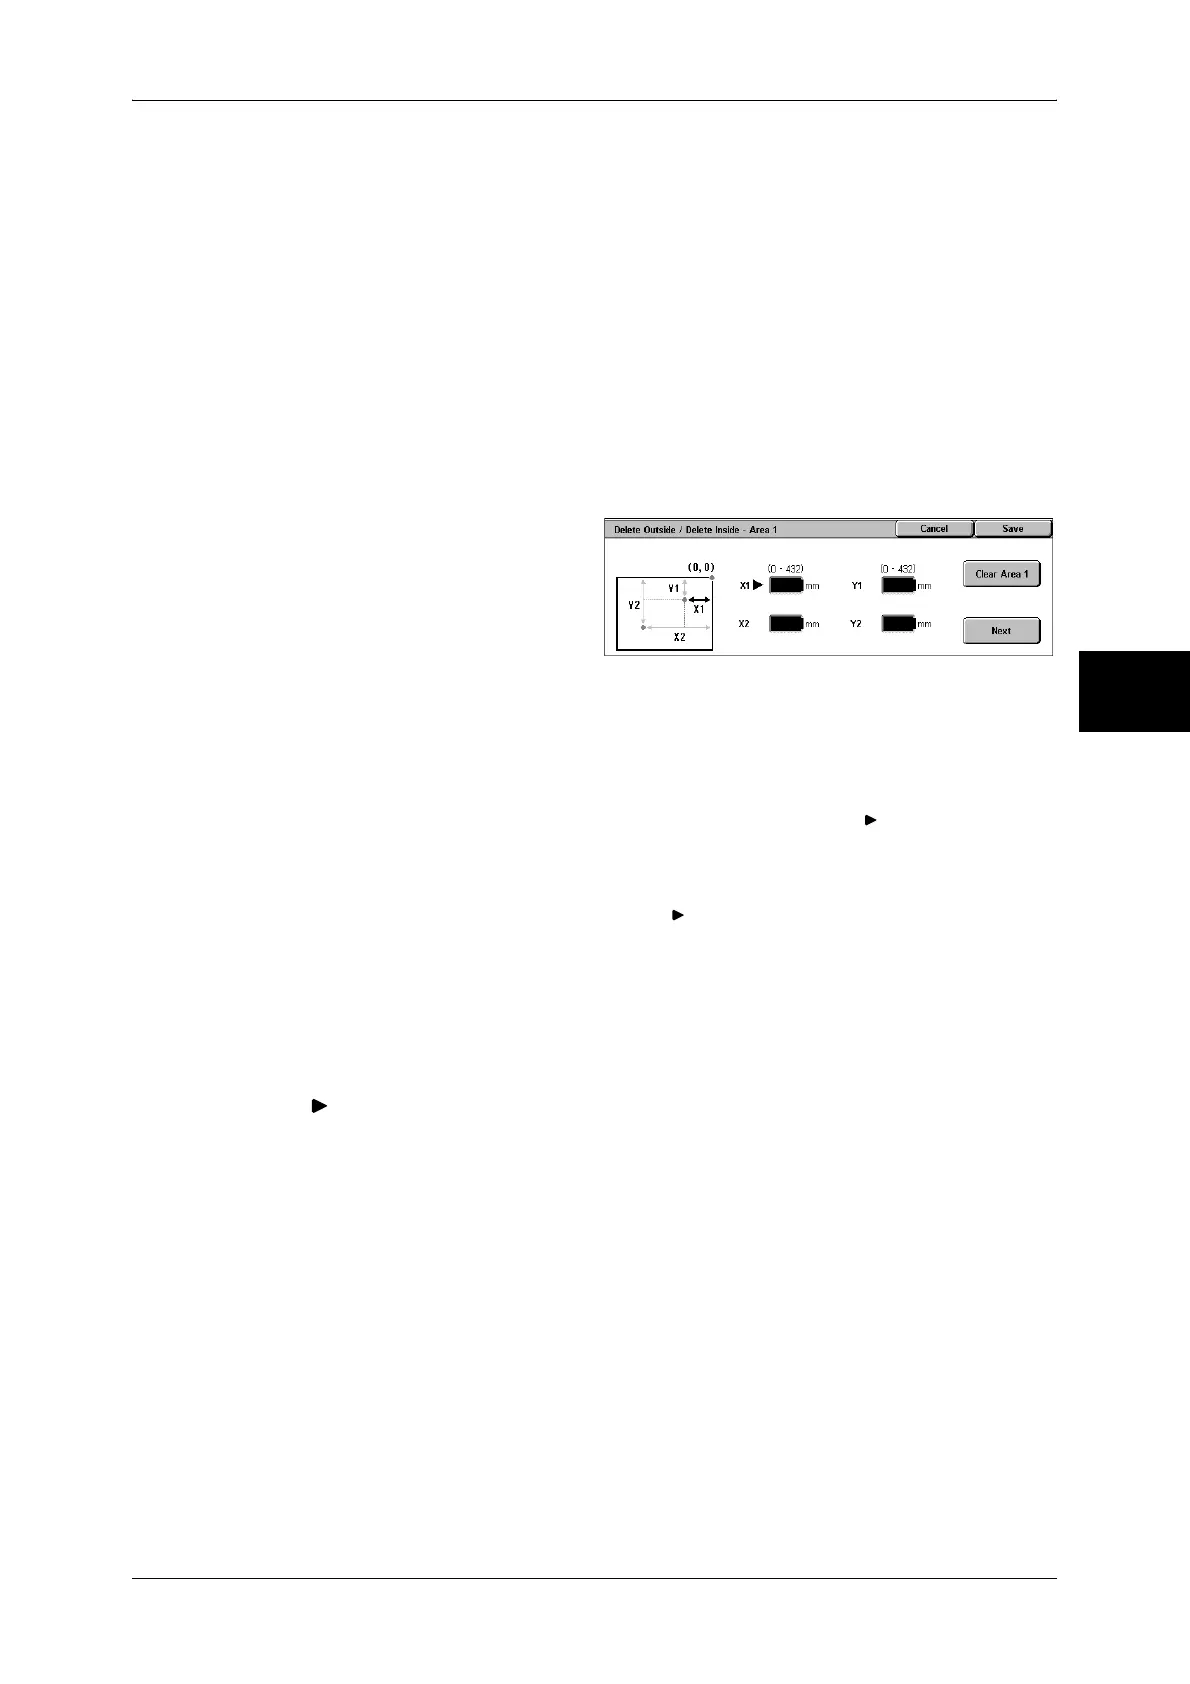
[Delete Outside/Delete Inside - Area X] screen
Set the area to delete outside of or inside of. The quadrangle with a diagonal line and
4 straight sides connecting the coordinates, X1/Y1 and X2/Y2 is a deleted or extracted
area. By making the top right corner of a document into the starting point, the X-axis is
set as the direction of width, and the Y-axis is set as the direction of length.
You can specify a value within the range of 0 to 432 mm for the width (X) and the length
(Y) in 1 mm increments.
Note • Specify the 2 coordinates from the top right corner of the document.
• When specifying multiple areas, the specified areas can overlap each other.
• When [Reduce/Enlarge] is enabled, the specified area will be reduced/enlarged accordingly.
1 Select [Area X].
Note • X represents the number of
the area displayed.
2 Enter the value for X1 in [X1] using
the numeric keypad, and select
[Next].
3 Enter the value for Y1 in [Y1] using the numeric keypad, and select [Next].
4 Enter the value for X2 in [X2] using the numeric keypad, and select [Next].
5 Enter the value for Y2 in [Y2] using the numeric keypad, and select [Next].
Note • To change the coordinates you have entered, select [Next], move , and then enter the
value again.
• If all of [X1], [Y1], [X2], and [Y2] are set to [0], the area will be invalid. If no other area is
specified, the Delete Outside/Delete Inside feature cannot be used.
• If you select <C> button, values that the mark indicates is cleared.
Clear Area X
Clear the specified area.
Note • X represents the number of the area displayed.
Next
The mark moves to the next coordinate.
 Loading...