Changing the Paper Size for the Trays
253
Paper and Other Media
9
Changing the Paper Size for the Trays
The following describes how to change the paper size for the Trays 1 to 4.
Note • The paper types for the Trays 1 to 4 are preset. Normally, plain paper is set. When changing
the setting to a different paper type, change the paper quality settings to match the type of
paper to be loaded to maintain high print quality.
For more information on paper type, refer to "Paper Size/Type" (P.277).
• When setting a non-standard size paper, you must register the paper size in advance. For
information on registering the paper size, refer to "Paper Size / Auto Paper Select" (P.277).
For information on how to make copies on non-standard size paper, refer to "Paper Supply (Selecting
the Paper for Copying)" (P.58). For information on how to print on non-standard size paper, refer to the
print driver's online help.
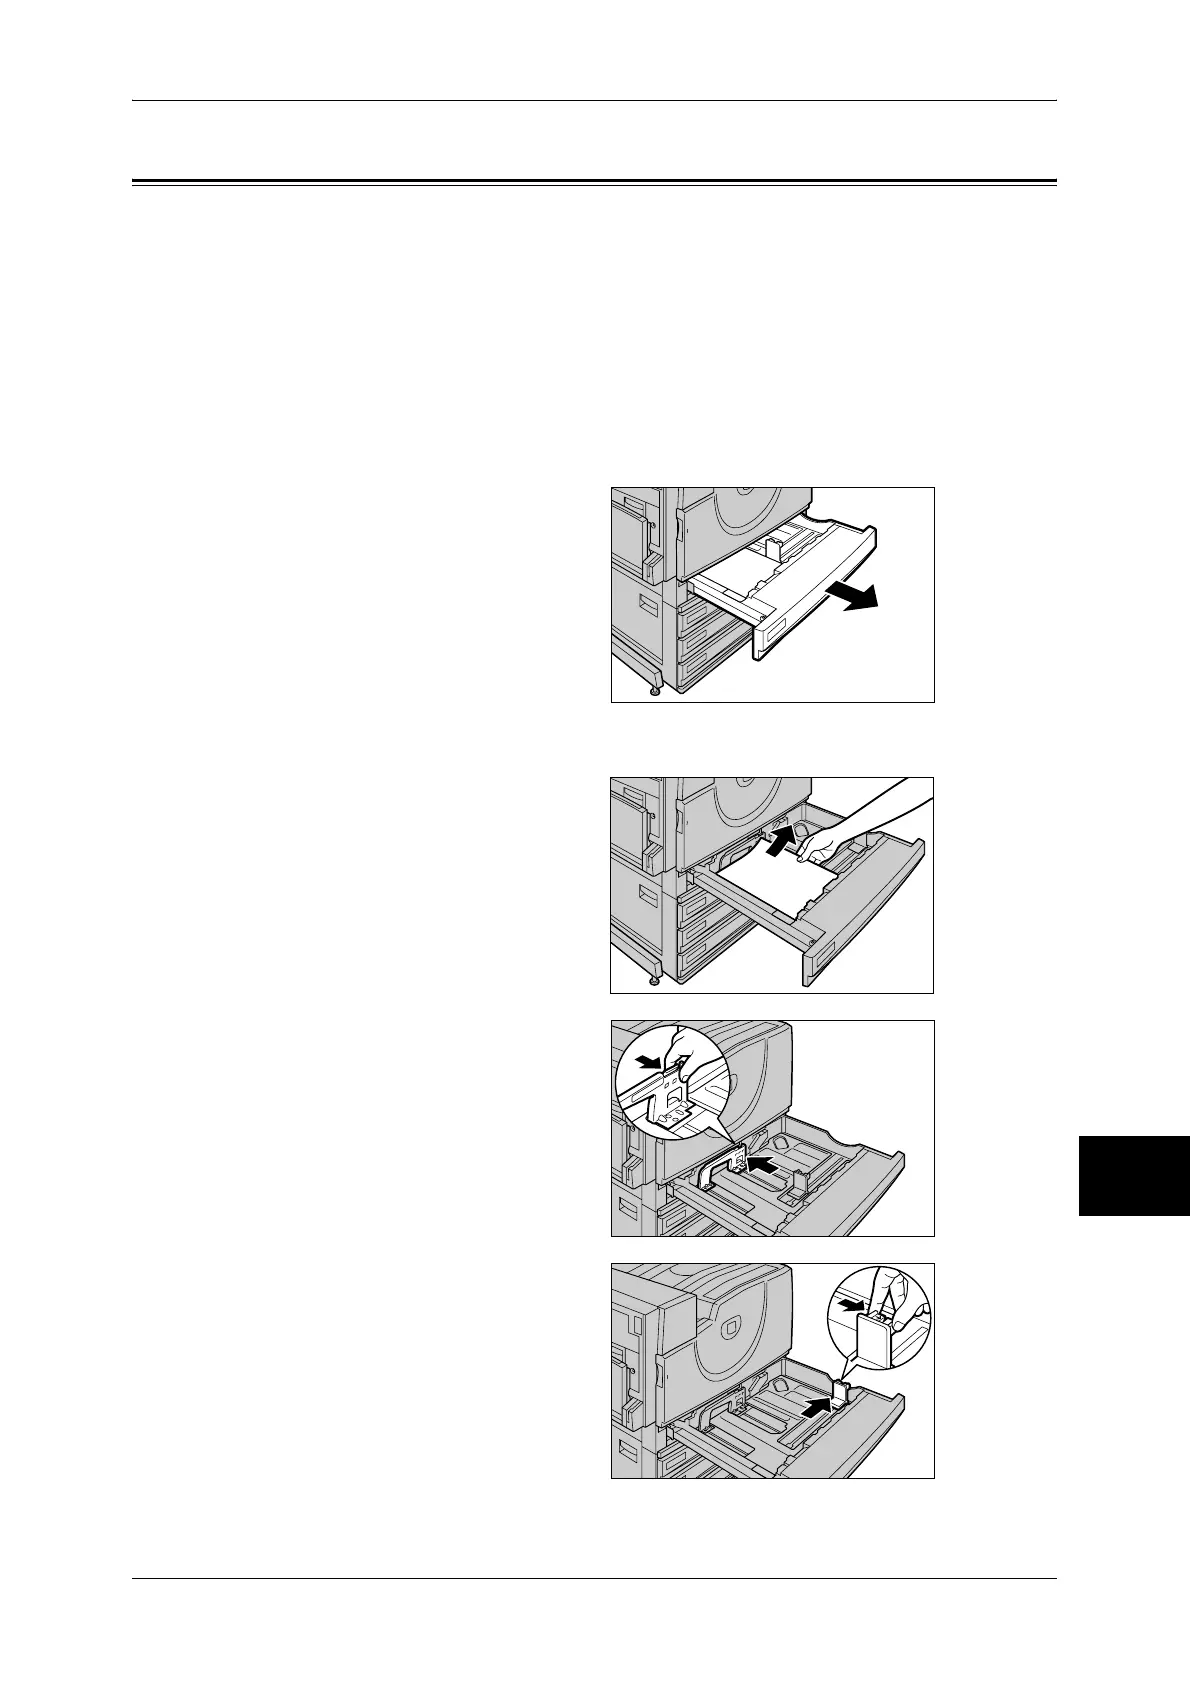
1 Pull out the tray towards you until it
stops.
Note • While the machine processes
a job, do not pull the tray out
that the job uses.
• Do not add new paper to the
paper on the tray in order to
prevent paper jams or making
mistakes of paper loading.
Remove any paper remaining
in the tray and then load the paper on newly loaded paper.
2 Remove any paper loaded on the
tray.
3 Move the paper guide while holding
the grips in the tray at the back until
it comes to a stop.
4 Move the paper guide while holding
the grips in the tray on the right to
the right direction.
 Loading...