Revision 14
48 August 02, 2019
3.6 Total Sulfur Furnace Assembly and Installation of the
Quartz Reaction Tube.
If the analyzer is equipped with the total sulfur option, access the Global tab
in the GUI software and ensure that the Furnace Pulse Width is set to 0 % until the
whole analyzer system including the total sulfur furnace has been leaked checked.
The Furnace Pulse Width can only be changed through the analyzer software and is located
on the Global Tab. Once the complete analyzer has been verified leak free, the appropriate
Furnace Pulse Width value can be entered. The value for the AC input voltage being used
is:(40% for 110 VAC, 10% for 230 VAC).
Failure to ensure that the furnace pulse width is set to the correct value
could result in failure of the furnace element or melting of the quartz
reaction tube.
It is essential that the power be turned off to the analyzer or the furnace
pulse width is set to Zero (0) before installing the quartz tube inside the
furnace enclosure. The furnace enclosure must be allowed to cool for at
least 1 hour prior to initiating these procedures. Do NOT remove the end
caps of the furnace enclosure until the furnace is cool - attempting to
remove the end caps while the furnace is still hot could result in an
explosion if even a small amount of hydrogen has leaked into the furnace!
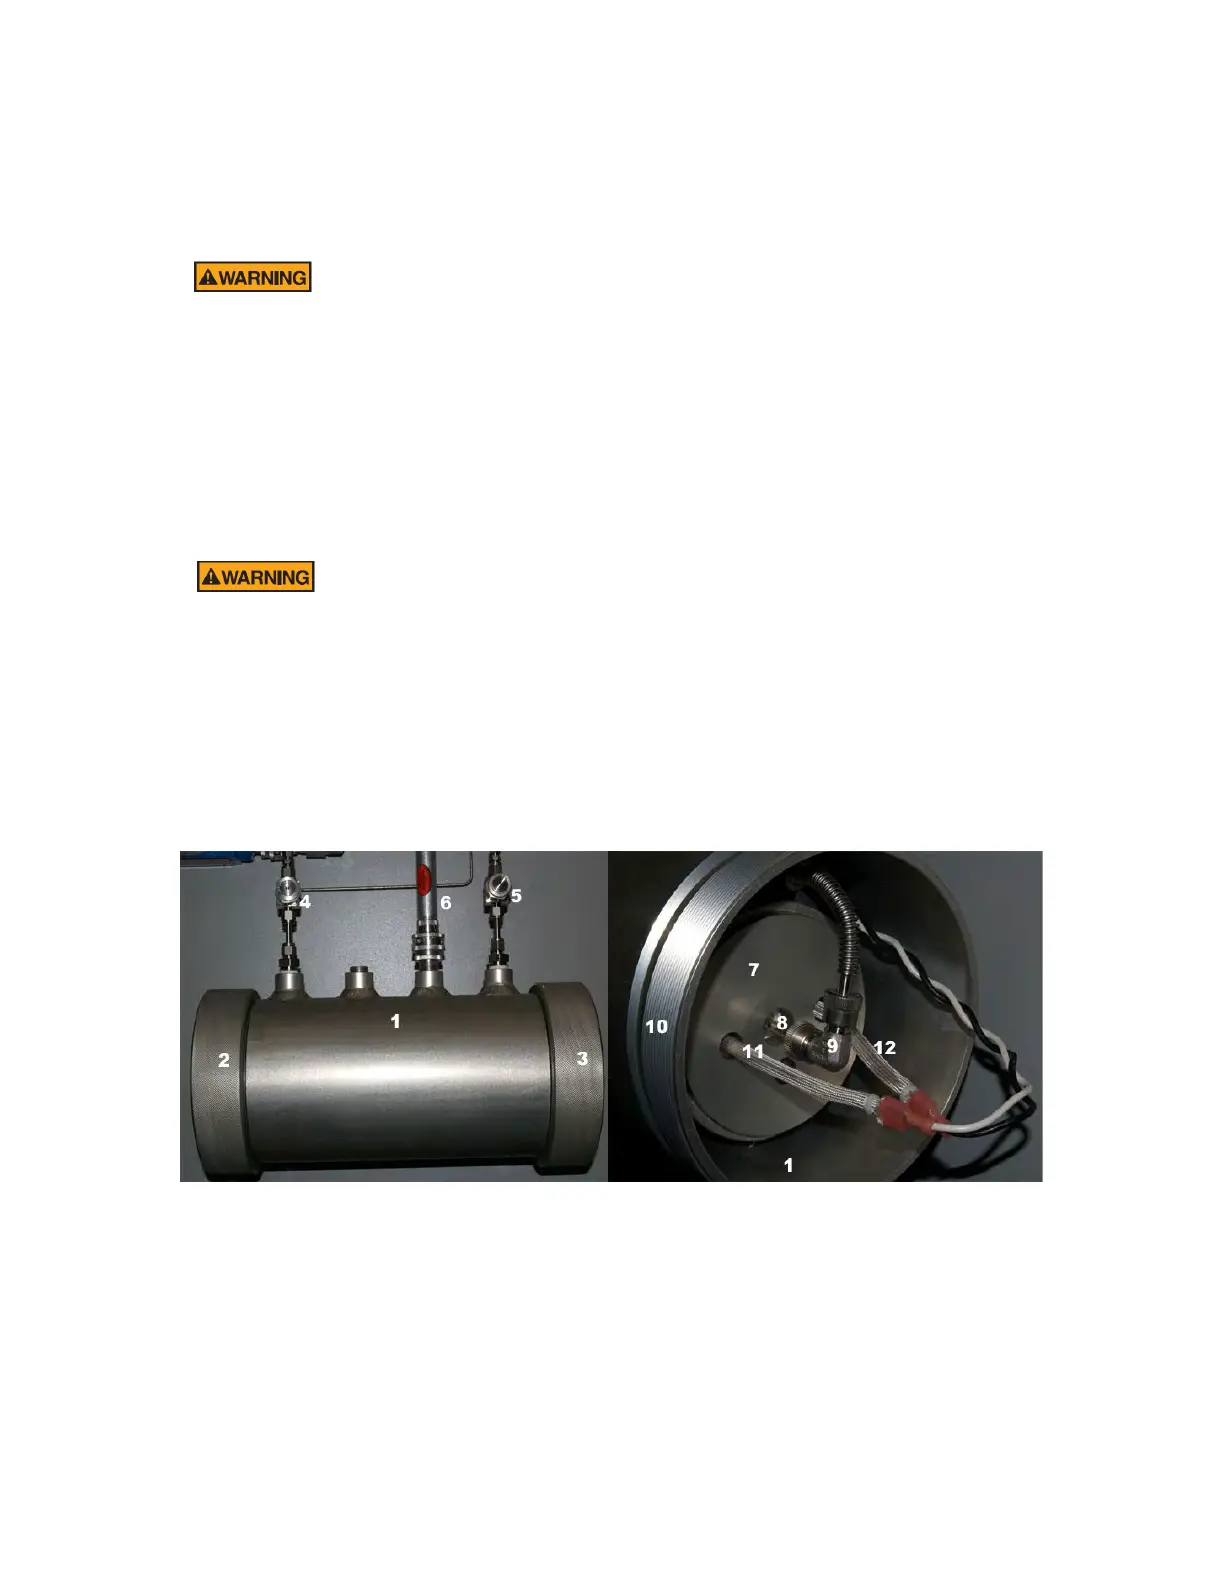
Figure 3-19 shows a numbered photo of the exterior and interior of the total sulfur furnace for
ease of identifying all the parts discussed in these procedures.
Figure 3-19: Total Sulfur Furnace Enclosure - Exterior (L) and Interior (R)
The total sulfur furnace is housed inside an explosion proof enclosure (1) with screw on end
caps (2, 3) that screw onto large threads (10) at each end of the enclosure. A conduit (6)
carries the power wiring (11, 12) and the temperature sensor wiring (not visible) into the
enclosure. The sample flows through flame arrestors (4, 5) on the way into and out of the
furnace. The reaction takes place in a quartz reaction tube (8) inside the actual total sulfur