Chapter 4
Calibration Procedures
WARNING
Some calibration tasks will be performed while the instrument enclosure is
open and power is applied. Do not touch wiring, circuitry or electrical com-
ponents! Voltages are present within the in-
strument enclosure that can cause
personal injury or death!
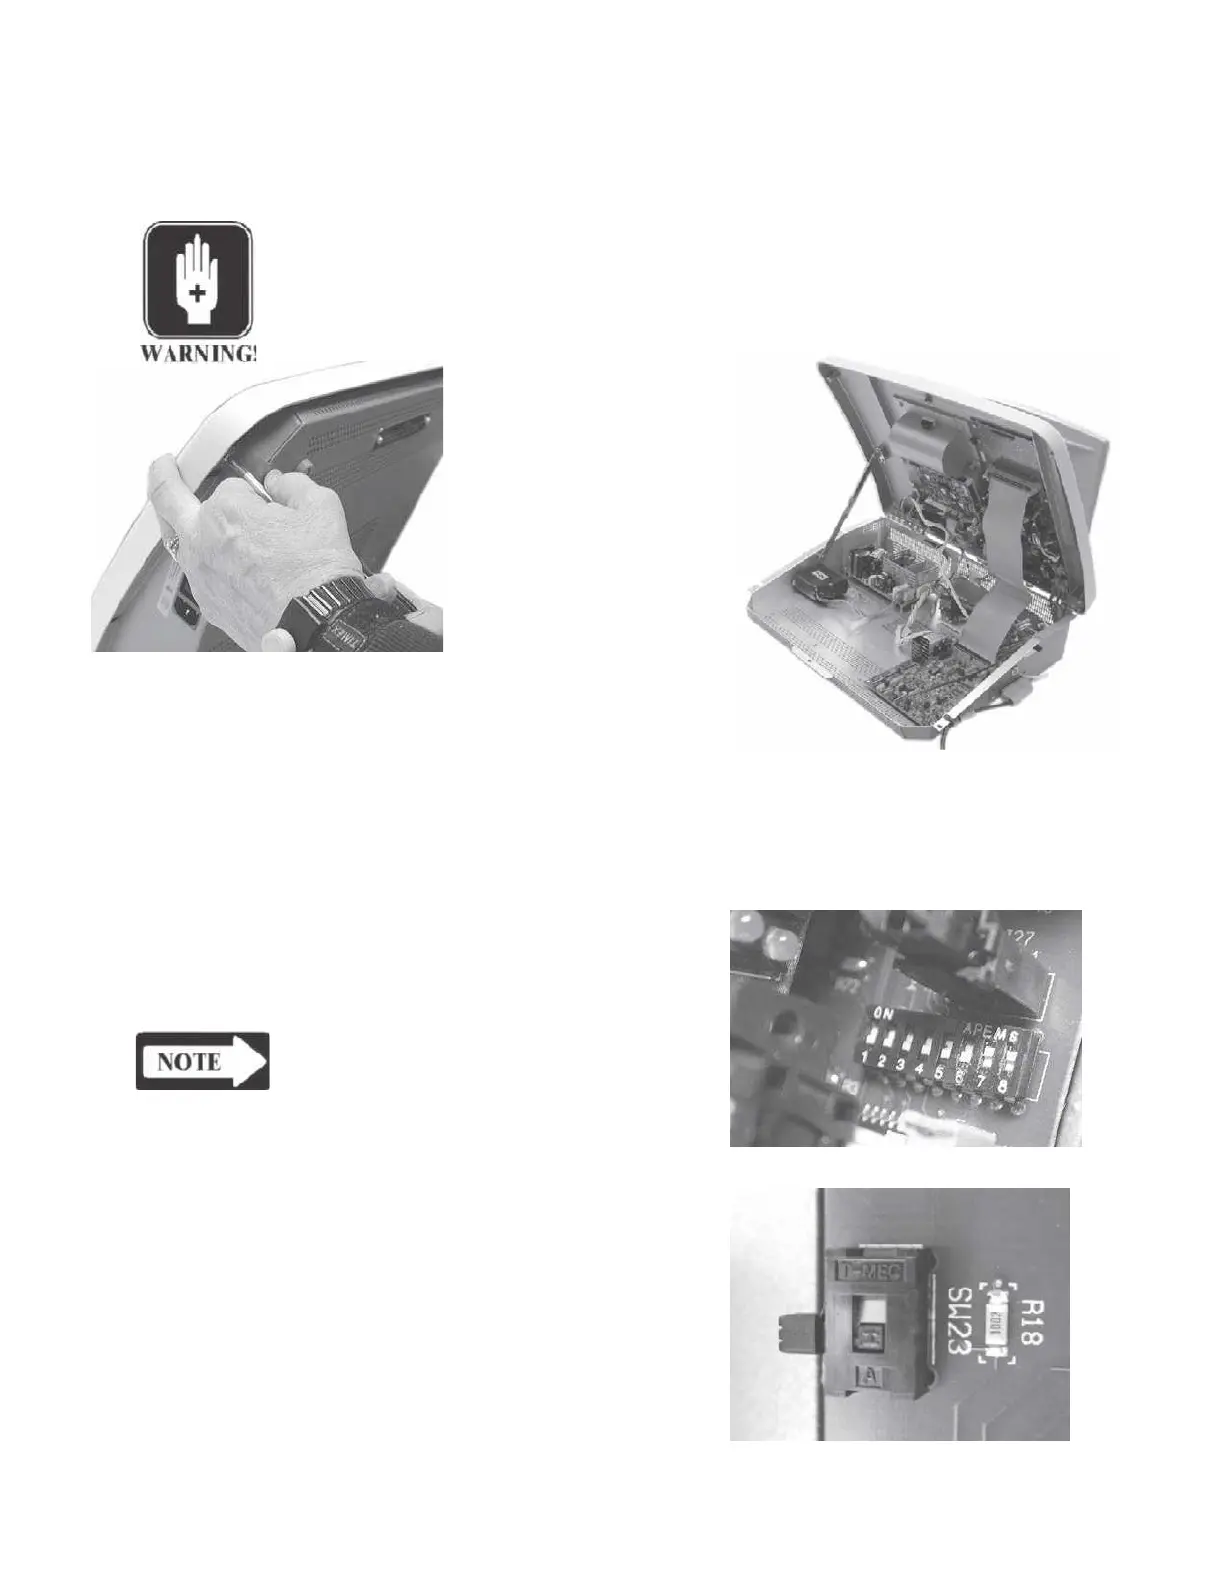
Remove the three retaining screws that
secure the cover to the bottom chas-
sis.
Lift the cover and lock the
cover support struts in place.
Self-Calibration stores new probe tone frequency data in
the TympStar and must be performed if circuit boards contained within the instru-
ment (digital board and analog board) are repaired. Self-Calibration is not required
if only the probe is repaired or replaced.
Step 1
Operate positions 1, 2, 3, 4, 5 and 6 of
the DIP switch on the digital board to
OFF, and positions 7 and 8 to ON.
NOTE
Refer to page 4-32 to calibrate
custom transducers.
Step 2
Operate the Cal/Normal switch on the

 Loading...
