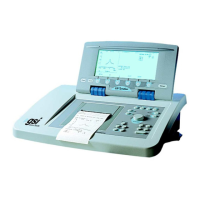
1) Select test mode by turning the POWER ON, or by pressing the TYMP
hardkey.
2) Default test parameters are displayed above softkeys on the LCD.
A) Selectable Probe Tone Hz- 226 Hz, 678 Hz, 1000 Hz
B) Selectable Admittance Components- Y, B, G, B/G
3) Temporarily modify test parameters, by pressing the parameter
softkey(s) to be changed
.
Use PROGRAM mode for more permanent
changes.
A) Alternative test parameters are displayed above the selected softkey.
B) Press the desired test parameter softkey. The selected value is
displayed on the parameter status line.
C) Press BASELINE-OFF if the tymp test is performed with the
following parameters:
• Y with 678 Hz or 1000 Hz
• B, G, or B/G with 226 Hz, 678 Hz, or 1000 Hz
NOTE
Pressing the B/G softkey allows B and G tracings to be run simultaneously.
4) Attach the probe box to the velcro strip on the shoulder probe mount.
5) Position the shoulder probe mount on the patient.
6) Position the appropriate size eartip on the probe tip and securely insert in
the ear canal.
7) Press the EAR softkey, then press LEFT or RIGHT ear.
8) Press START to initiate test.
9) View ongoing test results on the graphic display area, and on pressure and
admittance meters.
10) For tymp tests other than Y 226 Hz, the cursor is used to identify and set
peak data points as follows:
A) Press the CURSOR softkey.
B) Use arrow softkeys to move the cursor to left or right on the graphic
display
. Observe numeric data in cursor box at the right of pressure meter.
C) Press TYMP 1 SET PEAK softkey to specify and store peak data
for TYMP 1. Follow the same procedure to specify and store selected
peak data for TYMP 2 and 3.
D) Press CURSOR-OFF.
11) Press STOP to end the test, store the results in memory, and display the
summary data on the screen.
Grason-Stadler

 Loading...