Disassembly
Removing the LCD
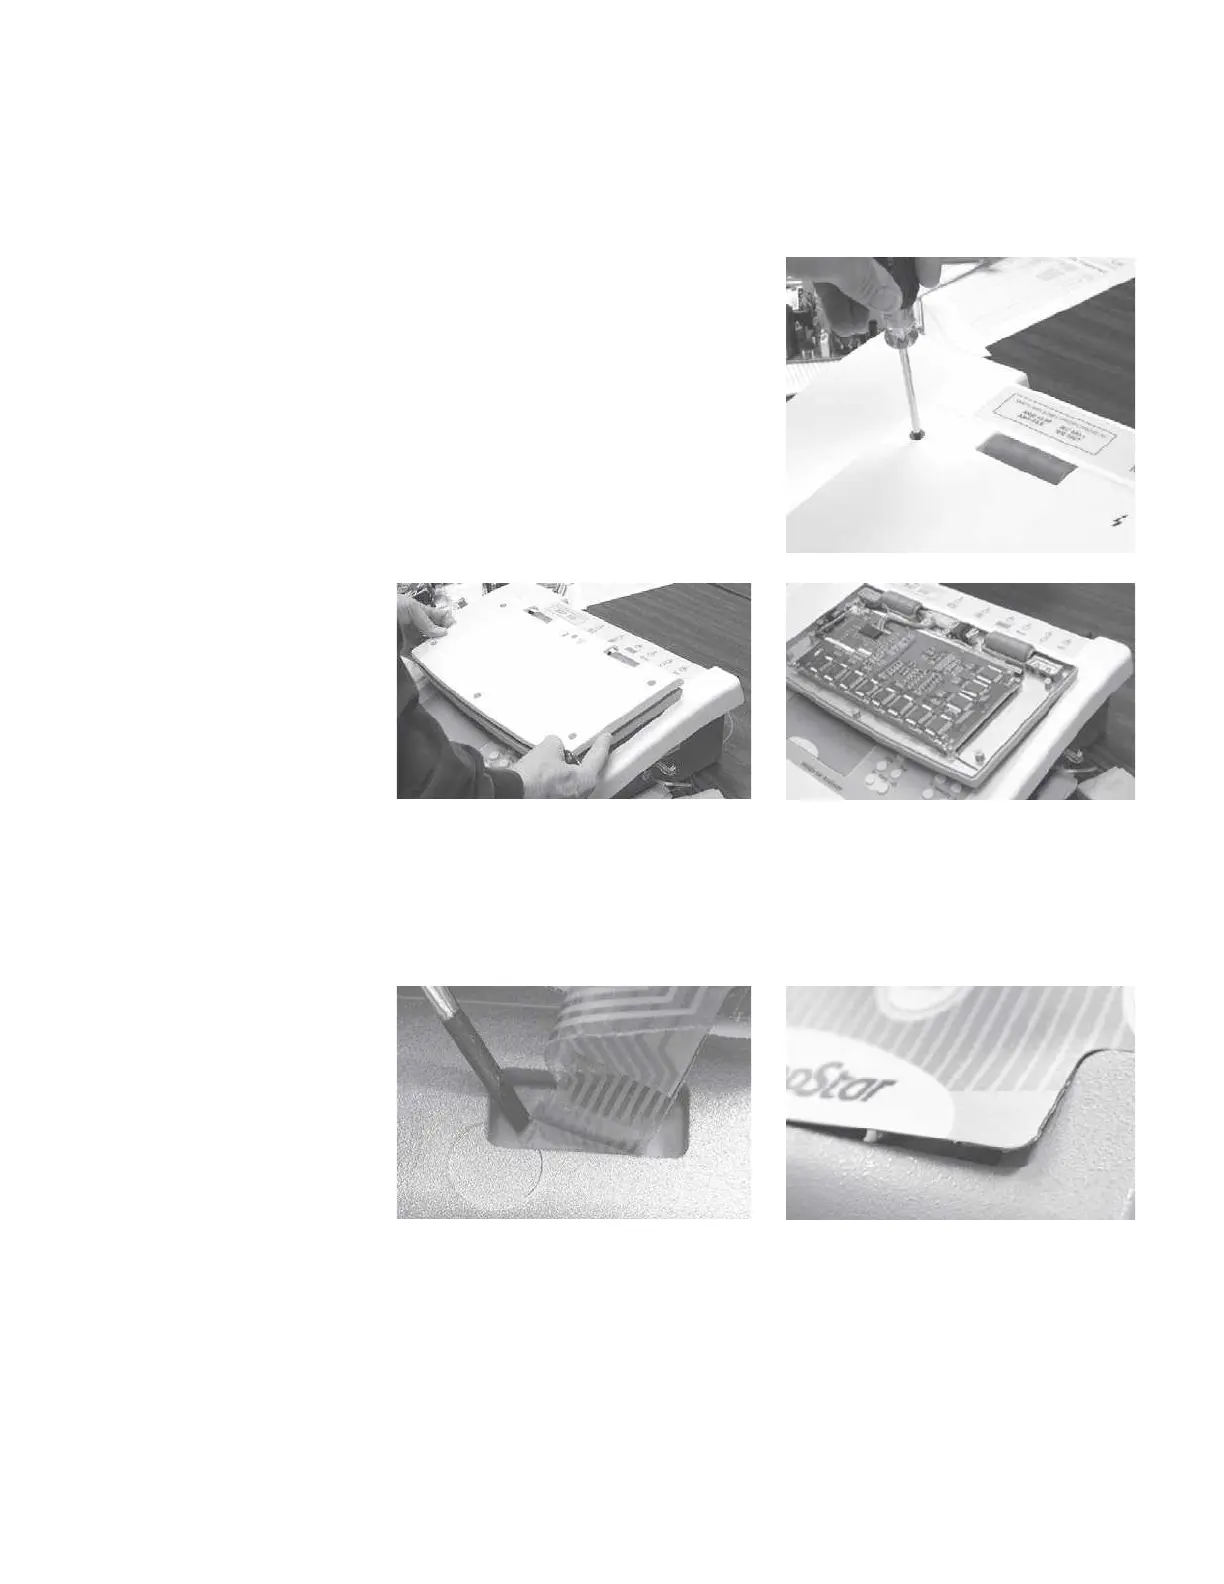
Step 1
front panel label Place the TympStar in its normal orientation and rotate the LCD forward to
(softkey panel)
expose the screw holes in the back of the LCD enclosure.
Step 2
Remove the six screws that secure the
back cover to the LCD enclosure.
Step 3
Gently lift the LCD back cover
straight off the LCD enclosure.
Dis-
connect the black Softkey cable con-
nector.
Step 4
Fold, but do not crease, the keypad flex circuit cable and apply a gently pres-
sure to the back of the LCD panel label through the cable slot in the front LCD
enclosure panel
.
The right lower corner of the label will lift off the surface of
the panel.
GSI TympStar Version 1 and Version 2 Service Manual
5 - 27

 Loading...
