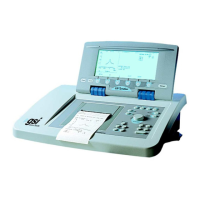
Operation Summary
Version 1 test procedures
The following TympStar Version 1 test procedures are summarized. Comprehen-
sive procedures are provided in the TympStar Version1User Manual.
Tymp diagnostic 1) Select test mode by turning POWER ON, or by pressing TYMP
hardkey. Default test parameters are displayed above softkeys on the
LCD.
2) Attach the probe box to the velcro strip on the shoulder probe mount.
3) Position the shoulder probe mount on the patient.
4) Position the appropriate size eartip on the probe tip and securely insert into
the ear canal.
5) Press EAR softkey, then select LEFT or RIGHT ear.
6) Press START hardkey to initiate test.
7) View ongoing test results on the graphic display area and on the pressure
and compliance meters.
8) Press the STOP hardkey to end the test, store the results in memory and
display the summary data on the screen.
NOTE
A MANUALTYMP test may be initiated by pressing the MANUAL hard-
key. Rotate the PRESSURE KNOB to vary pressure and view ongoing
test results graphically, or on the pressure and compliance meters.
Manual Tymp 1) Securely place the probe tip within the patient’s ear canal and press the
TYMP hardkey.
2) Press the EAR softkey and select the right or left ear.
3) Press the MANUAL hardkey to pressurize the ear canal to the
previously selected start pressure. Manual mode will appear below the
Name, ID and Tester Information on the display.
4) Use the PRESSURE CONTROL knob to vary the pressure within the
ear canal and control the speed of the tympanometric test.
5) View test results on the display along with the pressure and compliance
meters
. Test summary information is displayed to the right of the meters
for the two most recent pressure sweeps.
NOTE
The ERASE hardkey can be used to delete test data prior to pressing the
STOP hardkey.
6) Press the STOP hardkey to store the last two tracings in memory.
7) Press the PAGE hardkey to view test results.
8) Press the PRINT hardkey while in the PAGE mode for printed tests.
MANUAL will appear on the printout indicating a manual test.
GSI TympStar Version 1 and Version 2 Service Manual
3 - 17

 Loading...