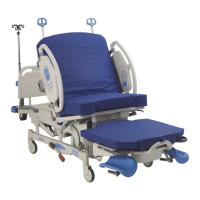
4.12 Foot Support Module
Chapter 4: Removal, Replacement, and Adjustment Procedures
Affinity® Three Birthing Bed and Affinity® Four Birthing Bed Page 4 - 35
Service Manual (MAN272 REV 4)
4
Replacement
1. To install the replacement foot support module (B), reverse the removal
procedure.
2. Do the “Function Checks” on page 2-4.
Adjustment
1. Do one of the following:
a. Grasp the loops at the bottom of the bellows wireform (A), pull it open
and lift it off the foot support bellows (B) and the foot support heel cup
(C) (see figure 4-17 on page 4-36).
b. Remove the screw (I) that attaches the strap (A) to the foot support
bellows (B) and the foot support heel cup (C). Remove the strap (A).
2. Using the ratchet and the T25 Torx®
1
head bit, remove the four screws (D)
attaching the foot support heel cup (C) to the foot rest weldment (E).
3. Remove the foot support heel cup (C) from the foot rest weldment (E) and
the foot support bellows (B).
4. Using the 7/16" wrench, adjust the cable tensioning nuts (F) so that
the cable ends ride freely in the mounting holes of the release handle
weldment (G) without binding.
5. Reassemble the foot support heel cup (C), Torx® head screws (D), and
bellows wireform (A) to the foot rest weldment (E) and the foot support
bellows (B).
6. Ensure that the foot support release handle (H) functions properly.
1. Torx® is a registered trademark of Textron, Inc.