2.5 Performing Zero-adjustment
35
Zero-adjustment (offset adjustment) is performed for voltage and current measured values after the instru-
ment has warmed up for approximately 30 minutes in order to ensure that its measurement accuracy specifi-
cations are satisfied. During zero-adjustment, the offsets of the instrument’s voltage and current internal
circuitry are adjusted.
Zero-adjustment should always be performed before starting measurement after the instrument has warmed
up.
Zero-adjustment adjusts offsets within the following ranges:
Voltage circuitry: ±15% of the measurement range
Current direct input circuitry: ±15% of the measurement range
External current sensor input circuitry: ±15% of the measurement range
Operating time: Approx. 30 sec. (No measured values are displayed during zero-adjustment.)
2.5 Performing Zero-adjustment
• Perform zero adjustment when there is no input to the instrument, after deactivating power to measure-
ment lines. If zero-adjustment is performed while there is input to the instrument, the process will not com-
plete normally, and you will be unable to make accurate measurements.
• Optional current sensors 9277, 9278, 9279, CT6841, and CT6843 are not degaussed. Degauss current
sensors as described in the instruction manual that came with each current sensor before performing the
instrument’s zero-adjustment process.
• When using the CT6841/CT6843, perform zero-adjustment for the CT6841/CT6843 using the 1 A range
noted on the panel.
• Zero-adjustment is performed for all voltage and current ranges, regardless of current input method.
• Settings cannot be changed, and integration cannot be started, during zero-adjustment.
• Zero-adjustment cannot be performed while integration is being performed or during display hold or maxi-
mum value/minimum value hold operation.
• To enable high-precision measurement, it is recommended to perform zero-adjustment at an ambient tem-
perature that falls within the range specified in the specifications.
• Turn off power to the measurement lines and perform zero-adjustment with the instrument in the no-input
state. The instrument will display [Err.18] if input is present when performing zero-adjustment. If this
occurs, remove the input and then repeat the zero-adjustment process.
1 Deactivate power to measurement
lines and ensure that no input is
being supplied to the instrument.
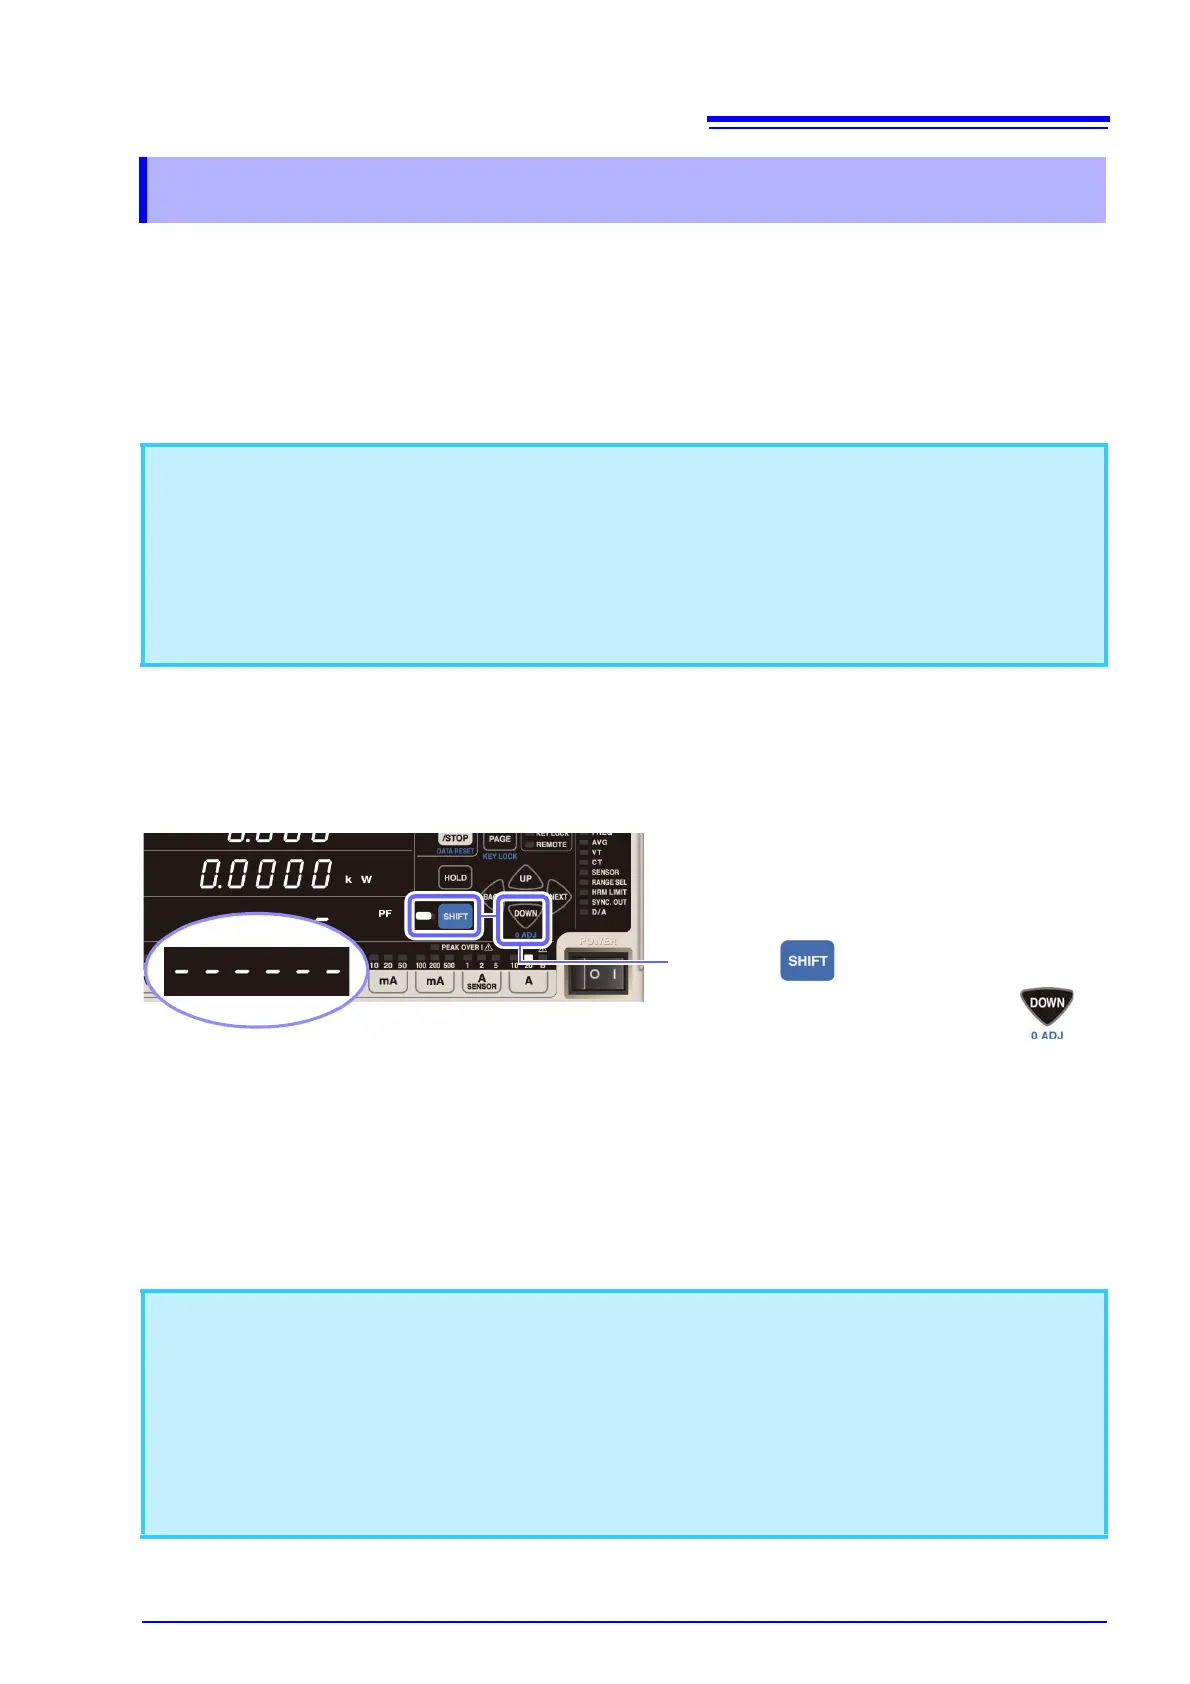
2 Press to place the instrument in
the shift state and then press .
During zero-adjustment (approximately 30
sec.), [- - - - - -] will be displayed.
Once zero-adjustment is complete, the in-
strument will change to the
normal display
(Measurement screen)
and be ready for mea-
surement.