Introduction
1
Thank you for purchasing the HIOKI PW3335, PW3335-01, PW3335-02, PW3335-03, PW3335-04 Power
Meter. To obtain maximum performance from the instrument software, please read this manual first, and keep
it handy for future reference.
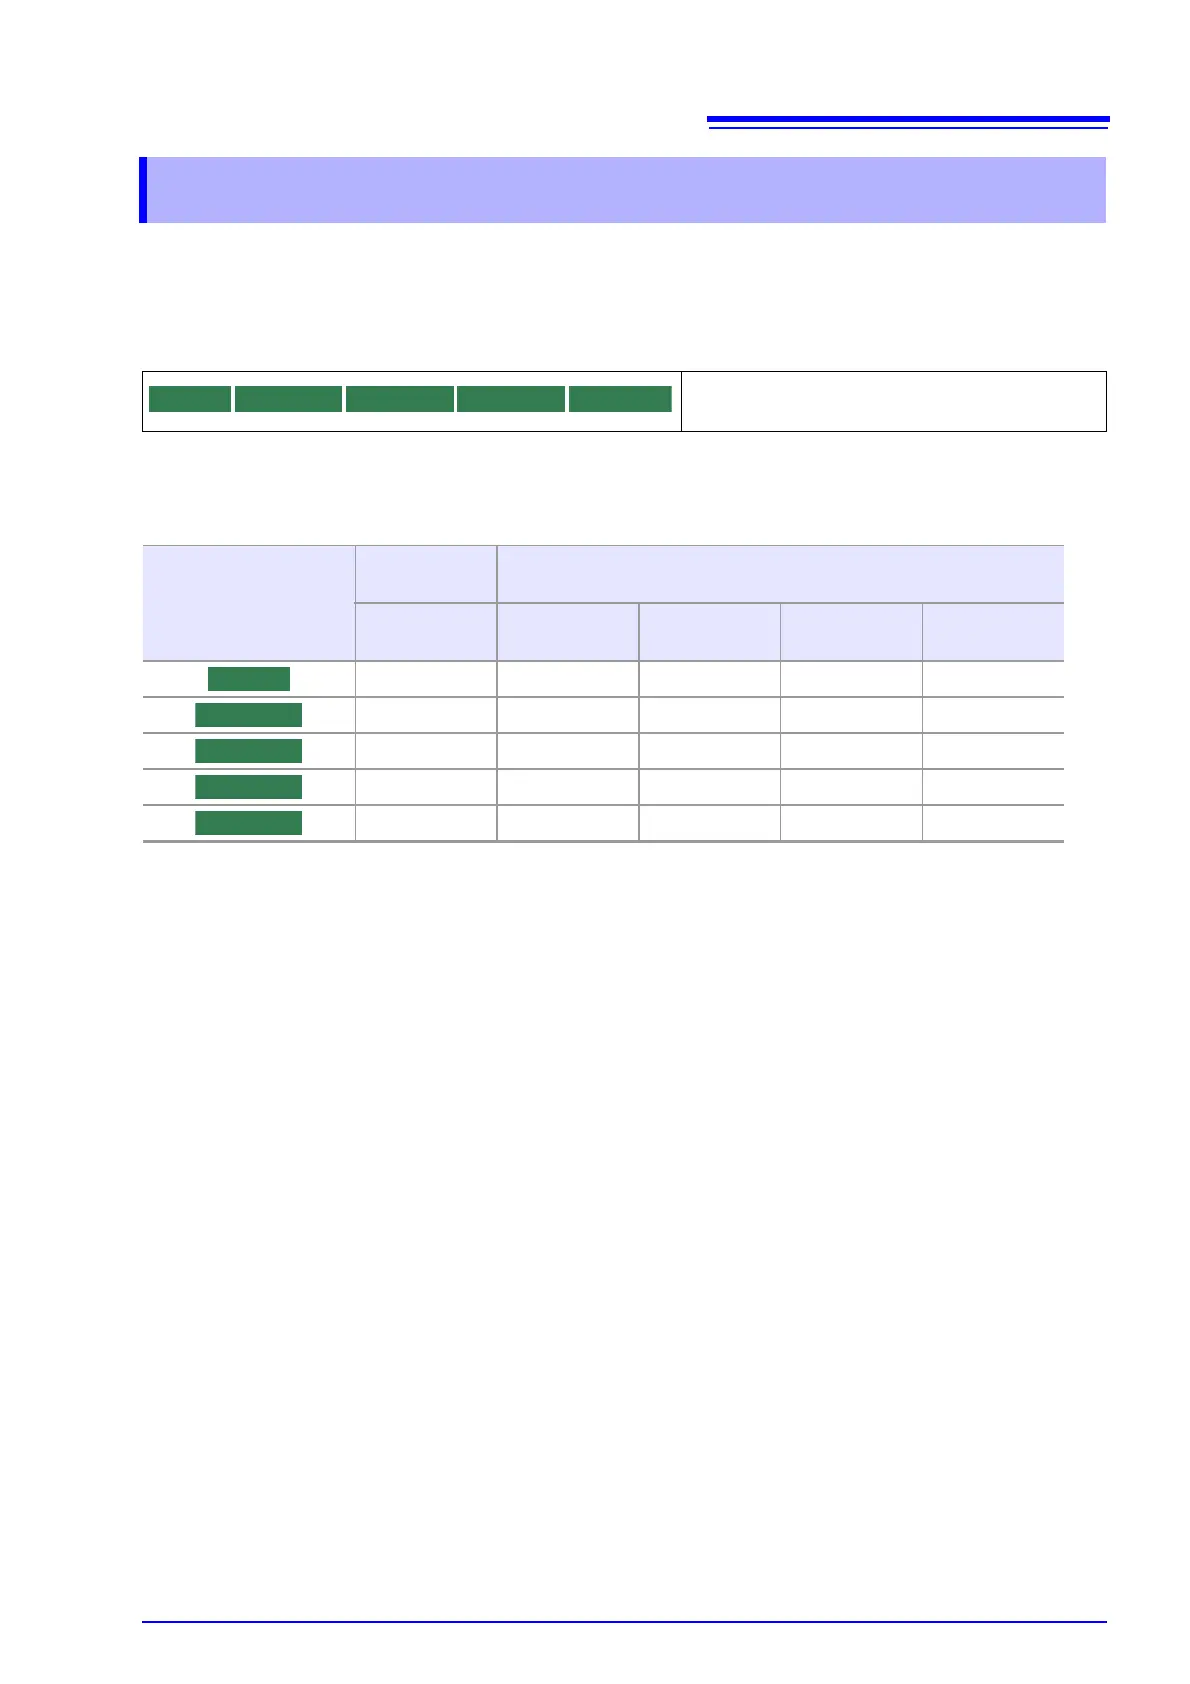
The models are classified according to the factory-installed options as follows.
You can check the model number on the rear of the instrument.
See: "Rear" (p.18)
Model PW3335-03 and PW3335-04 can measure relatively high current with the use of HIOKI Clamp on Sen-
sors (clamp sensors), which are option, or current sensors. Hereafter, those sensors are collectively referred
to as "current sensors". Please read the instruction manuals of each sensor for details before using.
The current sensors are classified as either "TYPE.1" or "TYPE.2" according to the output specifications.
Using a TYPE.2 current sensor requires Model 9555-10 Sensor Unit, which is option. Please refer to the
instruction manual of Model 9555-10 for details.
See: "3.8 Using a Current Sensor" (p.100)
Registered trademark
Internet Explorer is registered trademark of Microsoft Corporation in the United States and other countries.
Introduction
Show the model that is equipped with each function
as the icon.
: Installed − : Not installed
Model
Standard
equipment
Factory-installed options
LAN RS-232C GP-IB D/A output
External current
sensor input
−−−
− −−
− −
−−
PW3335 PW3335-01 PW3335-02 PW3335-03 PW3335-04