Before using the instrument the first time, verify that it operates normally to ensure that the no damage
occurred during storage or shipping. If you find any damage, contact your authorized Hioki distributor or
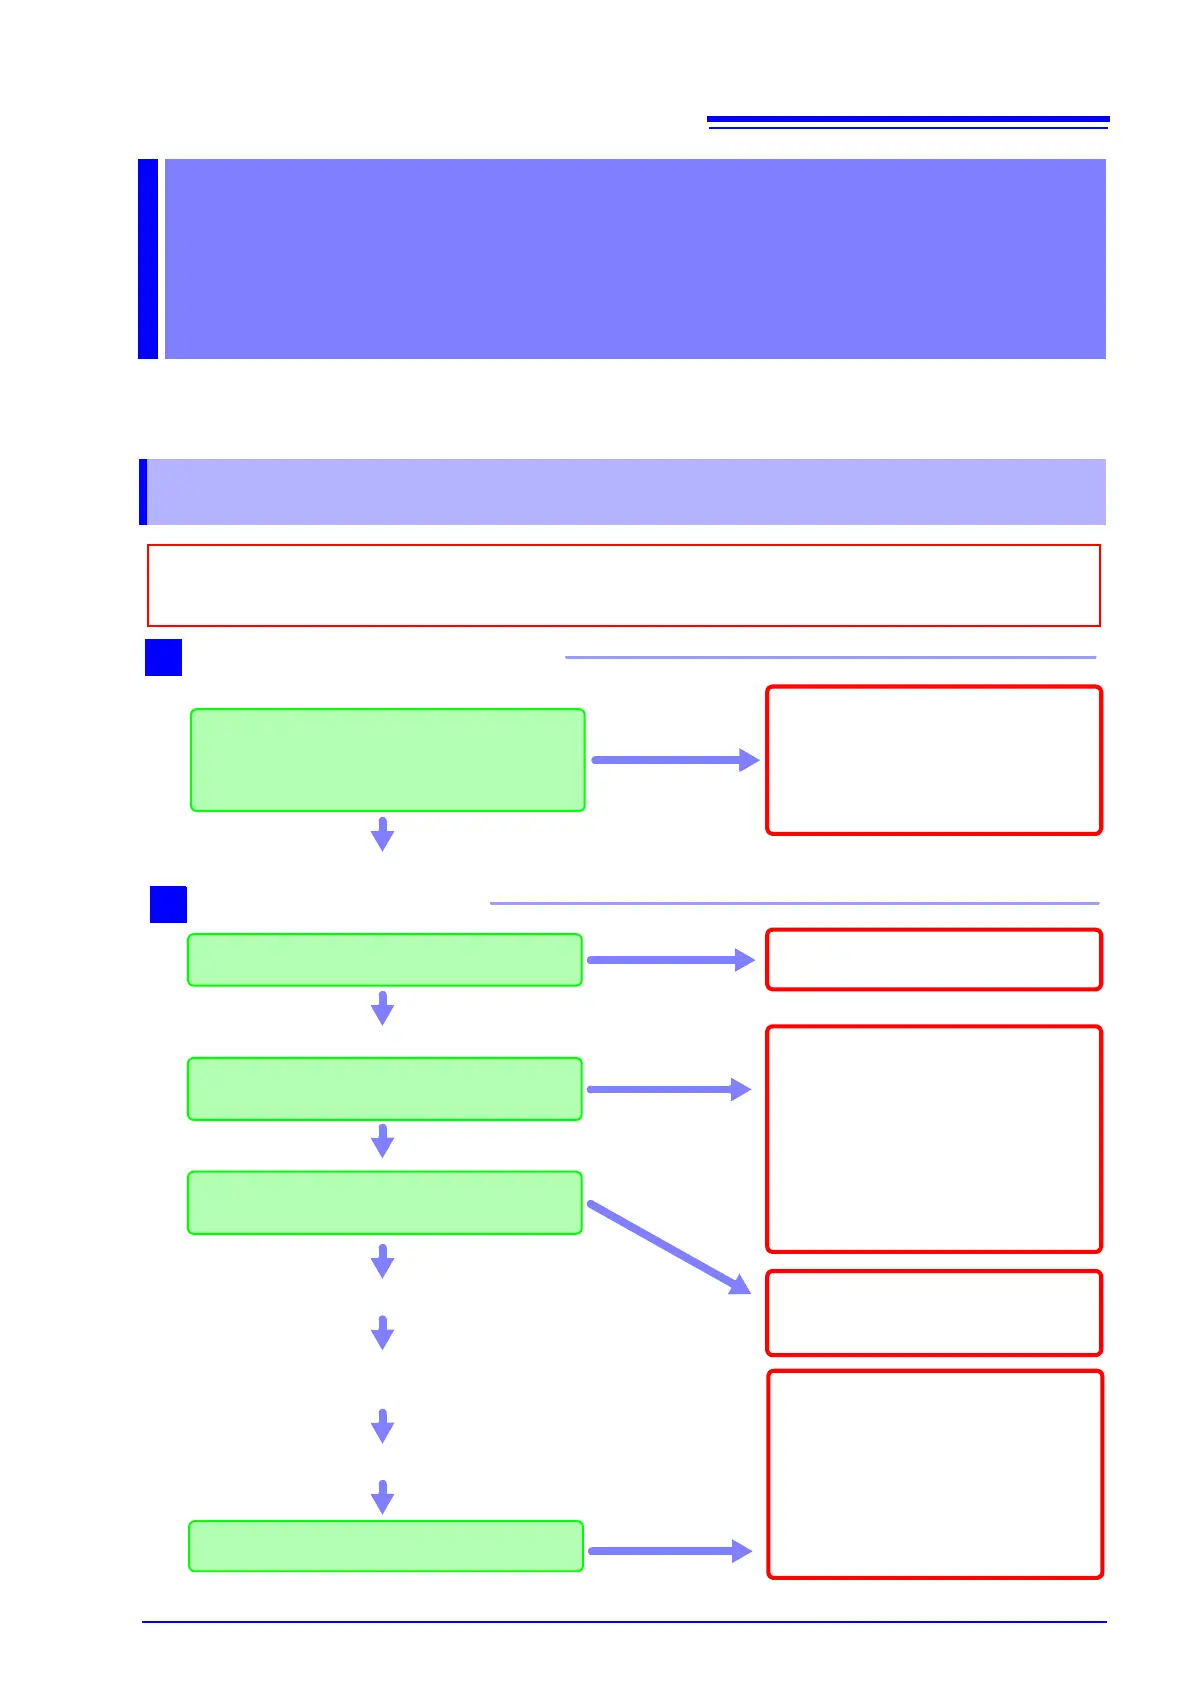
reseller.
If there is any damage or the screws
are loose, there is a risk of electric
shock or short-circuit. Do not use the
instrument. Replace the probe or cable
with an undamaged equivalent. Se-
curely retighten screws. (p.27)
Metal Exposed?
Screws are loose.
Is the insulation of the probe or connection
cable to be used damaged, or is bare metal
exposed?
Are any of the input terminal screws loose?
When using connection cables
1
No Metal Exposed
Screws are tight.
Peripheral Device Inspection
If damage is evident, request repairs.
Yes
Is there any damage to the instrument?
Instrument Inspection
Turn on the instrument.
Is self-test information (model, version number)
displayed?
No
2
There may be a break in the power
cord, or there may be internal damage
to the instrument.
If you find a break in the power cord,
contact your authorized Hioki distribu-
tor or reseller to purchase the desig-
nated power cord as a replacement for
the broken cord.
If the instrument is damaged, have it
repaired.
Is the Measurement screen displayed after the
self-test completes?
No
Yes
The instrument may be damaged inter-
nally. Request repairs.
See: "6.2 Error Indication" (p.166)
An error indication
occurs (ERR)
Yes
Inspection complete
Allow the instrument to warm up for at
least 30 minutes after turning it on.
Turn on power to the measurement lines.
There may be a break in a connection
cable or internal damage to the instru-
ment, or the instrument may have
been connected improperly.
Immediately disconnect the measure-
ment line power supply and repeat the
inspection. If there is no problem with
the wiring, have the instrument re-
paired.
No measured value
is displayed.
Measured value error
Perform zero-adjustment.