3.3 Integration
68
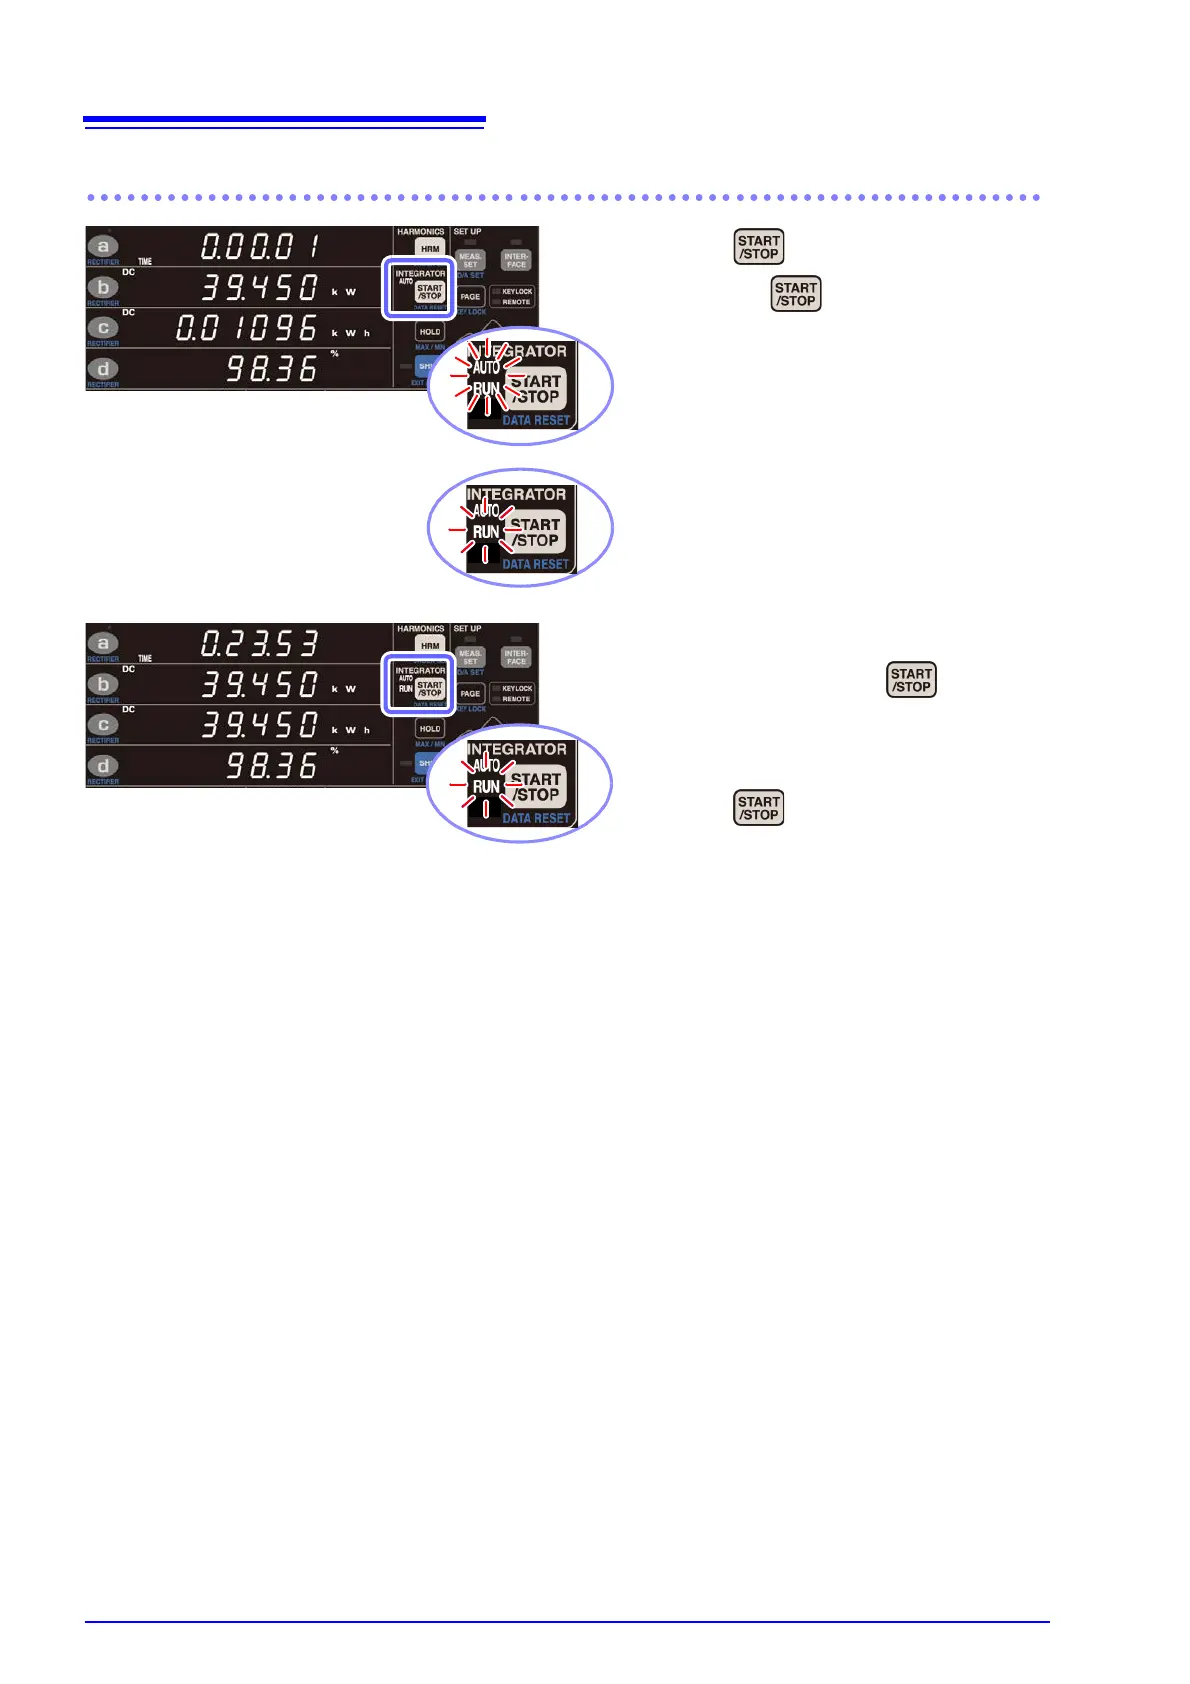
Starting and stopping auto-range integration
Supplemental explanation
(1) When integration starts, the voltage range is fixed.
(2) The timeout duration changes to 0.1 sec.
(3) The current range cannot be changed while auto-range operation is in progress. Once integration has
stopped, the current range can be changed, and integrated values for the 200 mA range to the 20 A
range and the B range can be displayed.
(4) When the TOTAL lamp is lit up on the integration display, the following data is shown in auto-range inte-
gration mode:
• Sum of integrated values for all ranges
• Sum of integrated times for all ranges
• Time-averaged value for overall range
(5) Functionality linked to auto-range integration
• Maximum and minimum value detection is cleared and restarted when integration starts. Additionally,
maximum and minimum value detection is stopped when integration stops. (This operation is the same
as for normal integration.)
• When auto-range integration is enabled, options for the current range you wish to output (200 mA to 20
A, B, total) are shown in the time-average (T. AV) and integrated value (Ah, Wh) fields on the D/A output
settings screen.
• If a power failure occurs during integration, integration will be in the stopped state when power to the
instrument is restored. Although integrated values are backed up, the data for maximum and minimum
values is cleared, triggering the invalid data display. (This operation is the same as for normal integra-
tion.)
• Some settings cannot be changed while integration is in progress or while integration is stopped. (This
operation is the same as for normal integration.)
1 Press when the AUTO lamp to
the left of is lit up.
Auto-range integration will start, and the RUN
lamp will light up.
When auto-range integration starts, the current
will switch to auto-range operation, and the
range will vary between the 200 mA range and
the 20 A range.
Integration operation will automatically stop
once the set integration time has elapsed, and
the RUN lamp will start flashing.
2 Integration operation can also be
stopped by pressing .
Auto-range integration will stop, and the RUN
lamp will flash.
3 Press again to restart integra-
tion.
RUN lamp will light up.