- 196 - - 197 -
Setting the network from the web browser Setting the network from the web browser
5
1
2
4
3
5
1
2
4
3
Convenient print
functions
Appendix Index
Checking and
Changing Printer
Settings Using
the Control Panel
Network
Setup
Matching
Colors
Using Utility
Software
Convenient print
functions
Appendix Index
Checking and
Changing Printer
Settings Using
the Control Panel
Network
Setup
Matching
Colors
Using Utility
Software
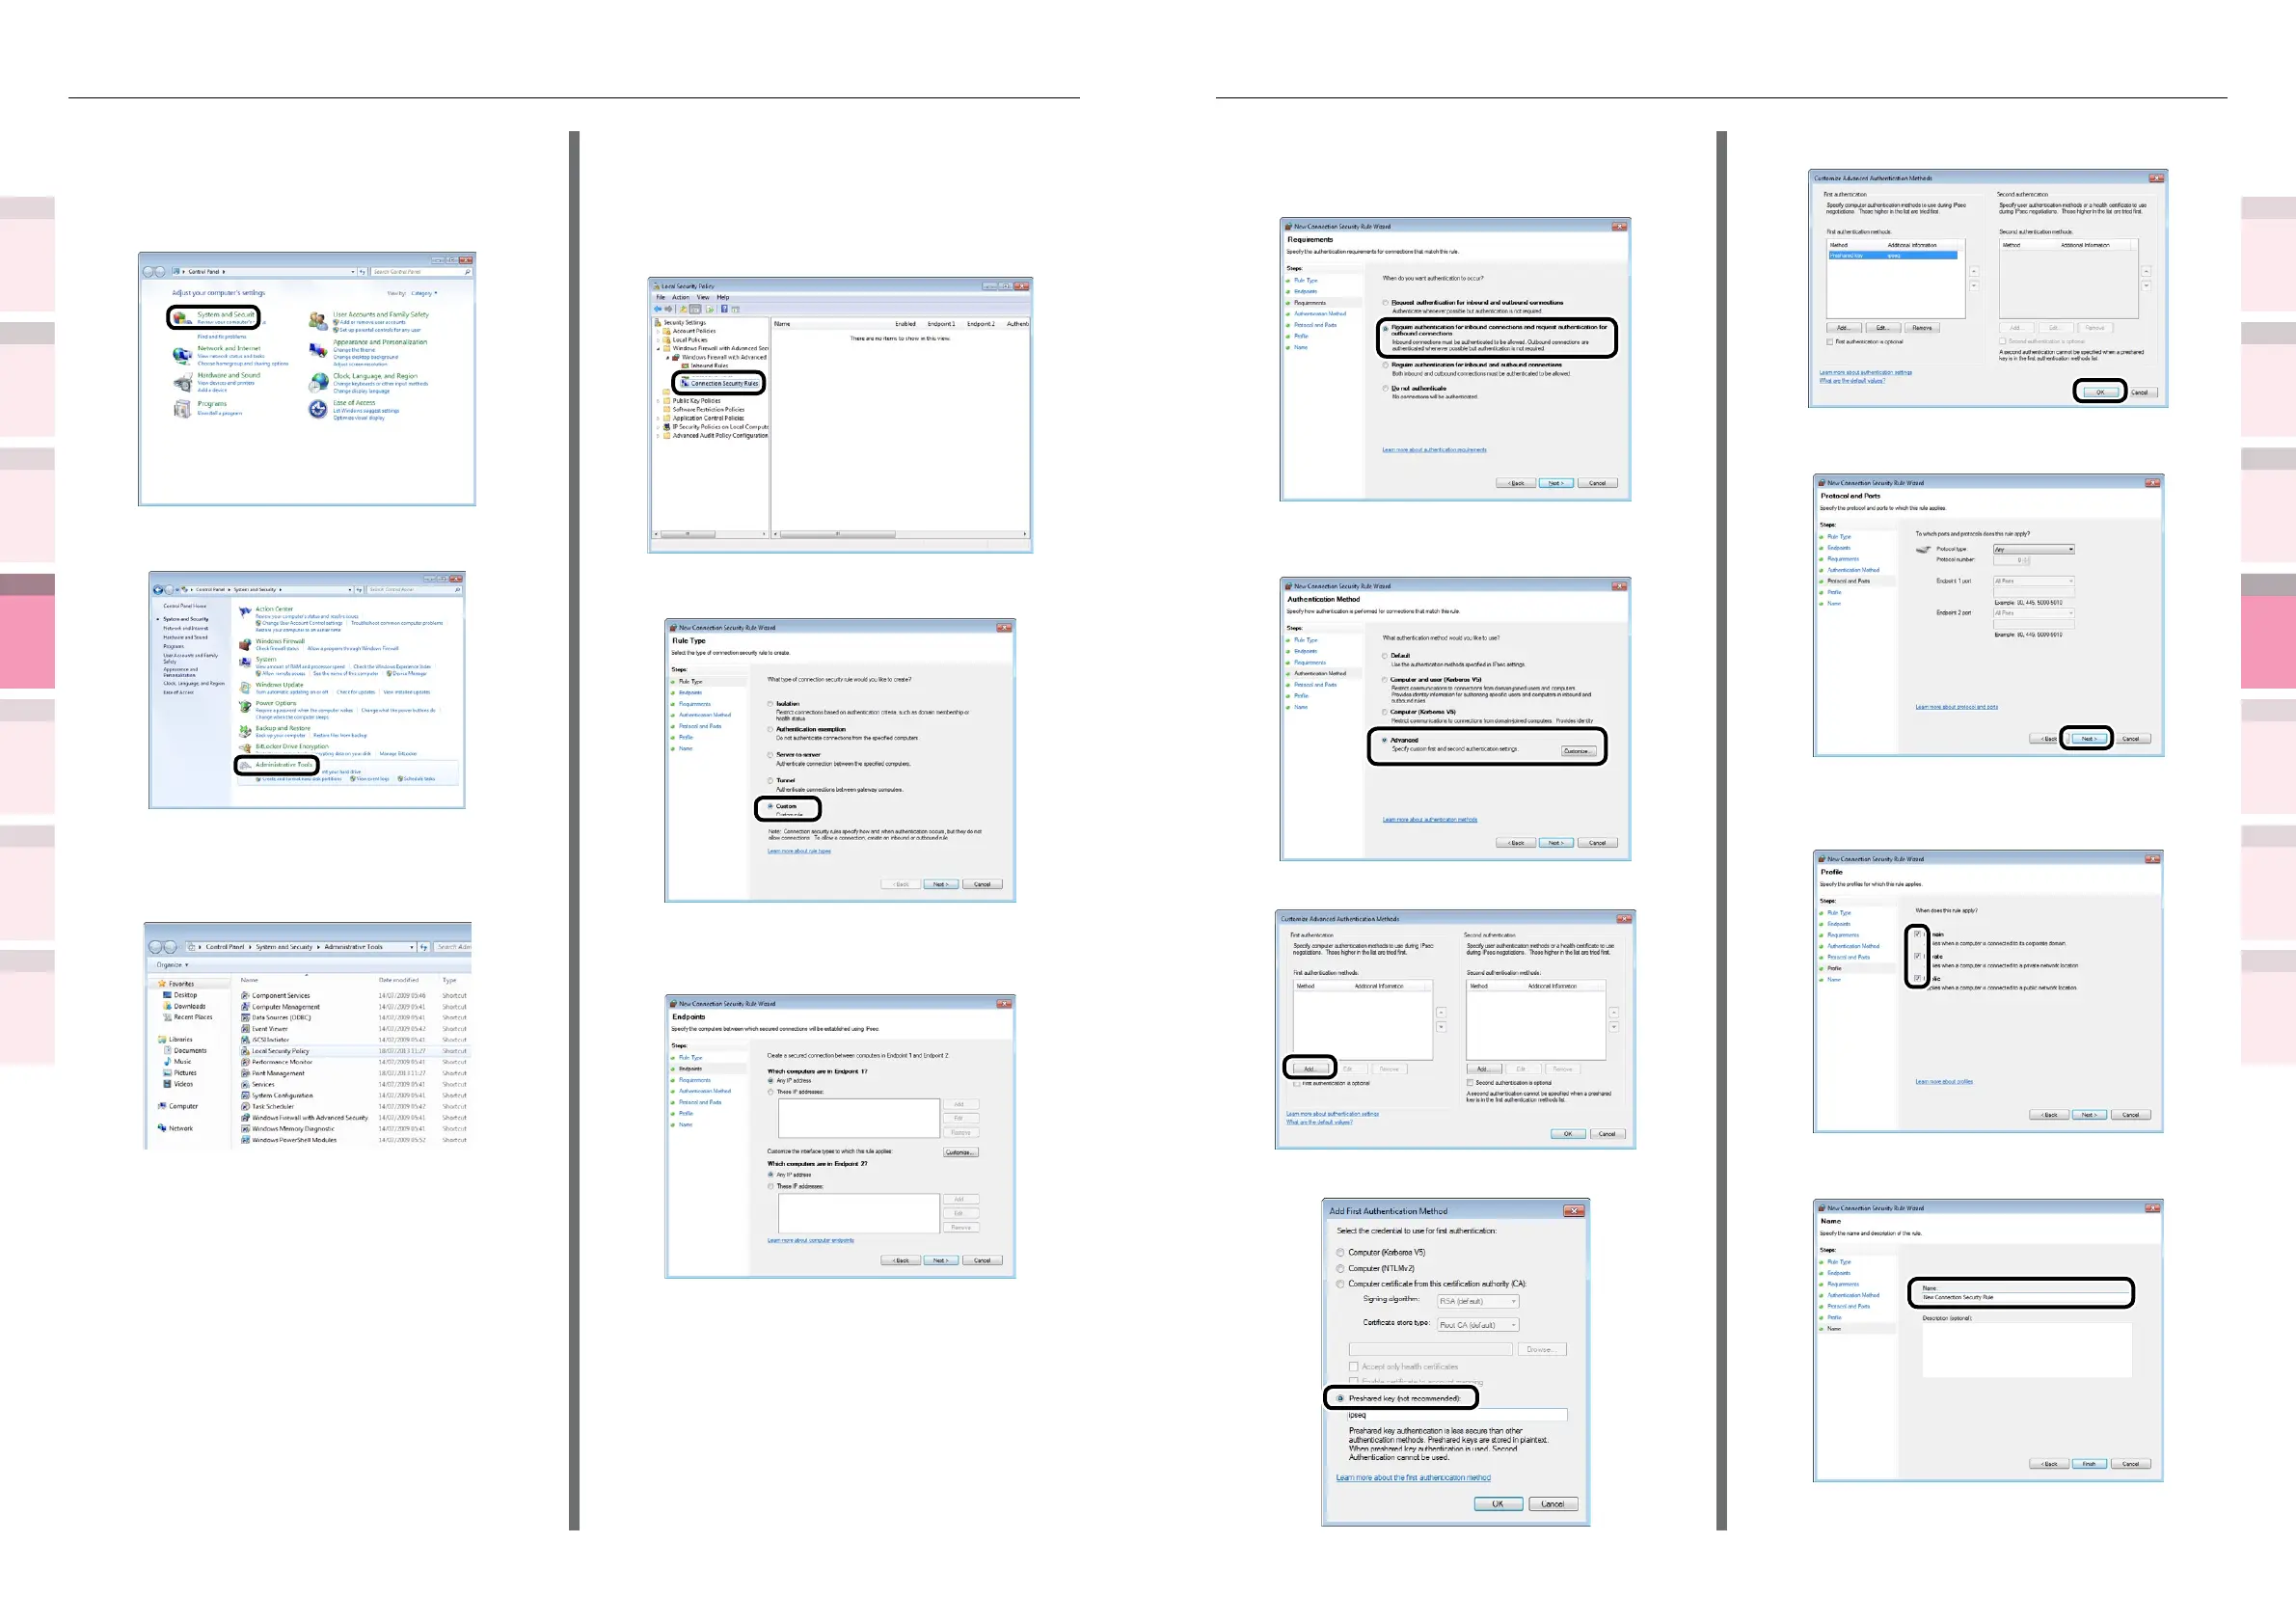
7
Enable the [Require authentication for inbound
connections and request authentication for
outbound connections] check box, and click [Next].
8
Select [Advanced], and click the
[Customize] button.
9
Click the [Add] button in [First authentication].
10
Select [Preshared key], and enter the key.
11
Click the [OK] button.
12
Click [Next].
13
Check that all check boxes have been
selected, and click [Next].
14
Enter a name, and click [Finish].
Computer setup
1
Click [Start], and select [Control
Panel]>[System and Security].
2
Click [Administrative Tools].
Connection security regulations
3
Double-click [Local Security Policy].
4
Right-click [Windows Firewall with
Advanced Security]-[Windows Firewall
with Advanced Security-Local Group
Policy Object]-[Connection Security
Rules], and select [New Rule].
5
Select [Custom], and click [Next].
6
Select end points 1 and 2. Specify as
necessary, and click [Next].