- 198 - - 199 -
Setting the network from the web browser Setting the network from the web browser
5
1
2
4
3
5
1
2
4
3
Convenient print
functions
Appendix Index
Checking and
Changing Printer
Settings Using
the Control Panel
Network
Setup
Matching
Colors
Using Utility
Software
Convenient print
functions
Appendix Index
Checking and
Changing Printer
Settings Using
the Control Panel
Network
Setup
Matching
Colors
Using Utility
Software
21
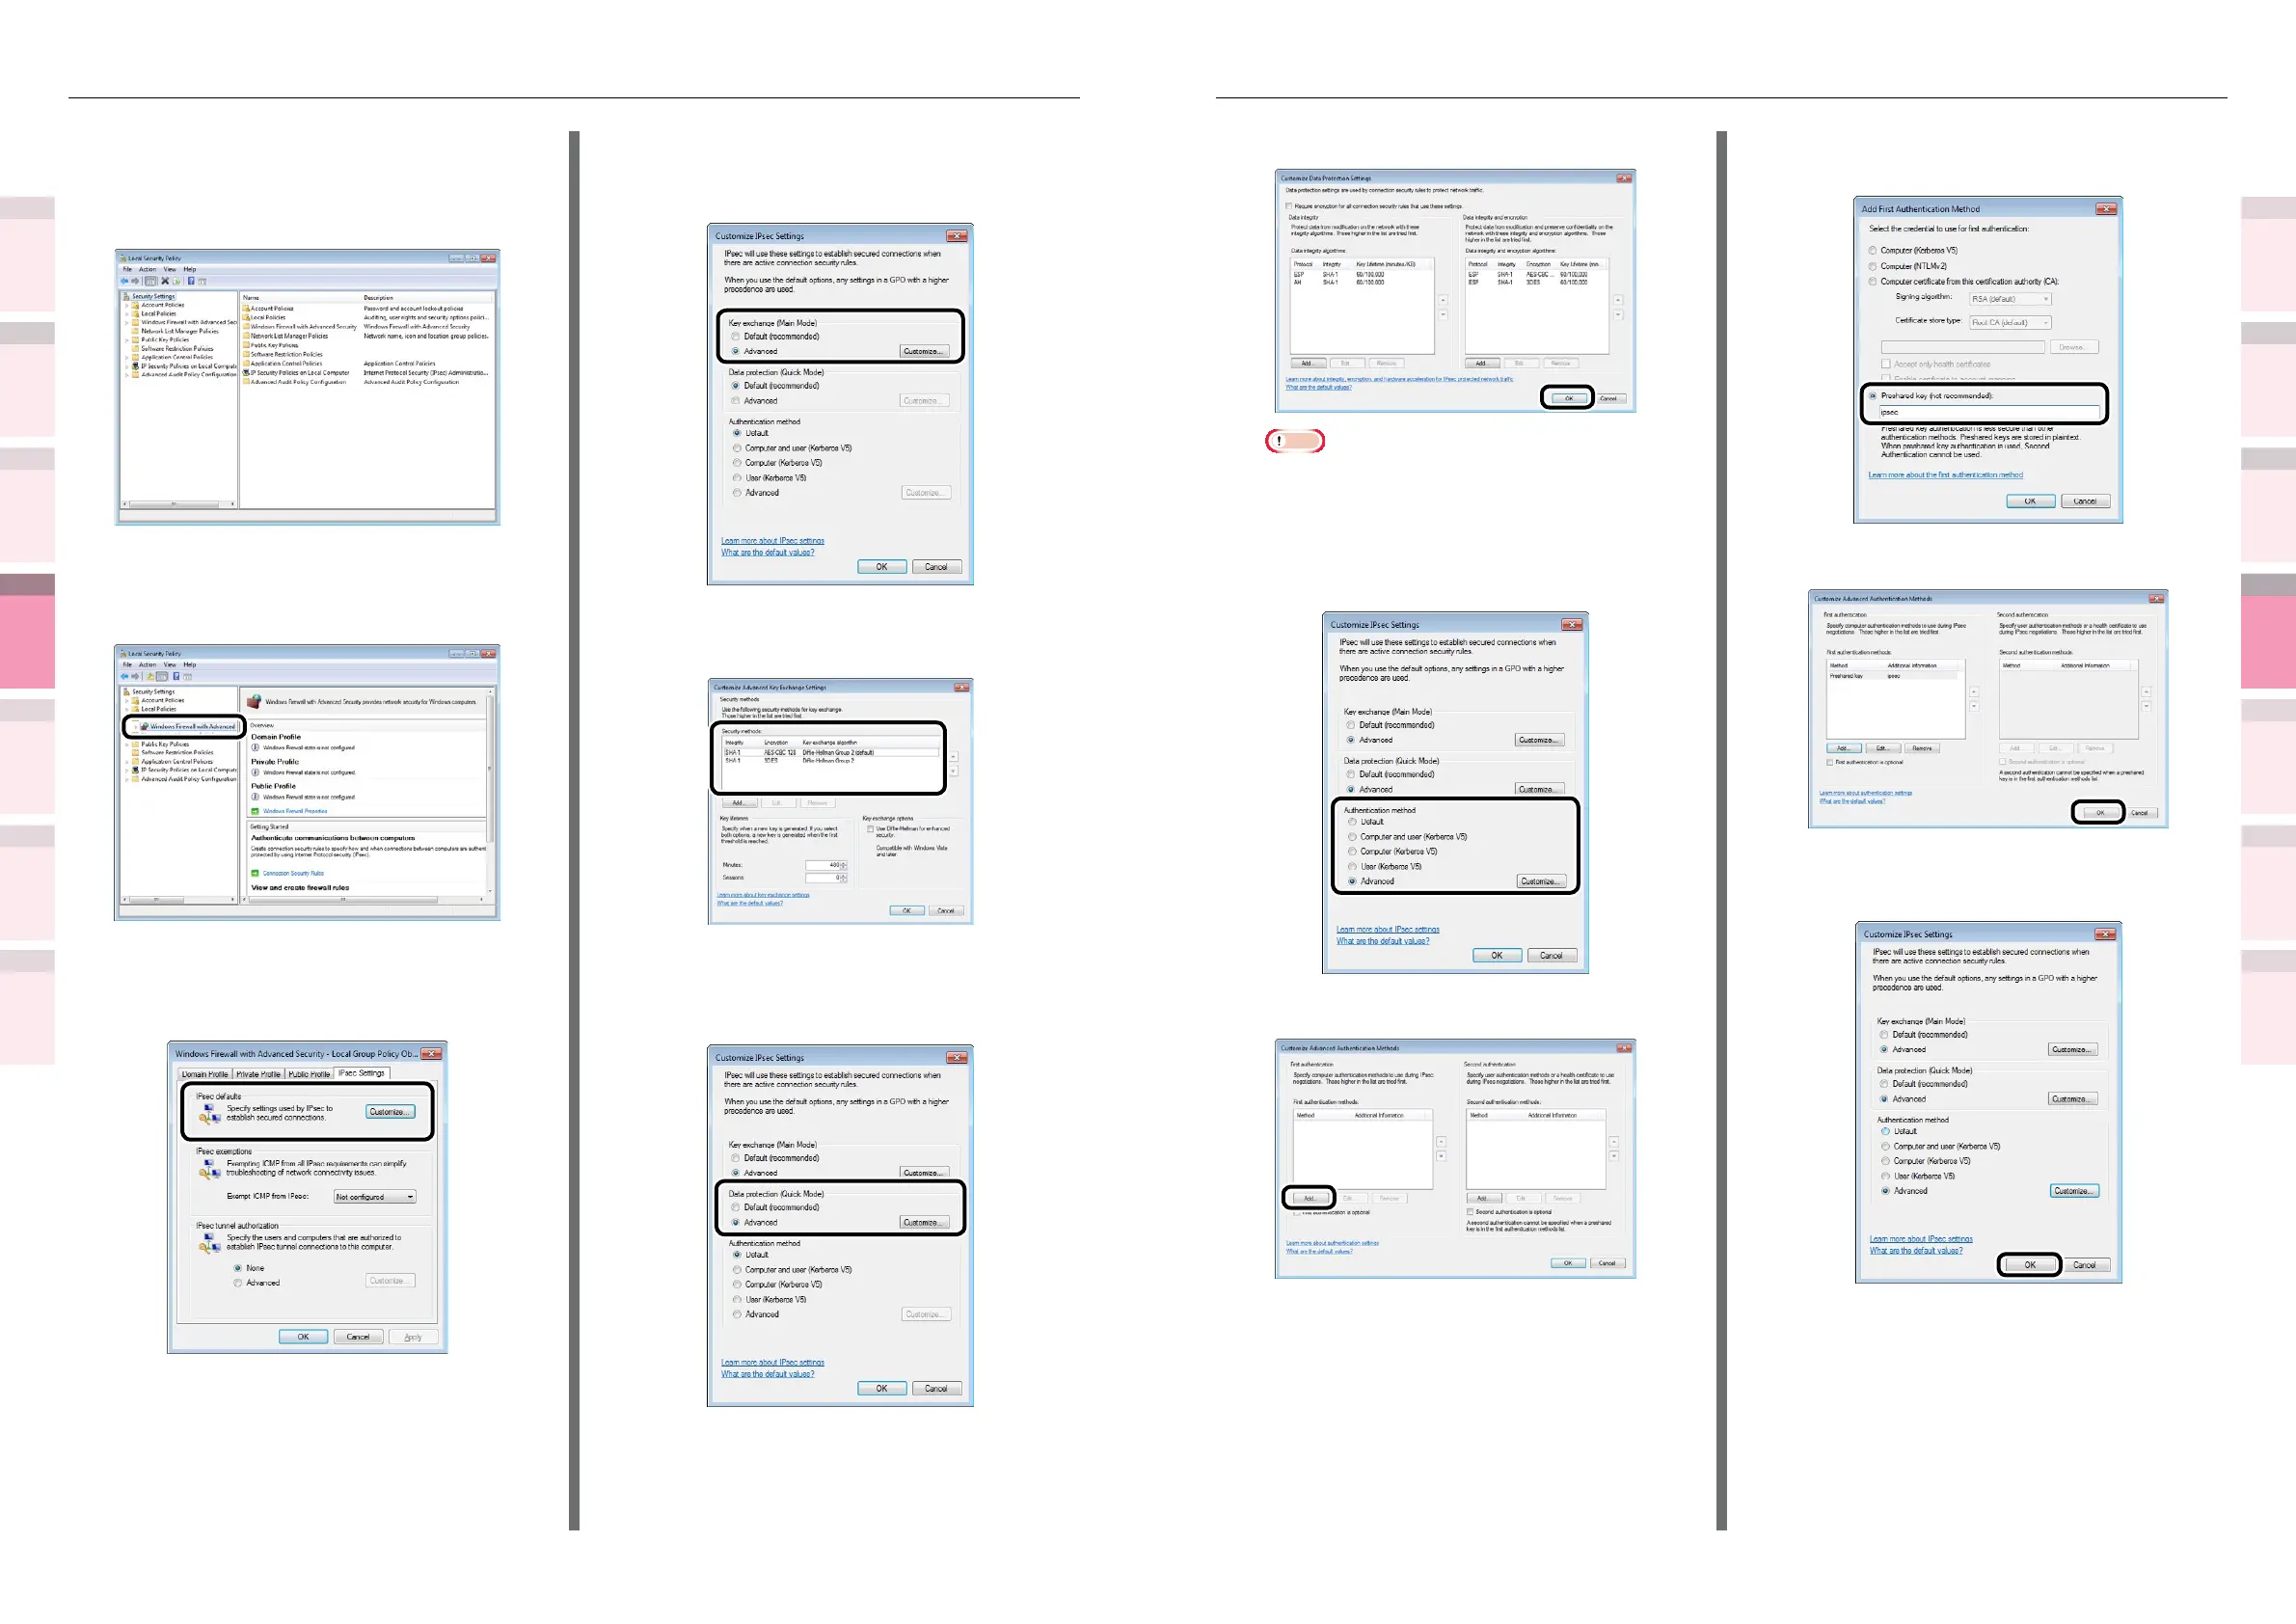
Enter the desired value, and click [OK].
Note
z
Only the time is supported as the key enabled time.
Set the maximum value to disable the conditions
using the session (IPSec communications data size).
22
Select [Advanced] in [Authentication
method], and click [Customize].
23
Click [Add] in [First authentication].
24
Select [Preshared key] and enter the
key.
25
Click [OK].
26
Click the [OK] button to nish
[Customize IPsec Settings].
27
Click the [OK] button.
IPSec setup
15
Open the local security policy in the
management tools.
16
Select [Windows Firewall with Advanced
Security], right-click, and select
[Properties].
17
Select the [IPSec Settings] tab, and
click the [Customize] button in [IPSec
defaults].
18
Select [Advanced] in [Key exchange
(Main Mode)], and click the [Customize]
button.
19
Change the [Security methods] to the
desired settings, and click [OK].
20
Select [Advanced] in [Data protection
(Quick Mode)], and click the
[Customize] button.