MAINTENANCE MANUAL
INTEL
®
FALCON™ 8+ UAS
DESCRIPTION
96 © 2017 Intel Corporation. All rights reserved.
REV 00
APR 2017
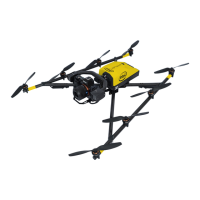
7.3.1 Camera Mount Exchange
To remove the camera mount:
1. Remove the thumbscrew nut on the back side of the central unit.
2. Carefully disconnect the payload adapter with pressure against the release clip of the
adapter.
3. Disconnect the ball of the ball link connector of the roll servo out of the adapter slot.
4. Pull out the camera mount gently, making sure it comes out straight and not at an angle.
To install the camera mount:
1. Feed the camera mount’s carbon rod into the hole on the front side of the central unit.
Make sure it is inserted straight and not at an angle.
2. Fit the payload adapter.
Take care that the connector plug of the adapter fits to the equivalent at the front
side of the Intel
®
Falcon™ 8+ UAS.
Make sure that the ball of the ball link connector of the roll servo is fixed in the
respective slot in the adapter when the camera mount is fixed onto the Intel
®
Falcon™
8+ UAS.
Press the releasing clip of the payload adapter into the respective counterpart
opening.
3. Install the thumbscrew nut on the back side of the central unit (finger tight).
The payload calibration and the compass calibration need to be performed once with each
payload.
PAYLOADS
7.4.1 Overview
To ensure complete integration into the Intel
®
Falcon™ 8+ UAS, every payload must undergo
mechanical and electrical modifications. Therefore, only payloads approved by Intel are
allowed. Payloads, which have not been integrated, might affect the compass calibration due to
magnetic fields emitted by the camera, and have detrimental effects on the flight performance.
Because of the deep integration of cameras, it is possible to change settings like aperture,
shutter speed or zoom (depending on the camera) directly from the Intel
®
Cockpit GCS, while
the system is airborne.