NORMAL PROCEDURES
© 2017 Intel Corporation. All rights reserved. 37
REV 00
APR 2017
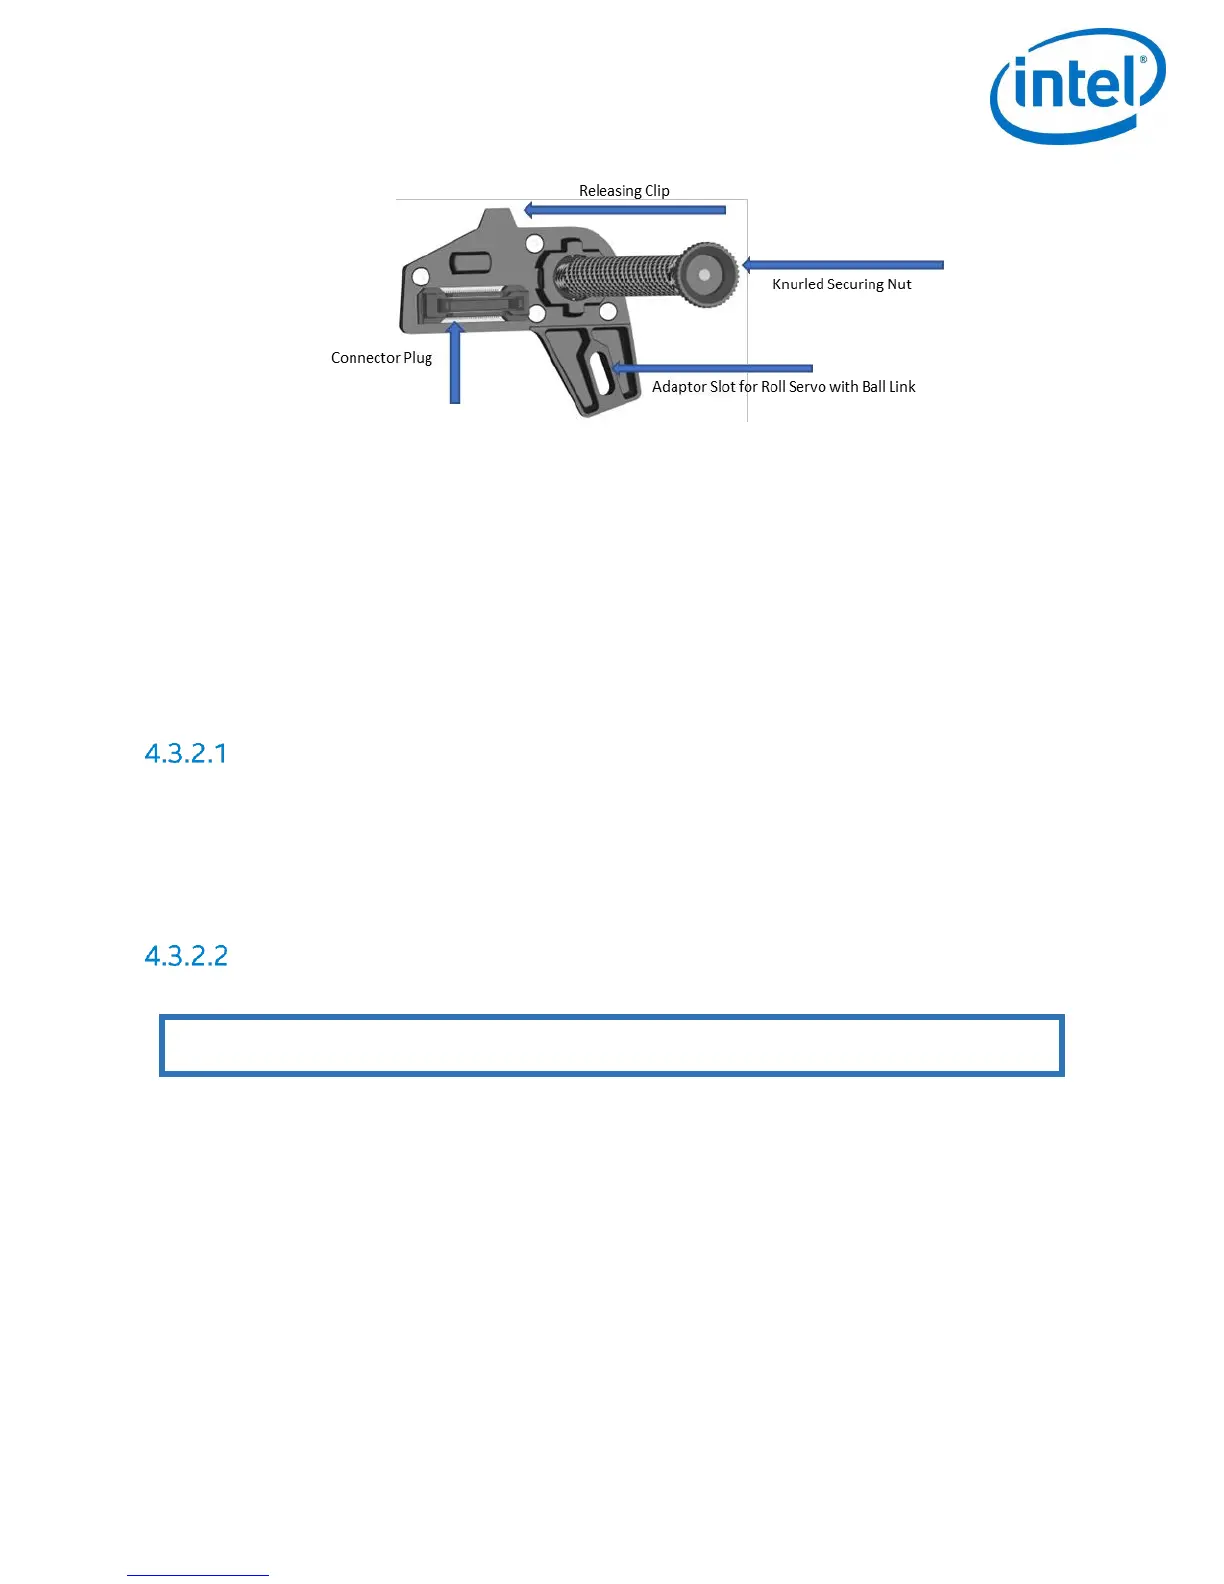
3. Take care that the connector plug of the adapter fits to the equivalent at the front side
of the Intel
®
Falcon™ 8+ UAS.
4. Make sure the ball of the ball link connector of the Roll Servo is fixed in the respective
slot in the adapter when the Camera Mount is fixed onto the Intel
®
Falcon™ 8+ UAS.
5. Press the releasing clip of the Payload Adapter into the respective counterpart opening.
6. Install the thumbscrew nut on the back side of the Central Unit (finger tight).
4.3.2 Payload and Compass Calibration
First Setup Only
The first time a payload is connected with the Intel
®
Falcon™ 8+ UAS, it is necessary to perform
a payload calibration and then the compass calibration (strictly in that order). The Intel
®
Falcon™
8+ UAS will save the calibrations with that exact payload and remember it the next time it is
used. If the calibrations are not done, the system will use default parameters which will lead to
decreased heading accuracies.
Calibrate the Payload
1. Attach the payload to be calibrated.
2. Switch on the payload, the Intel
®
Falcon™ 8+ UAS and the Intel
®
Cockpit GCS in that order.
3. On the Intel
®
Cockpit GCS navigate to Settings > Payload Calib’ and push the ENT button
on the Status Display
4. Make sure that the camera can turn freely from the full down position, to the full up
position.
5. The camera will first rotate fully downwards and then progressively move to the fully
upwards position. Do not touch the Intel
®
Falcon™ 8+ UAS during the process.
Note: The payload calibration can be done indoors with the Motors switched off.