USER MANUAL
INTEL® FALCON™ 8+ UAS
© 2018 Intel Corporation. All rights reserved 110
Modifying an Existing Project (Continued)
Tapping on the “move to left” button shows the notification “Choose the way-
point to follow the selected waypoints”. After tapping on the corresponding
waypoint, the direction order of the selected waypoints is changed against
the teach-in order.
Tapping on the “move to right” button shows the notification: “Choose the
waypoint to precede the selected waypoints”. After tapping on the corre-
sponding waypoint, the direction order of the selected waypoints is changed
in direction of the teach-in order.
On the right side of the window you see the total and active number of way-
points, contained within the loaded project. After selecting one or more waypoints,
the actual selected number of waypoints is displayed.
Under Properties the values of the properties of selected waypoints are shown.
Latitude and Longitude show the related coordinates of selected points.
Height shows the height of selected points.
Yaw shows the heading at which waypoints were stored.
Camera Pitch shows the actual stored pitch angle(s) of the camera.
To change these properties, select the waypoints you want to change to highlight
them.
Tapping on this button once, subtracts the value mentioned at Stepsize.
Tapping on this button once, adds the value mentioned at Stepsize.
The size of a step can be changed by tapping on the number right to Stepsize.
This opens a number keypad. With help of the keypad you can enter a new number.
The number behind Change Amount shows how often you tapped on the related
button (cumulated number of steps).
To change the properties
Height, Yaw and Camera Pitch of one or more
selected waypoints, you tap on the property you want to change. When its high-
lighted, tapping on the value of the property opens a number keypad.
With help of the keypad you can enter a new value.
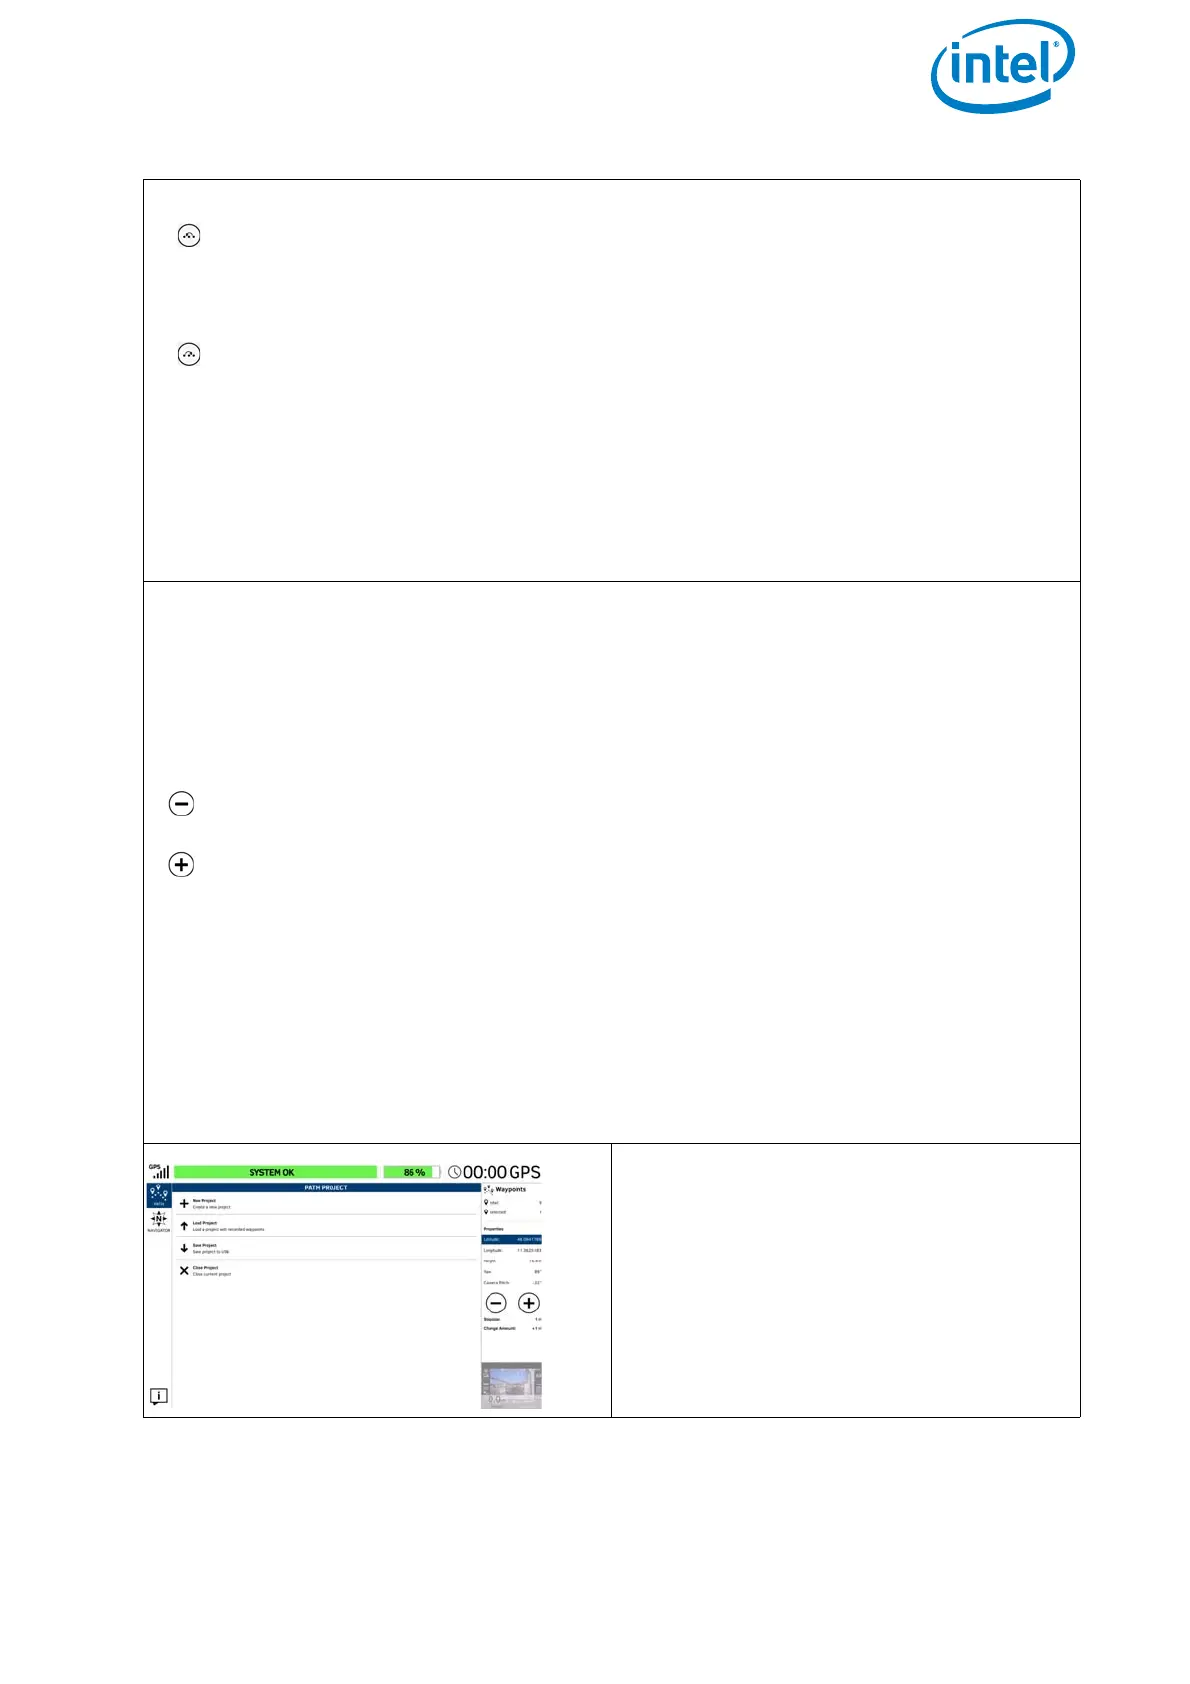
Save PATH Project
After modifying one or more waypoints
you can save the modifications by tap-
ping on the
PATH button (top left cor-
ner). The window PATH PROJECT is
opened again (shown to the left). Tap-
ping on Save Project saves the mod-
ifications to the project.
Figure 3.5: The Cockpit Control Application and PATH Projects (continued)