Chapter 14: Device management
120 TruVision NVR 11 User Manual
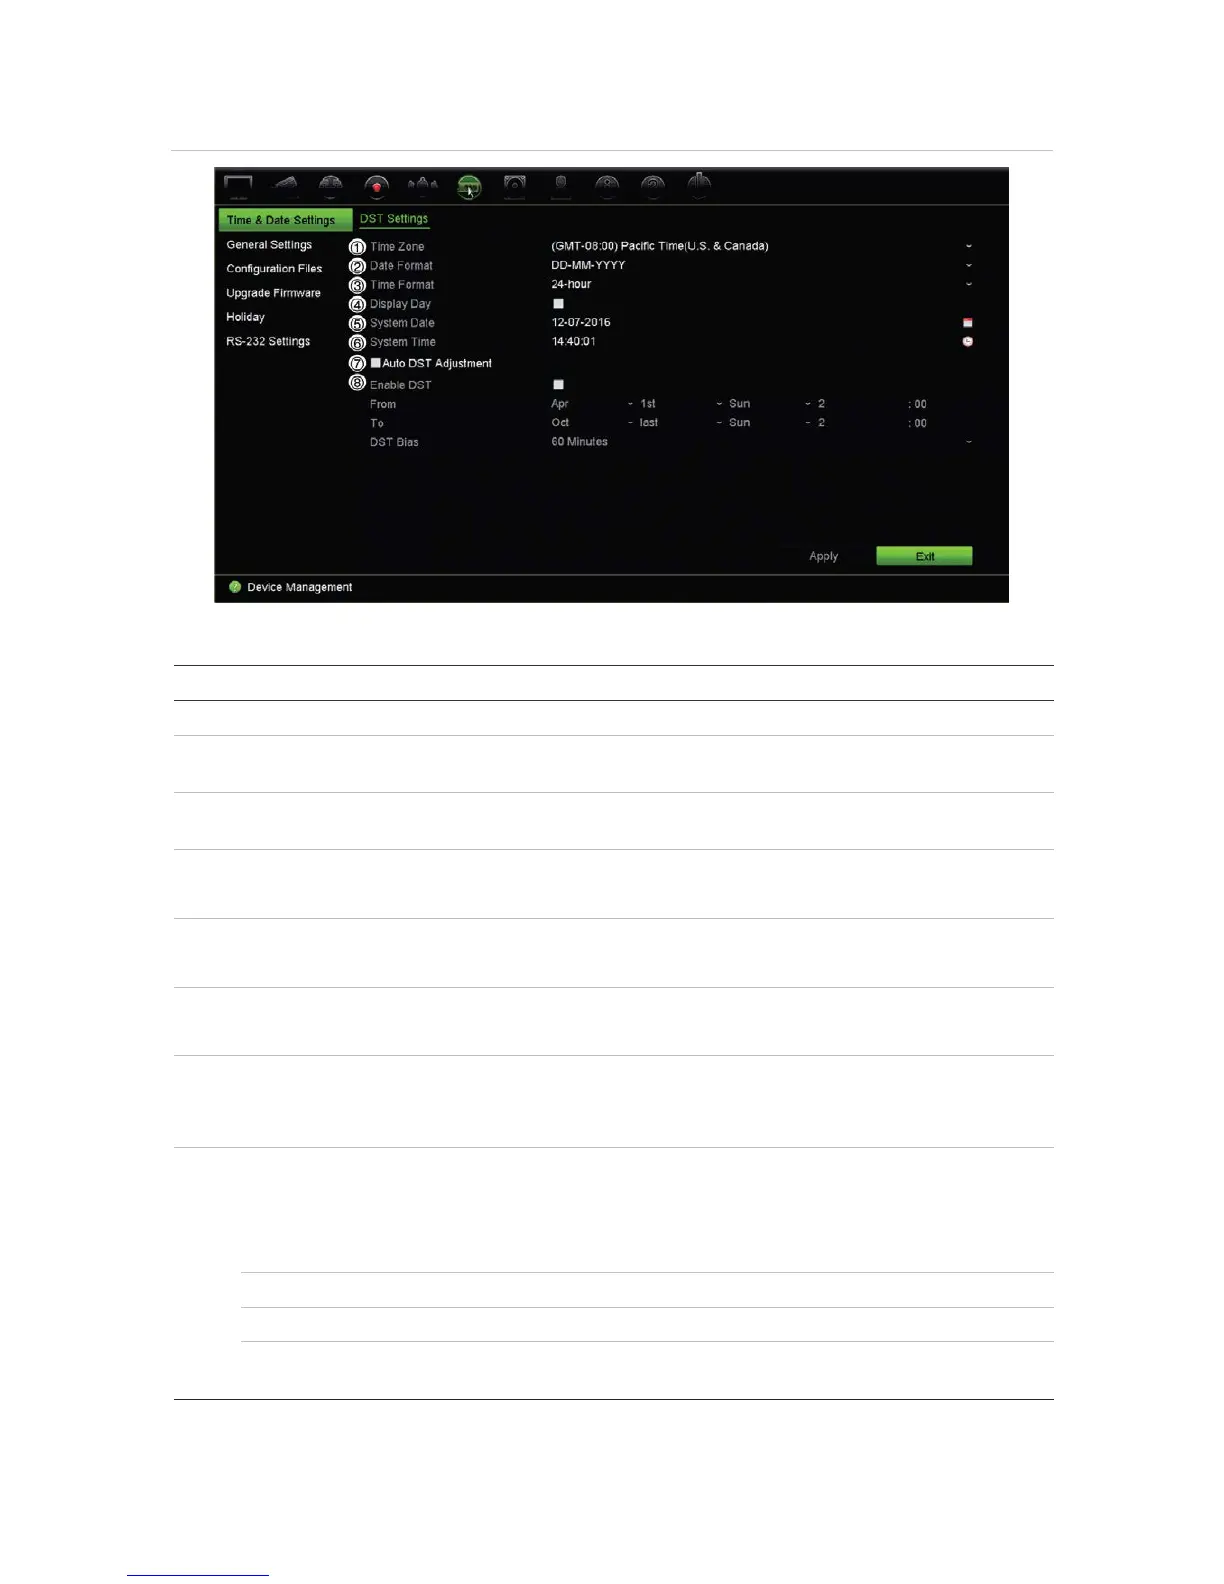
Figure 29: Time and Date Settings window
Table 14: Description of the Time and Date Settings window
Option Description
1.
Select a time zone from the list.
2.
Select the date format from the drop-down list. Default format is DD-
MM-YYYY.
3.
Select either the 12-hour or 24-hour time format from the list. Default
format is 24-hour format.
4.
Select it to display the day of the week in the monitor time bar.
Select the checkbox to enable/disable. Default is Disabled.
5.
Enter the system date.
Default date is the current date.
6.
Enter the system time.
Default time is the current time.
7.
Enable to activate DST is automatically. It depends on the time zone
selected.
Default is Disabled.
8.
Manually define DST. If this option is selected, the Auto DST
adjustment option is disabled.
Default is Disabled.
Click the checkbox to enable or disable daylight savings time (DST).
Enter the start date and time for daylight savings.
Enter the end date and time for daylight savings.
Set the amount of time to move DST forward from the standard time.
Default is 60 minutes.
 Loading...