Chapter 2: Physical installation
12 TruVision NVR 11 User Manual
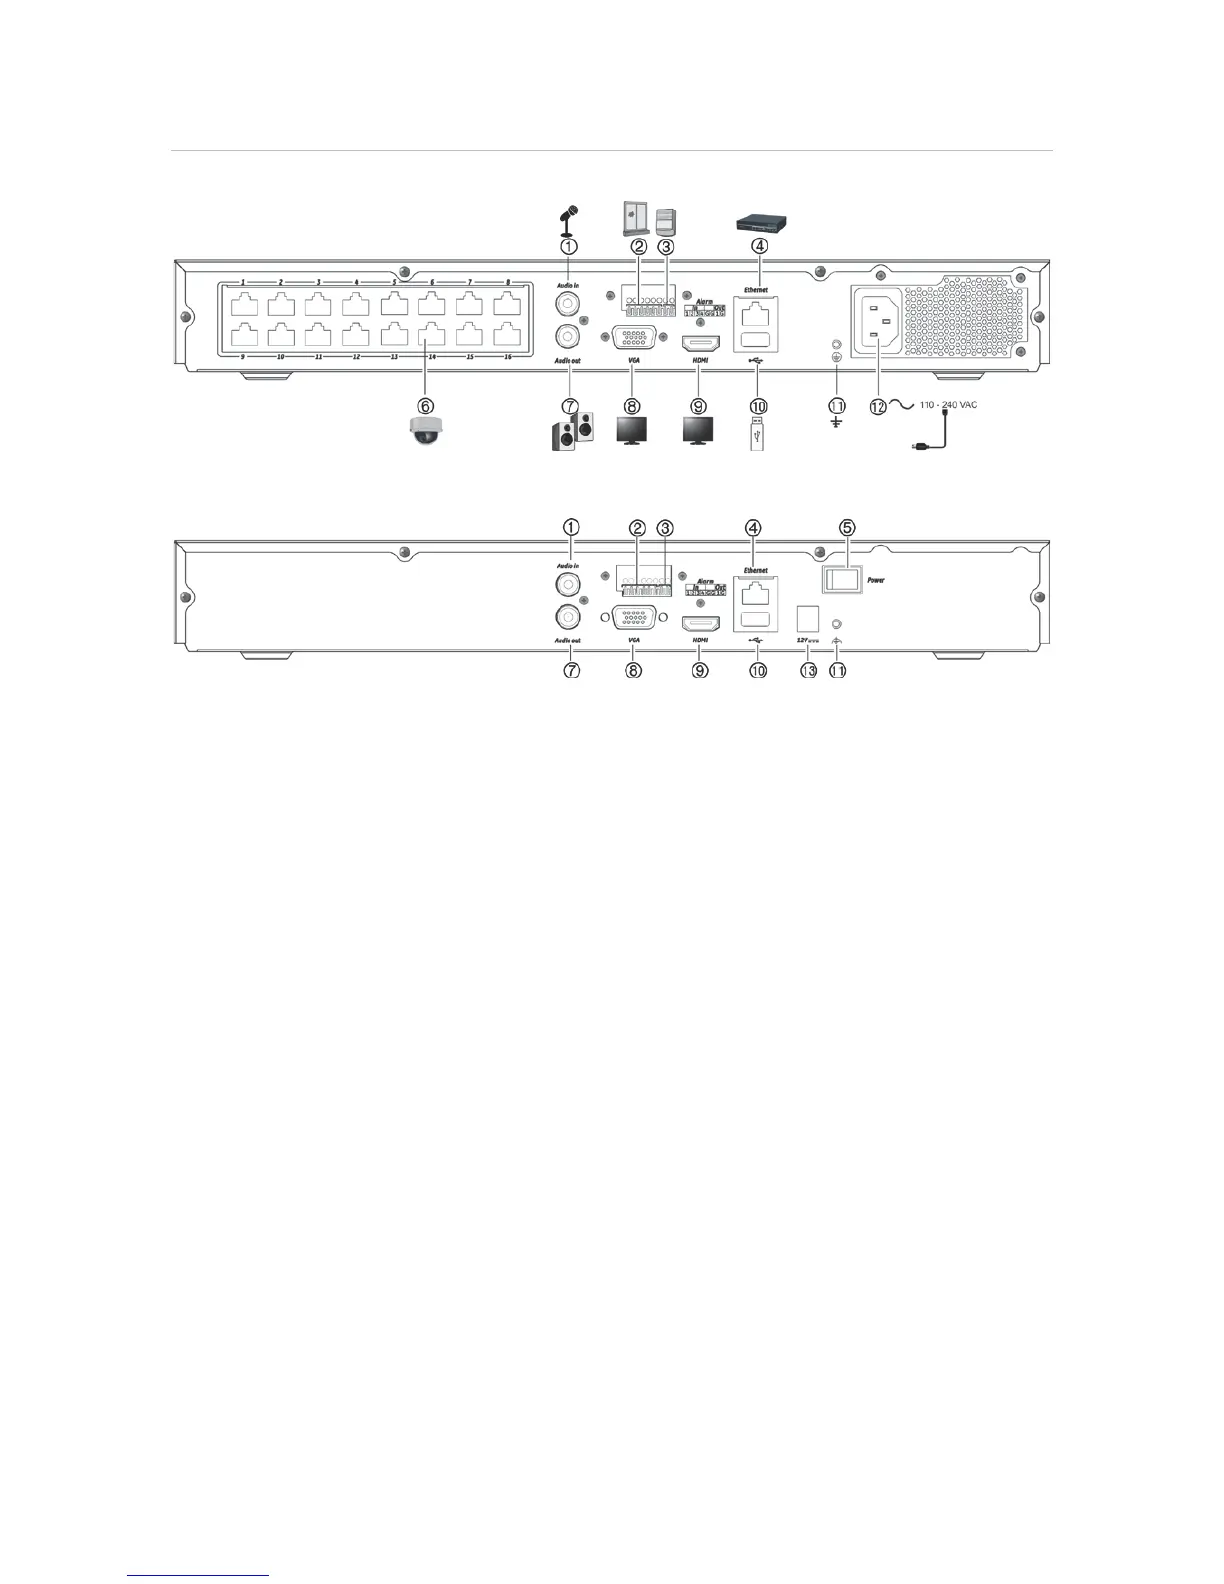
Figure 3: Back panel connections TVN 1116S and TVN 1116
TVN 1116S:
TVN 1116: (EMEA only)
1. Connect a microphone for bi-directional audio
(not recorded).
2. Connect up to four alarm inputs
3. Connect one alarm relay output.
4. Connect to a network.
5. Power switch (on/off).
6. Embedded PoE ports to connect IP cameras
(16).
8. Connect to a VGA monitor.
9. Connect to an HDTV. The HDMI connection
supports both digital audio and video.
10. Connect to an optional USB 2.0 device such
as a mouse, CD/DVD burner or HDD.
11. Connect to ground.
12. Connect a power cord to the recorder
(included).
13. Connect to the 12 VDC PSU (included).
Monitor connections
The recorder supports up to 1920 × 1080 / 60 Hz resolution in VGA and up to 3840 x
2160 / 30 Hz in HDMI. The monitor resolution should be at least 1024 × 768. Adjust
your monitor accordingly to this resolution.
There is no event monitor for the 4-channel recorder. The VGA and HDMI monitors
both show the same image. When an event occurs, it appears in full-screen mode on
both monitors.
For the 8- and 16-channel recorders, the VGA and HDMI monitors can be used as the
main and event monitors.