Chapter 10: Camera setup
78 TruVision NVR 11 User Manual
10. Click OK to return to the motion detection settings window.
11. Click Apply to save all settings.
12. Click Exit to return to live view.
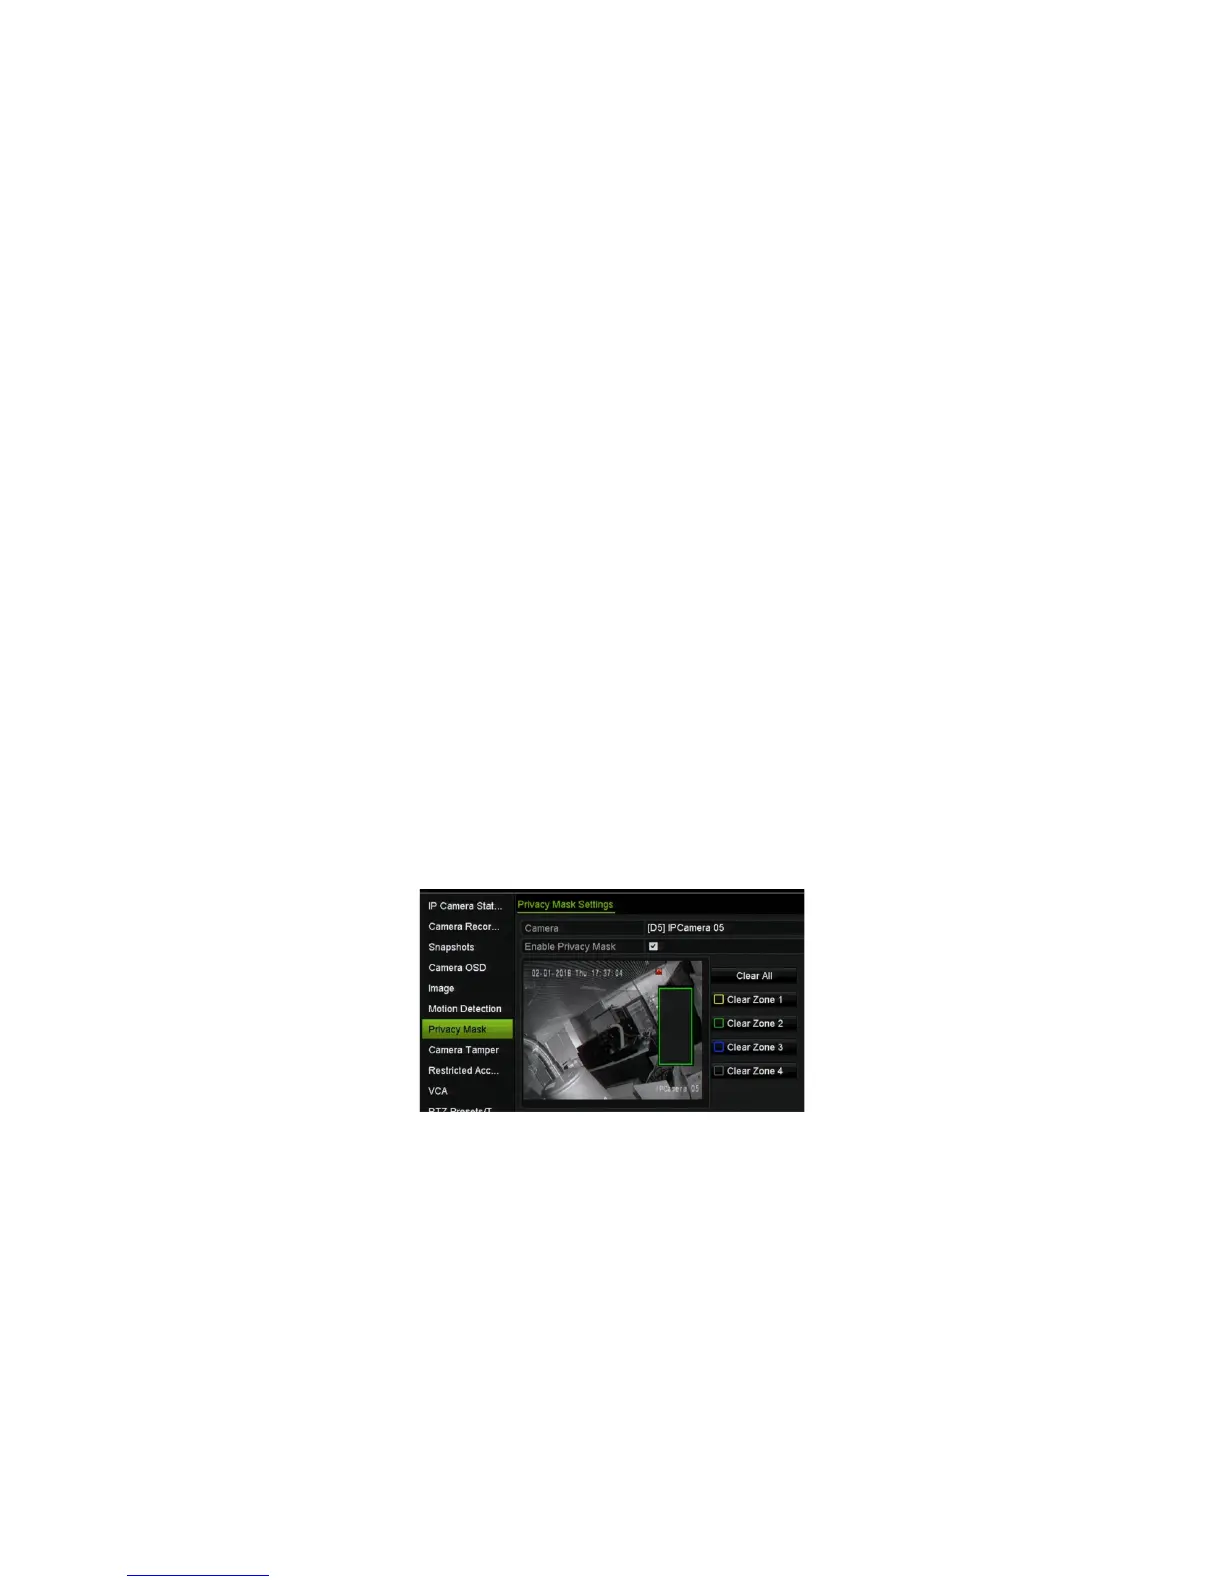
Privacy mask
You can define an area on screen to remain hidden from view and recording. For
example, you can choose to block the view of a camera when overlooking residential
premises. This hidden area is referred to as privacy masking. Privacy masking cannot
be viewed in live view or recorded mode, and appears as a black area on the video
image.
The permitted number of privacy masks is determined by the number supported by the
camera.
To setup a privacy mask:
1. From the menu toolbar, click Camera Setup > Privacy Mask.
2. Select the camera for which to set up privacy masking.
3. Select the Enable Privacy Mask checkbox to enable the feature.
4. Set up the mask area. Up to four areas can be set (depending on the camera).
Using the mouse, click and drag a privacy-mask box in the camera view window
over the desired area. You can set up to four areas for privacy masking. Masked
areas are dimmed and outlined in four different colors. Click Apply to save settings.
To delete a mask, click Clear All. All the masks are deleted.
5. To copy the settings to other cameras, click Copy and select the desired cameras.
Click OK.
6. Click Apply to save the settings and then click Exit to return to live view.