Chapter 4: Operating instructions
TruVision NVR 11 User Manual 19
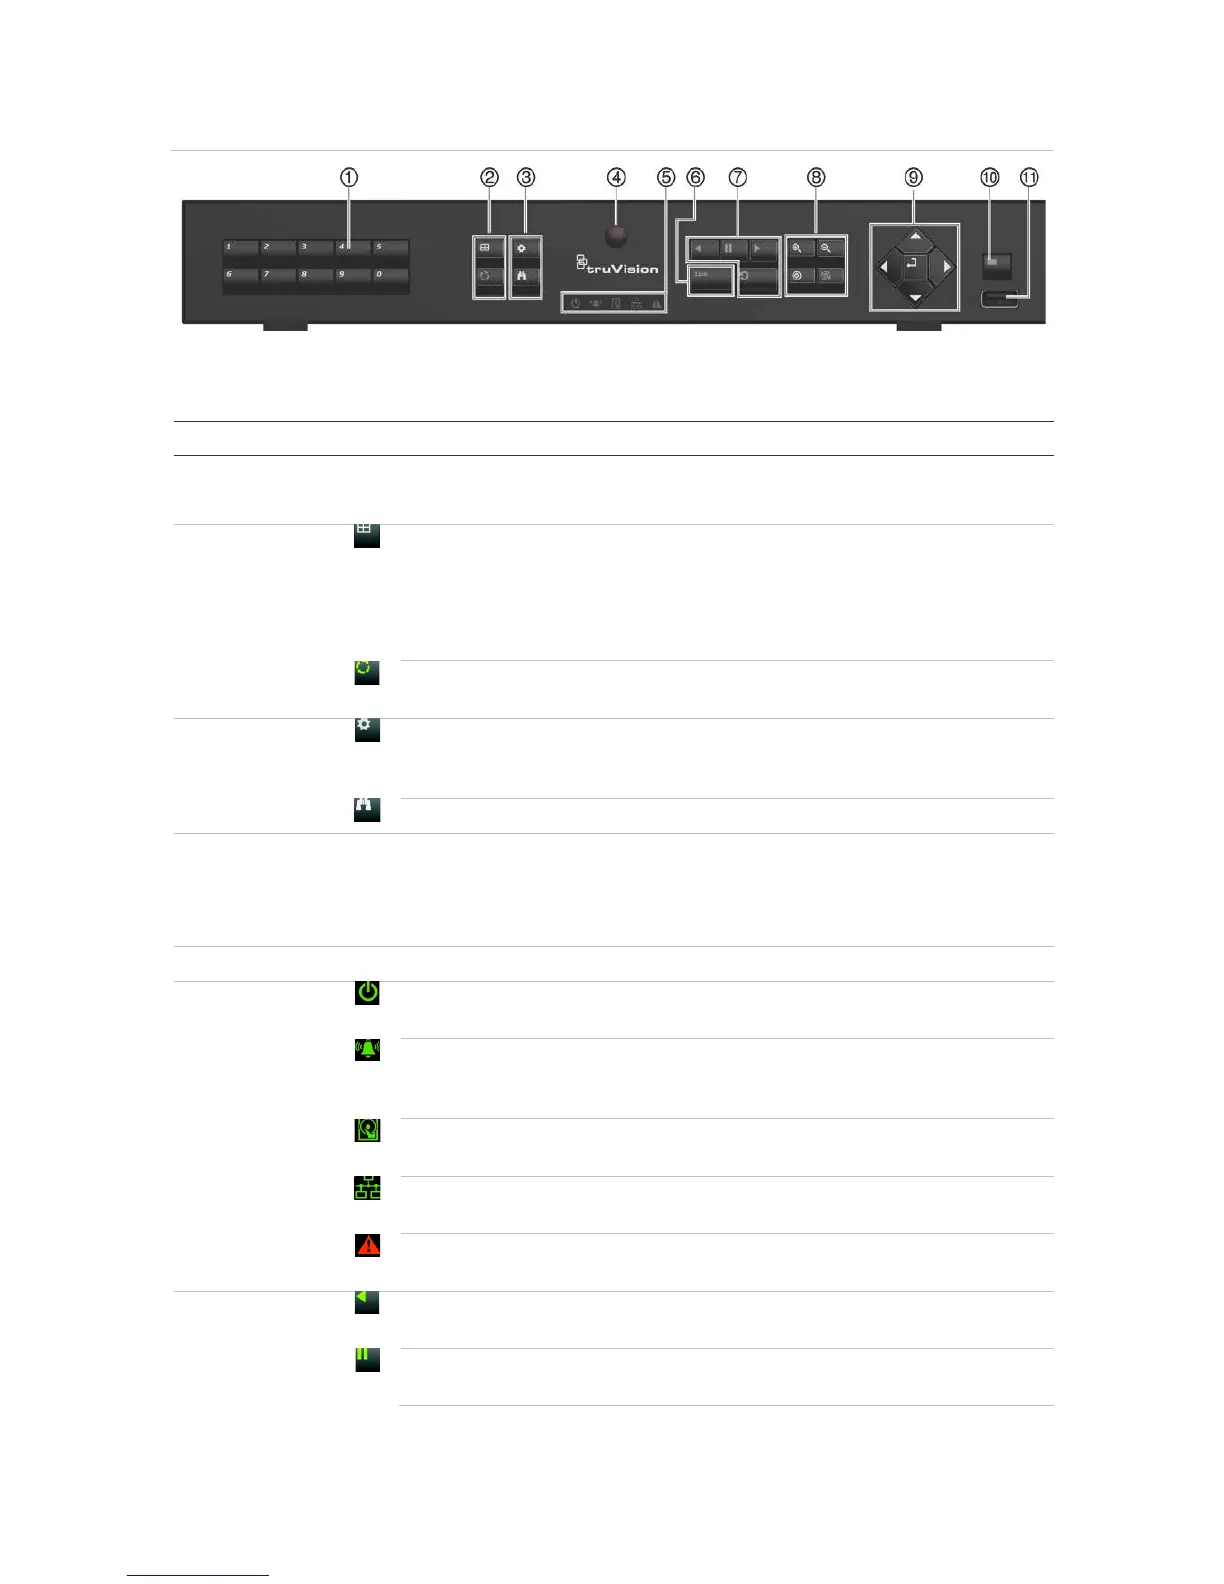
Figure 6: TVN 11 front panel (four-channel model shown)
The controls on the front panel include:
Table 1: Front panel elements
. Channel buttons Switch between different cameras in live, PTZ control or playback modes.
Use the soft keyboard to enter numerals 0 to 9.
. Display
buttons
Display: In multiview mode, toggle through the various multiviews (full, quad,
1+5, 1+7, 9 and 16).
In HDD information mode and user management mode delete a selected
item. In PTZ mode, delete a selected key point. In Log Search mode, display
the details of a log file in Log Search result.
Seq: In Live View mode, start/stop sequencing cameras on the current
monitor.
. Menu and
Search
buttons
Menu: Enter/exit the main menu.
Search: In live view, enter the advanced search menu.
. IR receiver Receiver for IR remote.
To connect the remote control to the recorder, press the Device button, enter
the device address, and press Enter. See “Using the IR remote control” on
page 22 for more information.
. Live button Live: Switch to live view mode.
. Status LEDs Power: A steady green light indicates the recorder is working correctly. Red
indicates a fault.
Event Alarm: A flashing red light indicates that there is a sensor Alarm In or
another alarm such as motion or tampering. No light indicates that there is no
alarm.
HDD: HDD indicator steady green when data is being read from or written to
the HDD. A steady red light indicates an HDD exception or error.
Tx/Rx: Steady green indicates a normal network connection. No light
indicates that it is not connected to a network.
Technical Alarm: A steady red light indicates that there is a technical alarm
from the recorder. No light indicates that there is no alarm.
. Playback
buttons
Reverse: In live view mode, use to play back the earliest video. In playback
mode, playback a camera in the reverse direction.
Pause: In live view, freeze the last image of the live display for all active
cameras displayed. In playback mode, stop playback.