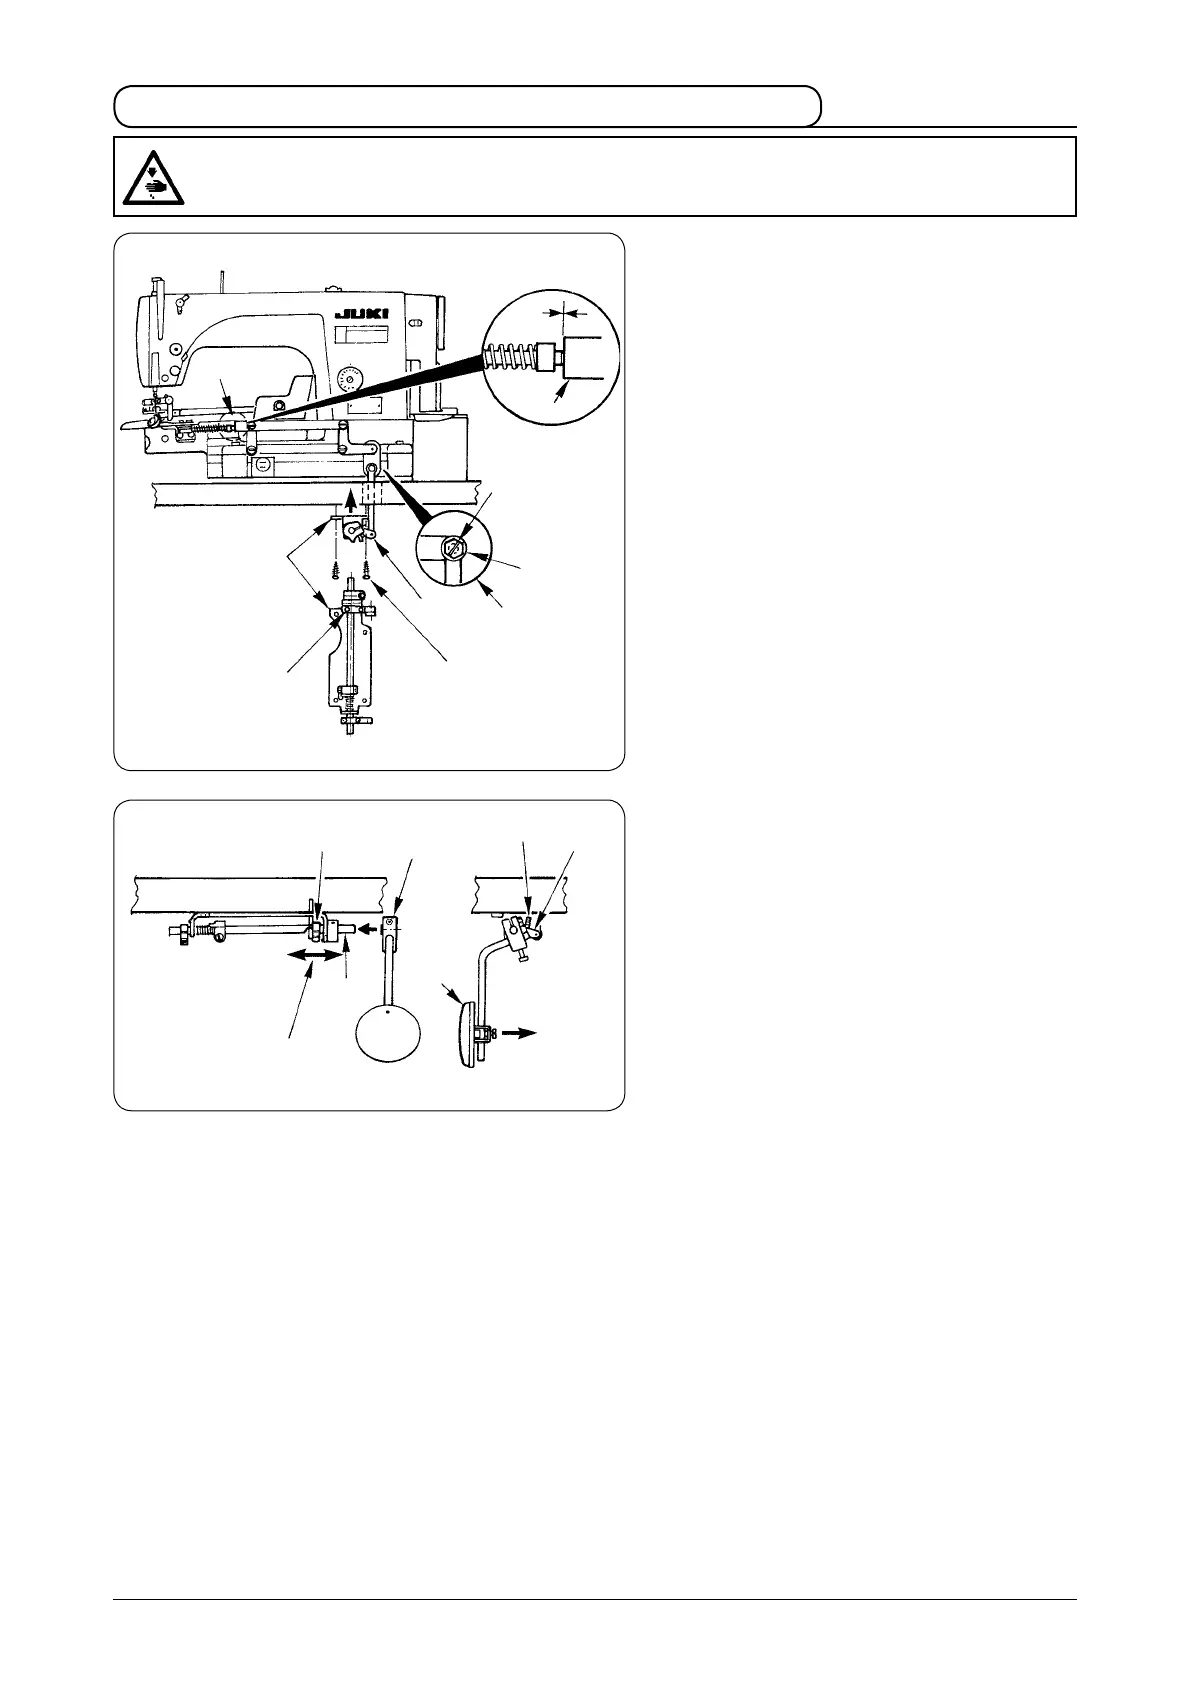
1) Fix knee lifter unit
1
on the table with wood
screws
2
(4 pcs.).
(For the position of the wood screw, refer to the
drawing of table for reference .)
2) Fix the hemming binder open/close mechanism
with hinge screw
4
and nut
3
, as shown in
A
.
(Tightening torque should be 4.5 to 5.5 N·m. To
secure nut
3
on the underside, tighten it with a
8mm spanner.)
3) Loosen setscrew
C
and adjust the angle of arm
D
so that the clearance between the top end
of hemming binder in section
B
and hemming
binder actuating rod A
8
is “0 mm”.
4) Set
5
to shaft
6
x it at the optimum position.
Push
7
in the direction A and check that the hem-
ming binder (asm.) is smoothly opened/closed.
(If not, adjust the lateral direction of
D
.)
3. Set-up of the hemming binder open/close mechanism
WARNING :
To protect against possible personal injury due to abrupt start of the machine, be sure to start the
following work after turning the power off and ascertaining that the motor is at rest.
0 mm
*
Max. open/close amount of the hemming binder open/close mechanism is 13 mm.
Adjust the protruding amount of stopper screw
8
and set the open/close amount you desire to obtain within the range
of the amount not exceeding max. open/close amount of 13 mm.
5
6
7
D
D
Adjustment of lateral
direction
Direction A
8
1
2
3
4
A
B
C
8
D
 Loading...


