39
ENGLISH
)
. SETUP OF OPTIONAL COMPONENTS
1. Needle cooler
• Needle cooler can reduce the occurrence of thread breakage due to the heat of needle when the sewing machine runs
at a speed of 4,000 sti/min or more.
• Needle cooler uses air. Refer to the table below and select the part used since the components vary according to the
machine head (with thread trimmer or without thread trimmer).
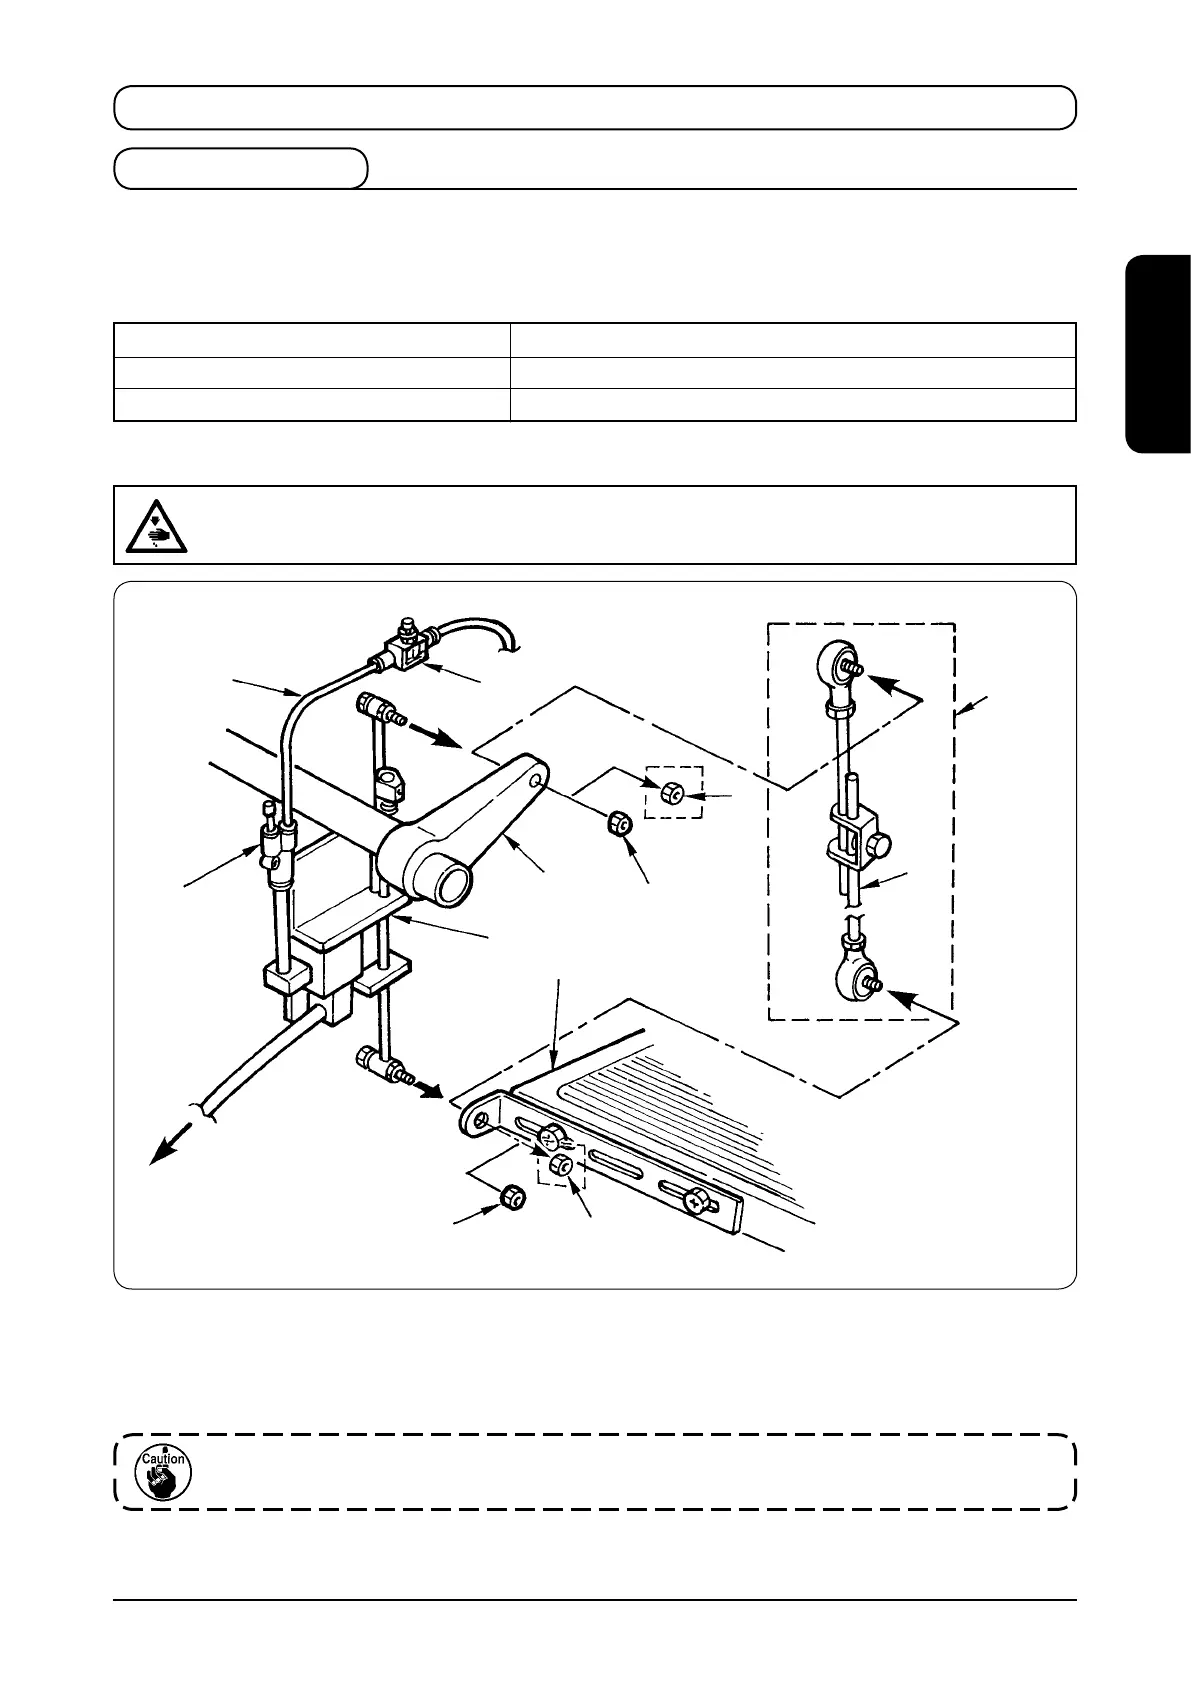
(1) Installing the top action air switch unit (without thread trimmer)
WARNING :
To protect against possible personal injury due to abrupt start of the machine, be sure to start the
following work after turning the power off and ascertaining that the motor is at rest.
Remove
6
3
Remove
1
4
5
2
9
8
7
A
6
3
Remove
1) Remove nut
3
connecting pedal connecting arm
1
and pedal
2
of the table and stand, and remove connecting rod
(asm.)
4
.
2) Install top action air switch unit
5
and x it with nut
6
supplied with the unit.
3) Connect air hose
8
to air joint
7
and install speed controller
9
at the top end of the air hose.
Machine head Part used
DLN-6390-7 (with thread trimmer) 40070354 Needle cooler (DLN-6390-7)
DLN-6390 (without thread trimmer) 40070355 Needle cooler (DLN-6390)
Be sure to conrm that the pedal returns smoothly to the position before depressing when
depressing the pedal.
 Loading...


