29
ENGLISH
4. Explanation and adjustment of the pedal components
Adjustment of the pedal
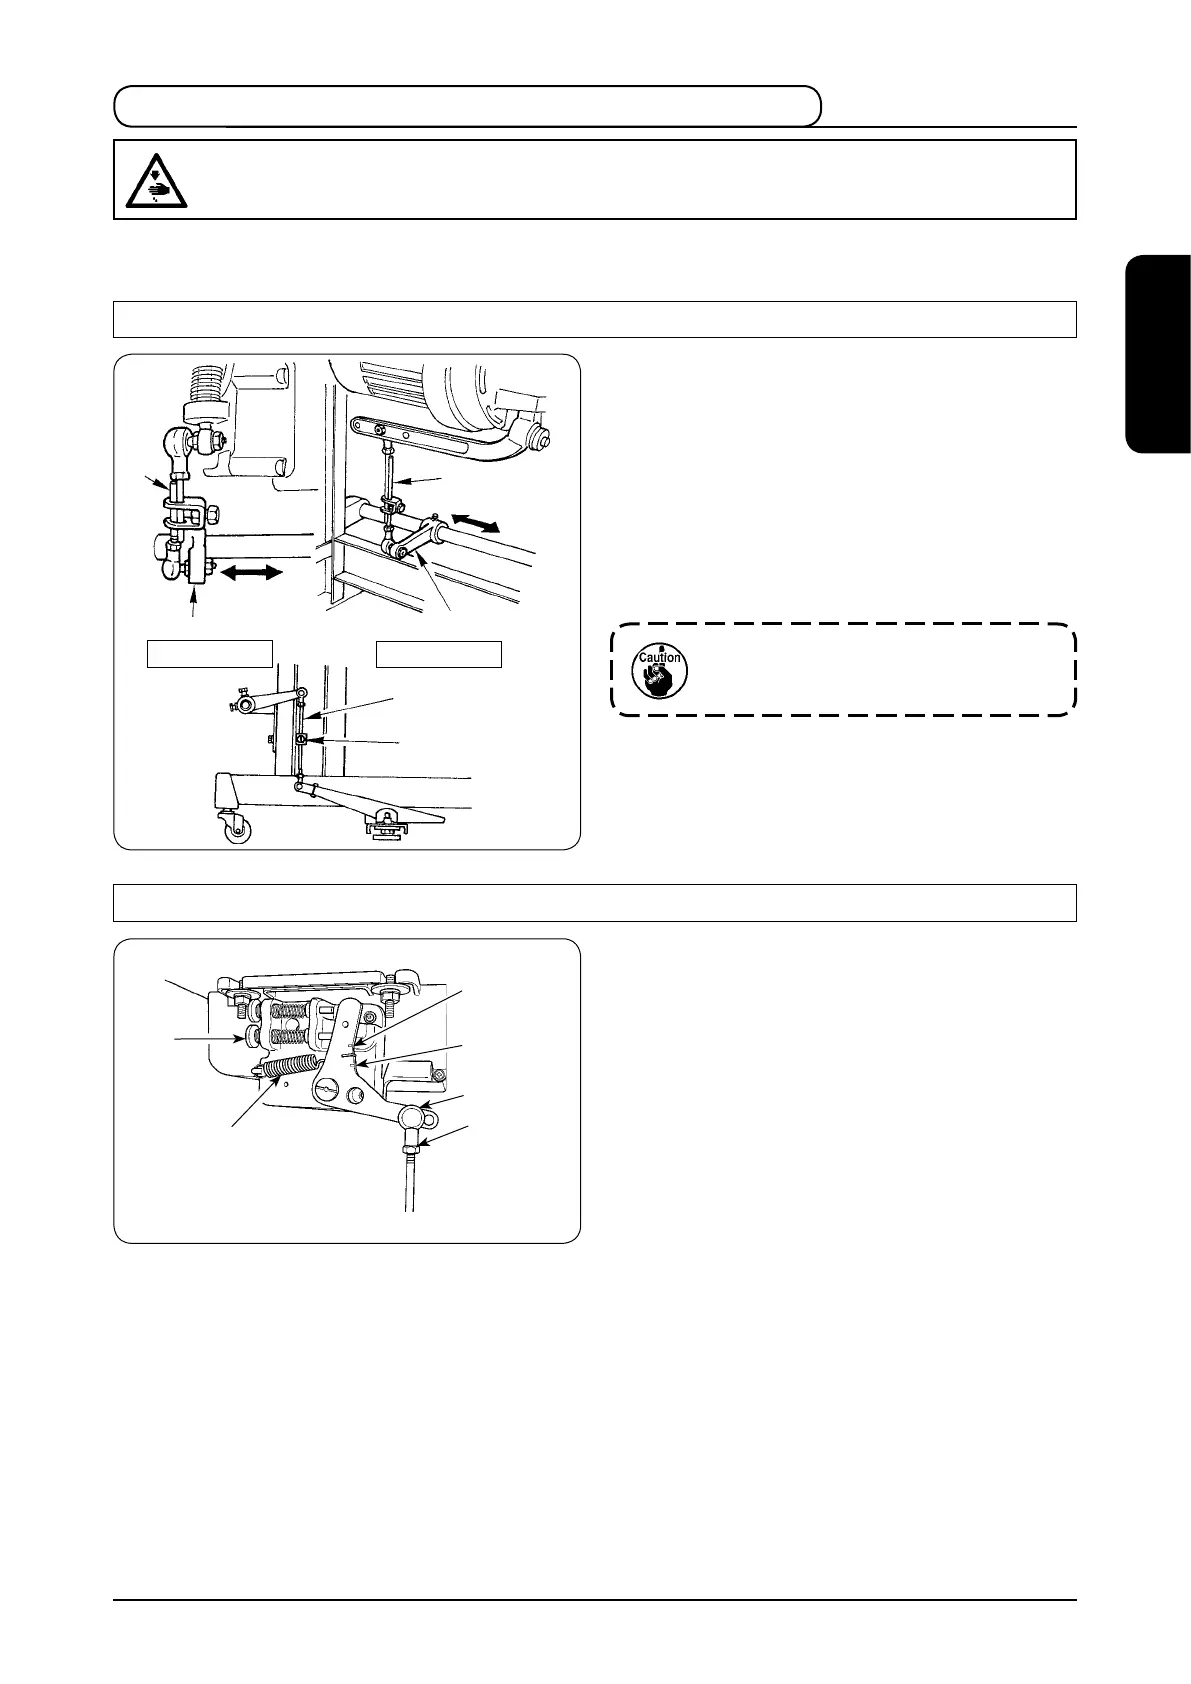
(1) Installing the connecting rod
1) Move pedal connecting arm
2
to the right or left as
illustrated by the arrow so that connecting rod
1
is
perpendicular.
(2) Adjusting the pedal angle
1) The pedal tilt can be freely adjusted by changing the
length of the connecting rod
3
.
2) Loosen adjust screw
4
, and adjust the length of
connecting rod
3
.
WARNING :
To protect against possible personal injury due to abrupt start of the machine, be sure to start the
following work after turning the power off and ascertaining that the motor is at rest.
63906390-7
1
2
3
4
1
2
* For the adjustment below, be sure to check that the pedal returns smoothly to the position before depressing when it
is depressed.
Pedal pressure and pedal stroke
(1) Adjusting the pressure required to depress the
front part of the pedal
1) When the pedal pressure spring
1
is hooked to the
lower side, the pedal pressure will decrease, and
when hooked to the upper side, the pedal pressure will
increase.
(2) Adjusting the pressure required to depress the
back part of the pedal
1) The pressure increases as you turn reverse depressing
regulator screw
2
in, and decreases as you turn the
screw out.
(3) Adjusting the pedal stroke
1) The pedal stroke decreases when you insert connecting
rod
3
into the left hole
4
.
Be sure to conrm that the pedal
returns smoothly to the position before
depressing when depressing the pedal.
3
1
4
Lower side
Upper side
2
 Loading...


