30
Adjust the wiper as follows when it is necessary to adjust it.
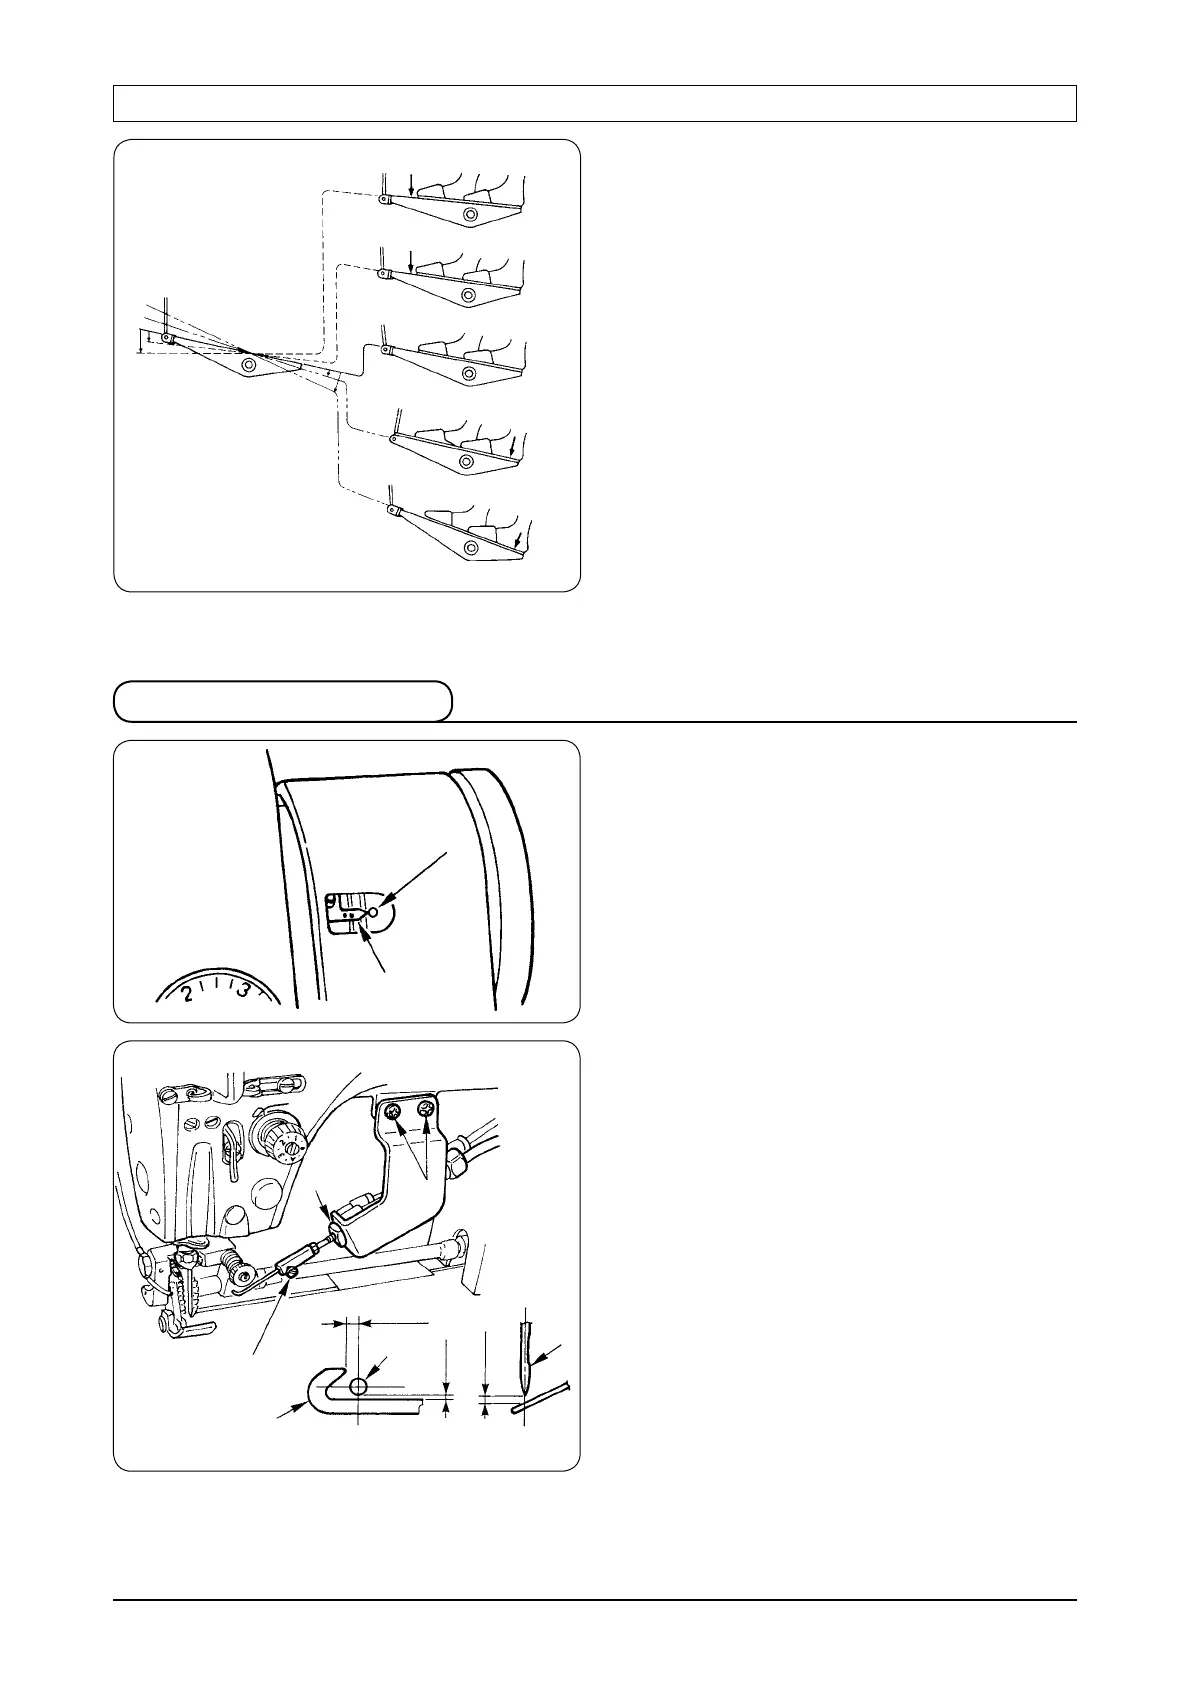
1) Turn the handwheel in the normal direction of
rotation to align white marker dot
1
engraved on the
handwheel with pointer
2
on the machine arm.
2) Loosen nut
3
, move wiper
4
and adjust the distance
between the wiper and needle
5
to –0.5 to 0.5 mm for
the adjustment of longitudinal direction
A
.
*
After the adjustment, securely tighten nut
3
.
(Tightening torque : 3 to 5 N·m)
(Note that the screw should face front.)
3) For adjusting vertical direction
B
, loosen screws
6
and adjust the distance from top end of needle to 1.5 to
2.5 mm.
4) For adjusting protruding amount
C
, loosen screw
7
and adjust the distance from needle to 0.5 to 1.5 mm.
*
After the adjustment, securely tighten screws
6
.
(Tightening torque : 3 to 4 N·m)
*
Check that the top end of the wiper does not come in
contact with the presser and the nger guard when the
wiper is in operation.
5. Adjusting the wiper
A
6
3
4
5
0.5 to 1.5
–0.5 to 0.5
1.5 to 2.5
C
B
5
7
1
2
Pedal operation
(1) The pedal is operated in the following four steps :
1) The machine runs at low sewing speed when you
lightly depress the front part of the pedal.
B
2) The machine runs at high sewing speed when you
further depress the front part of the pedal.
A
3) The machine stops (with its needle up or down) when
you reset the pedal to its original position.
C
4) The machine trims threads when you fully depress the
back part of the pedal.
E
5) The presser foot goes up when you lightly depress the
back part of the pedal
D
, and if you further depress the
back part, the thread trimmer is actuated.
• The machine will perform normal thread trimming even
if you depress the back part of the pedal immediately
following high or low speed sewing.
• The machine will completely perforrn thread trimming
even if you reset the pedal to its neutral position
immediately after the machine started thread trimming
action.
A
B
C
D
E
 Loading...


