2. Copy the install-media image to the USB flash drive using the command dd
if=<LOCATION>/<junos-install-media> of=/dev/<Device Name> bs=<n>m . For example:
LOCATION = Locally where Junos OS image is stored (/var/tmp/), junos-install-media = Junos OS
install media image, Device Name = the device name given to the USB flsh drive (da0), bs = block
size, and n = number of blocks.
user@srx5800% dd if=/var/tmp/junos-install-media-usb-srxhe-x86-64-17.4R1-S1.9.img
of=/dev/da0 bs=16m
128+0 records in
128+0 records out
2147483648 bytes transferred in 271.689162 secs (7904193 bytes/sec)
5. Remove the USB flash drive.
user@srx5800% umass0: at uhub1 port 1 (addr 3) disconnected
(da0:umass-sim0:0:0:0): lost device
(da0:umass-sim0:0:0:0): removing device entry
umass0: detached
The USB flash-drive is now ready to use as a bootable disk.
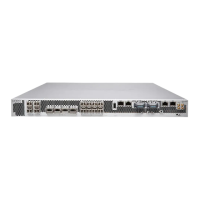
Creating a Bootable USB Flash Drive using an SRX4600 Services Gateway
To create a bootable USB flash-drive using an SRX4600 Services Gateway:
1. Connect to any SRX4600 Services Gateway that has enough storage (approx. 3GB), through a console
and login with root credentials.
2. Copy the Junos OS install image to the /var/tmp directory of the SRX4600 Services Gateway.
3. Copy the install-media to hypervisor using the statement scp
Example:
root@SRX4600:~ # scp -JU __juniper_private4__
/var/tmp/junos-install-media-usb-srxhe-x86-64-17.4R1-S1.9.img root@192.168.1.1:/var/tmp
4. Insert a USB flash drive into the USB port of SRX4600 services gateway.
5. Enter hypervisor using the command vhclient -s and check the image under /var/tmp/
root@ SRX4600:~ # vhclient -s
105

 Loading...