Chapter 6. Defining Study Setups
Kaye Validator AVS User’s Manual 66
6.4 The Sensors Configuration Screen
From the Study Details screen, press Sensors Configuration to open the Sensors
Configuration screen. Below the current study title, asset and ID number, the header row
shows that you have reached the Sensors Configuration screen, in the setup creation process.
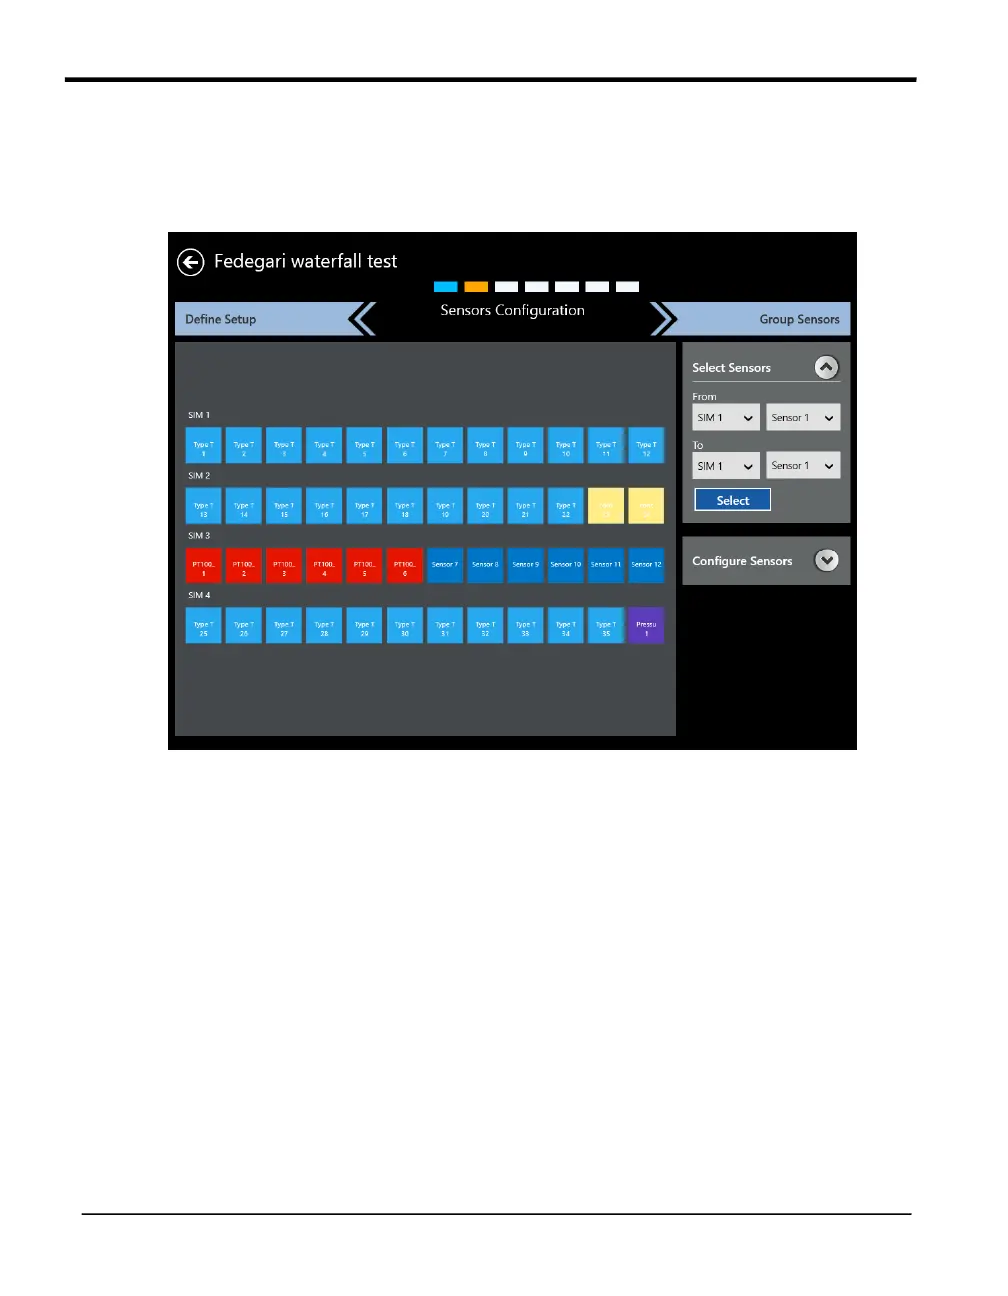
Figure 39: The Sensors Configuration Screen
The Sensors Configuration screen graphically represents the four Sensor Input Modules
labeled SIM 1, SIM 2, SIM 3 and SIM 4. The numbers on the icons correspond to the
numbers on the input connectors (up to 12) mounted inside the SIM.
For an initial setup, all the input connector tiles are blue, to indicate that they have not been
selected. Press an individual connector tile to select it, and the tile turns to dark blue, with a
selection icon in the upper right corner. You can also select a series of sensors in the Select
Sensors series of drop-down boxes at the right. Select a range of sensors from one SIM to
another SIM, press Select, and those sensors all appear as selected on the left pane. To
deselect a sensor, press on the individual sensor, or select a range of previously selected
sensors on the Select Sensors pane, and press Select.