A75UM3EE (Ver. E.2)
3-85
3.7.1 How to print the Date Stamp
[Function]
When you validate the Date Stamp Mode, the Date Stamp is printed on the copy according to your
date stamp settings if only you do copying in the usual way.
It is explained on later pages how to change each date stamp setting such as position and format.
Reading this section, please understand the way to print the Date Stamp first.
[How to validate the Date Stamp Mode]
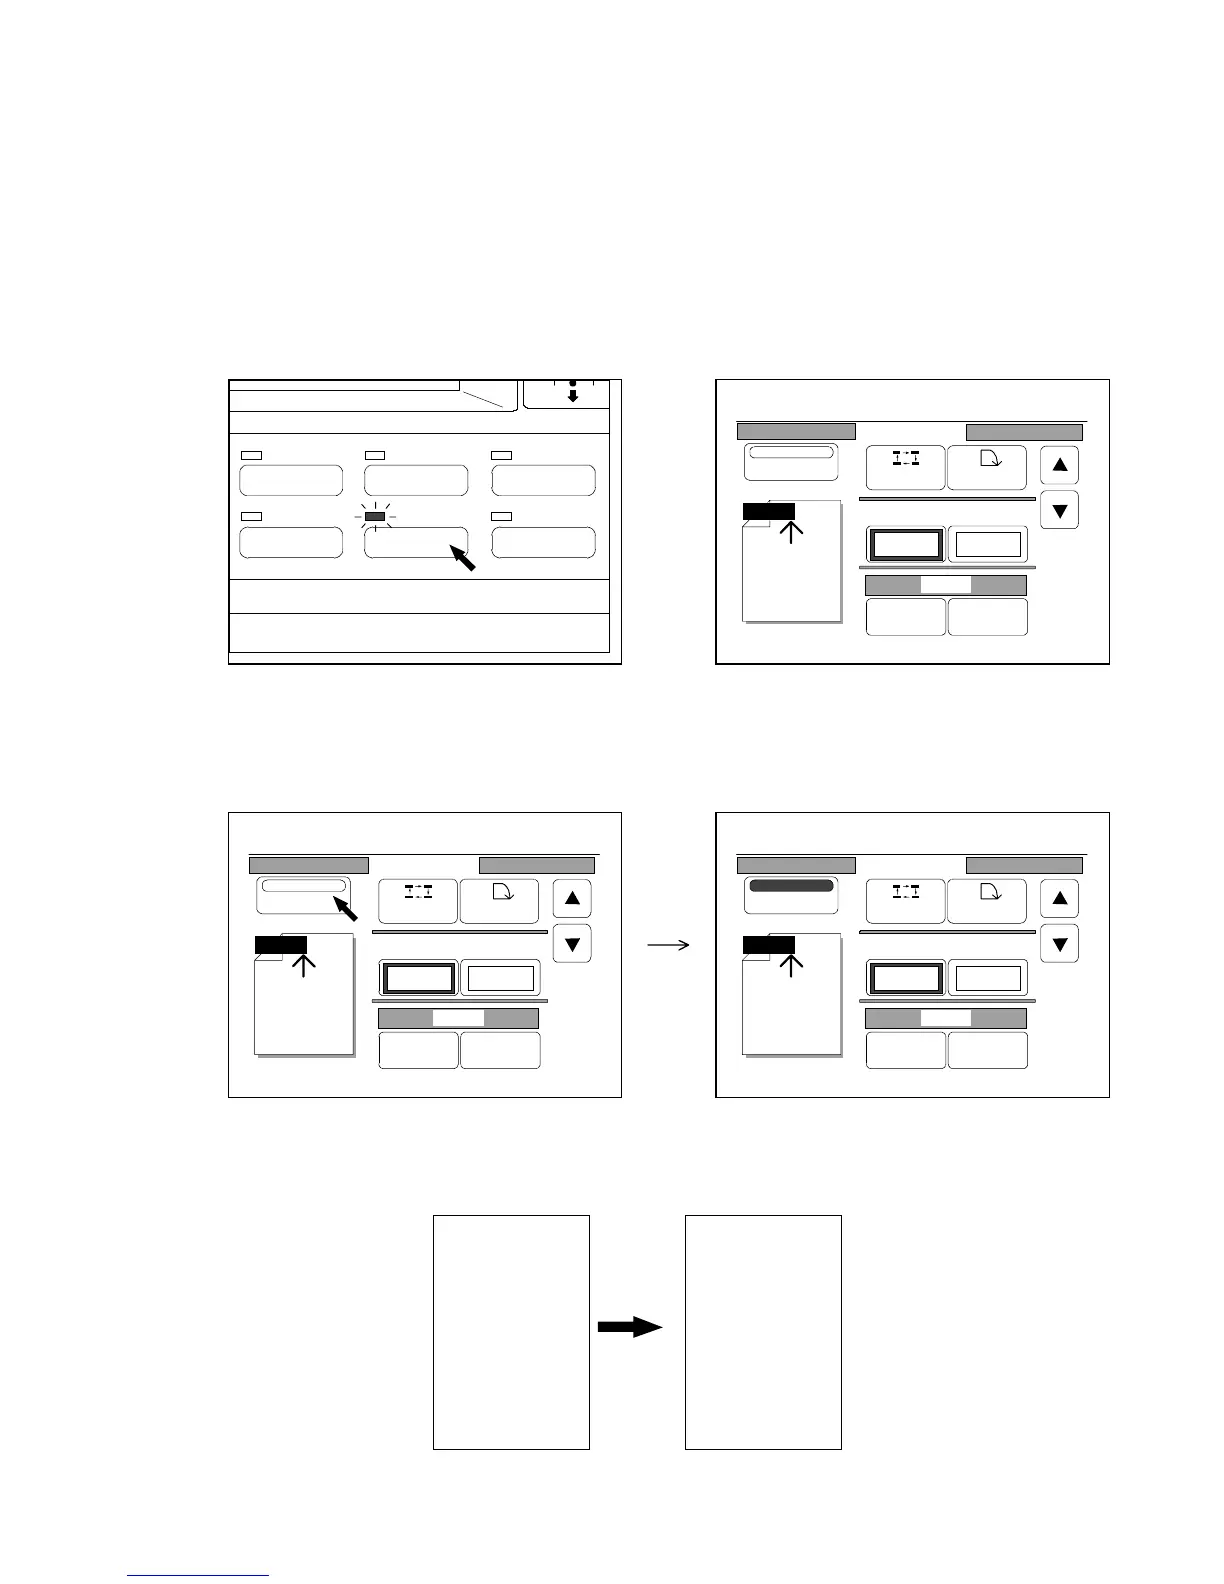
1) Push the Date Stamp Key to indicate the Date Stamp Setting Screen on the LCD.
(Date Stamp Key) (Date Stamp Setting Screen)
2) Press “Print” to validate the Date Stamp Mode.
“Print” is colored.
3) Set the original to the scanner, and then push the Start Key to start copying.
The present Date Stamp is printed on the copy obeying decided stamp settings.
As for the time, the time you pushed the Start Key is printed in case of the normal copying.
Original Copy
SCANNER
KIP
1999/01/31
KIP
SCANNER
IMAGE QUALITY
LAYOUT/SORT
ZOOM
DATE STAMPFUNCTION
PAPER
0%
001
Date Stamp
Print
Y/M/D
Position Rotate
X Shift Y Shift
0.00" 0.00"
Y/M/D
Change Detail
0%
001
Date Stamp
Print
Y/M/D
Position Rotate
X Shift Y Shift
0.00" 0.00"
Y/M/D
Change Detail
0%
001
Date Stamp
Print
Y/M/D
Position Rotate
X Shift Y Shift
0.00" 0.00"
Y/M/D
Change Detail