2FD/2FF/2FG
1-3-15
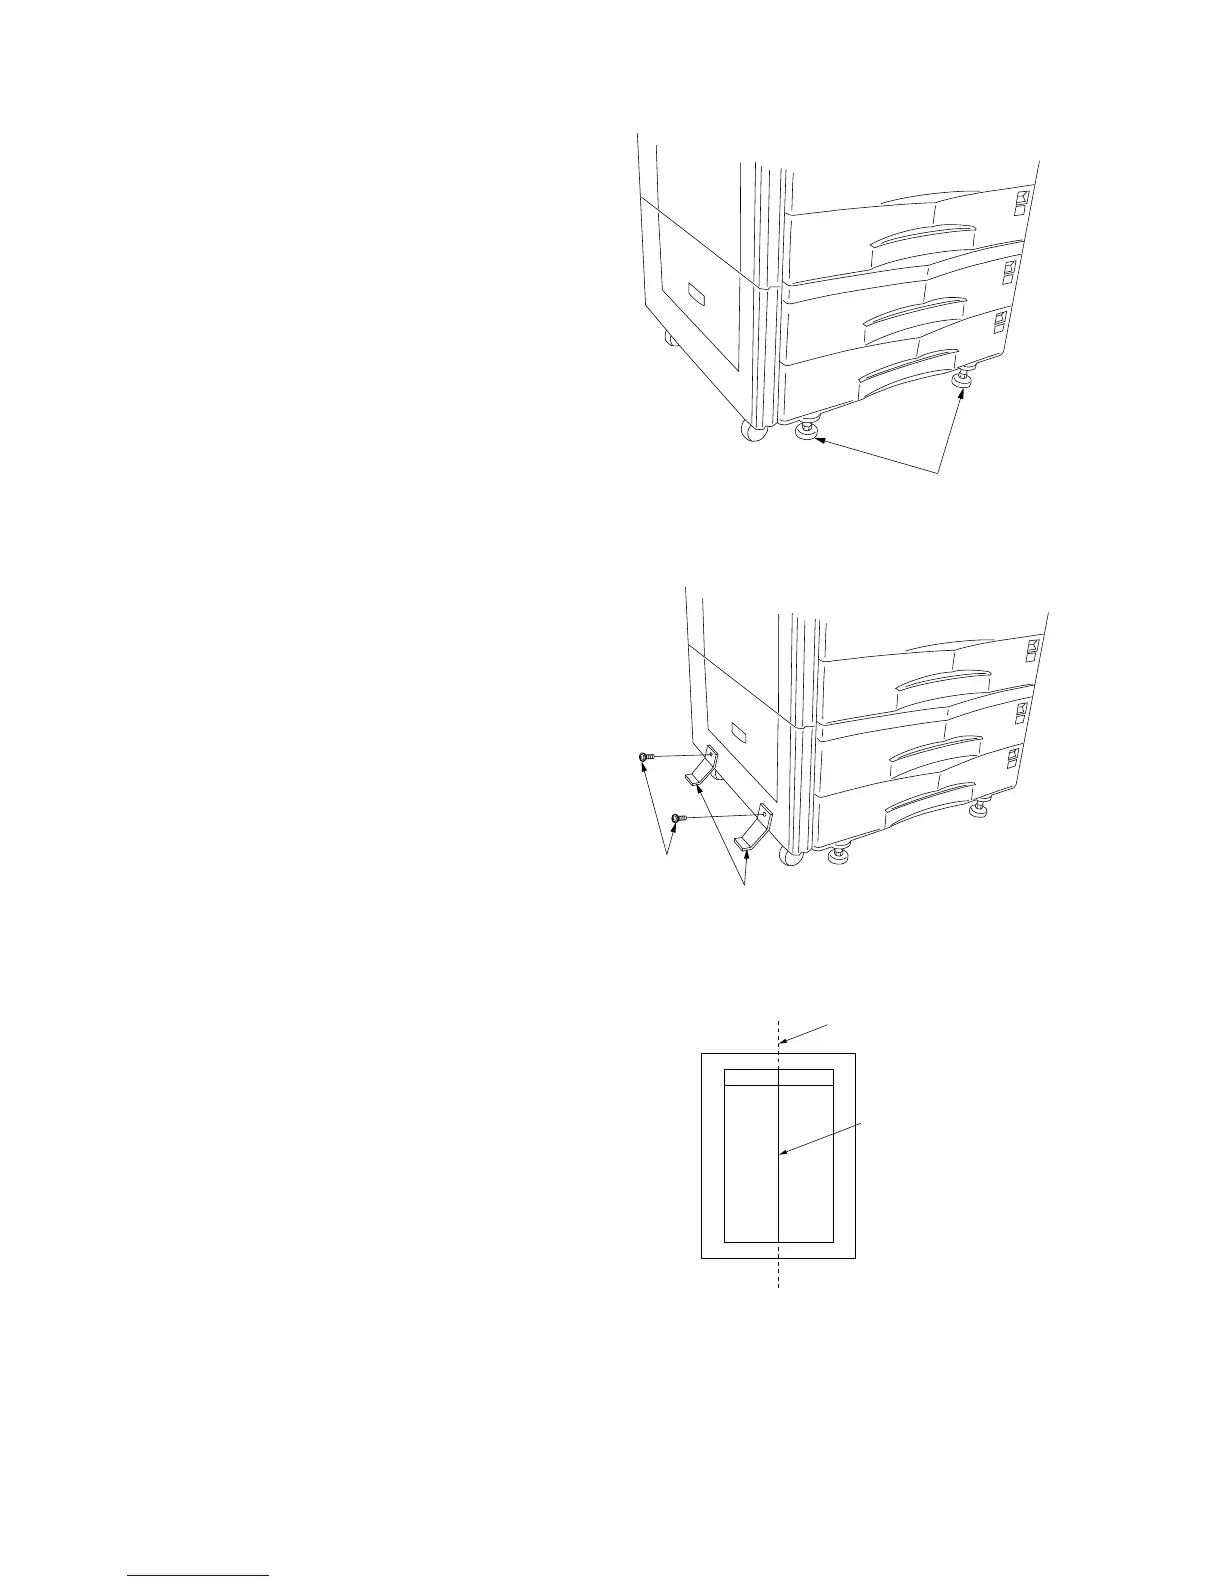
11. Turn the four leveling bolts until they reach
the floor and adjust them to level the
machine.
12. Fit the two stays to the left of the paper
feeder (one toward the front and the other the
rear) using the two M4 × 10 chrome TP
screws such that they make contact with the
floor.
Note: Do not fit the stays if the finisher is to
be installed.
13. Connect the copier power plug to the wall
outlet and turn the copier power switch on.
14. Load paper into the drawer and make a test
copy to check the operation.
Figure 1-3-24
Figure 1-3-25
Stays
M4 × 10 chrome
TP screws
Levelin
bolts
Adjusting the center line
1. Run maintenance item U993. Select “PG1”
and output a test pattern.
2. Check if the center of the paper and that of
the test pattern output are aligned. If not,
perform the following adjustment.
Center of the paper
Center of the
test pattern output
Figure 1-3-26

 Loading...


