2FD/2FF/2FG
1-3-21
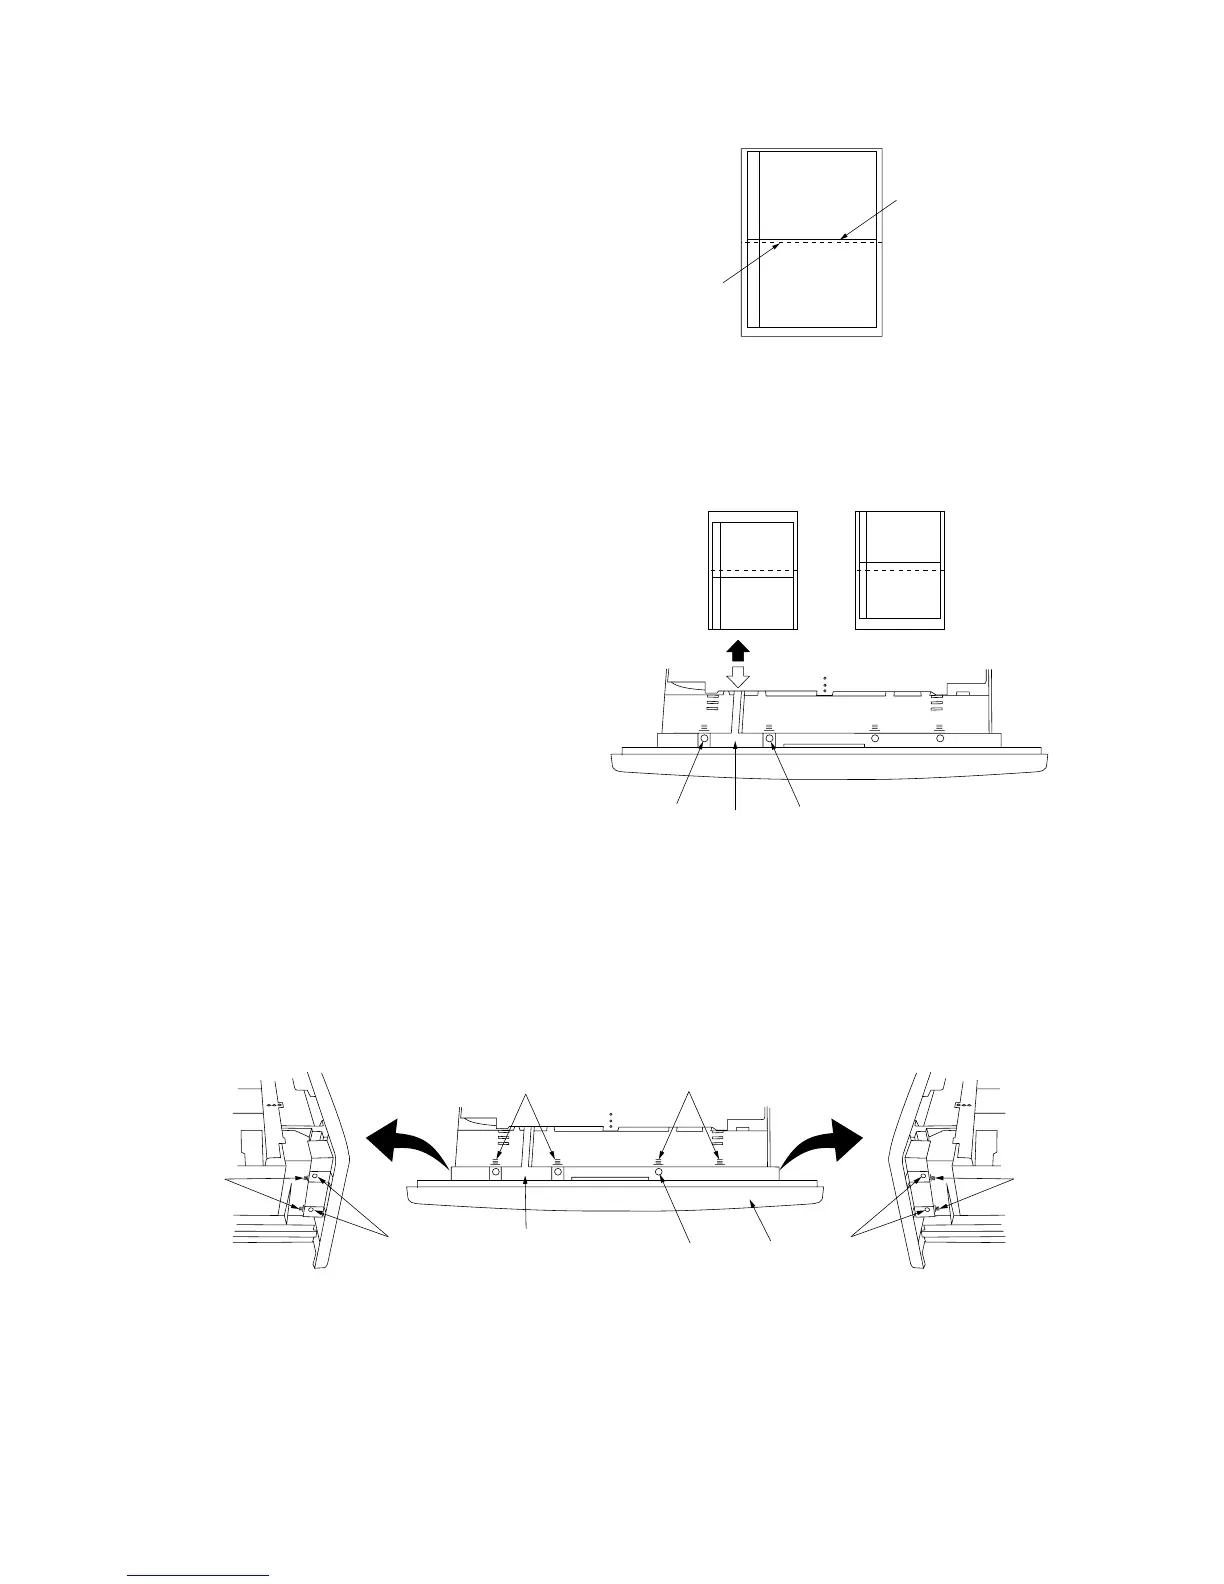
Adjusting the center line
1. Run maintenance item U993. Select “PG1”
and output a test pattern.
2. Check if the center of the paper and that of
the test pattern output are aligned. If not,
perform the following adjustment.
Center of the
test pattern output
Center of
the paper
Figure 1-3-39
3. Pull out the cassette of the paper feeder and
loosen the two screws securing the adjuster.
A and B: test pattern output examples
4. If the test pattern output looks like A, move
the adjuster in the direction of the black arrow
(b) and retighten the two screws.
If the test pattern output looks like B, move
the adjuster in the direction of the white arrow
(e) and retighten the two screws.
5. Output a test pattern again.
6. Repeat steps 3 to 5 until the centers of the
paper and the test pattern are aligned.
7. Loosen the five screws.
8. Adjust the position of the front cover so that the level indicating the position of the adjuster and the level‚ indicating
the position of the front cover are the same. If the positions of the adjuster and front cover are not aligned, the paper
cassette cannot be closed properly.
9. Retighten the five screws.
Screw
Screw
Adjuster
AB
Figure 1-3-40
Screws
Screw
Levels
Levels
Levels
Levels
Front cover
Screws
Adjuster
Figure 1-3-41

 Loading...


