2FD/2FF/2FG
1-3-69
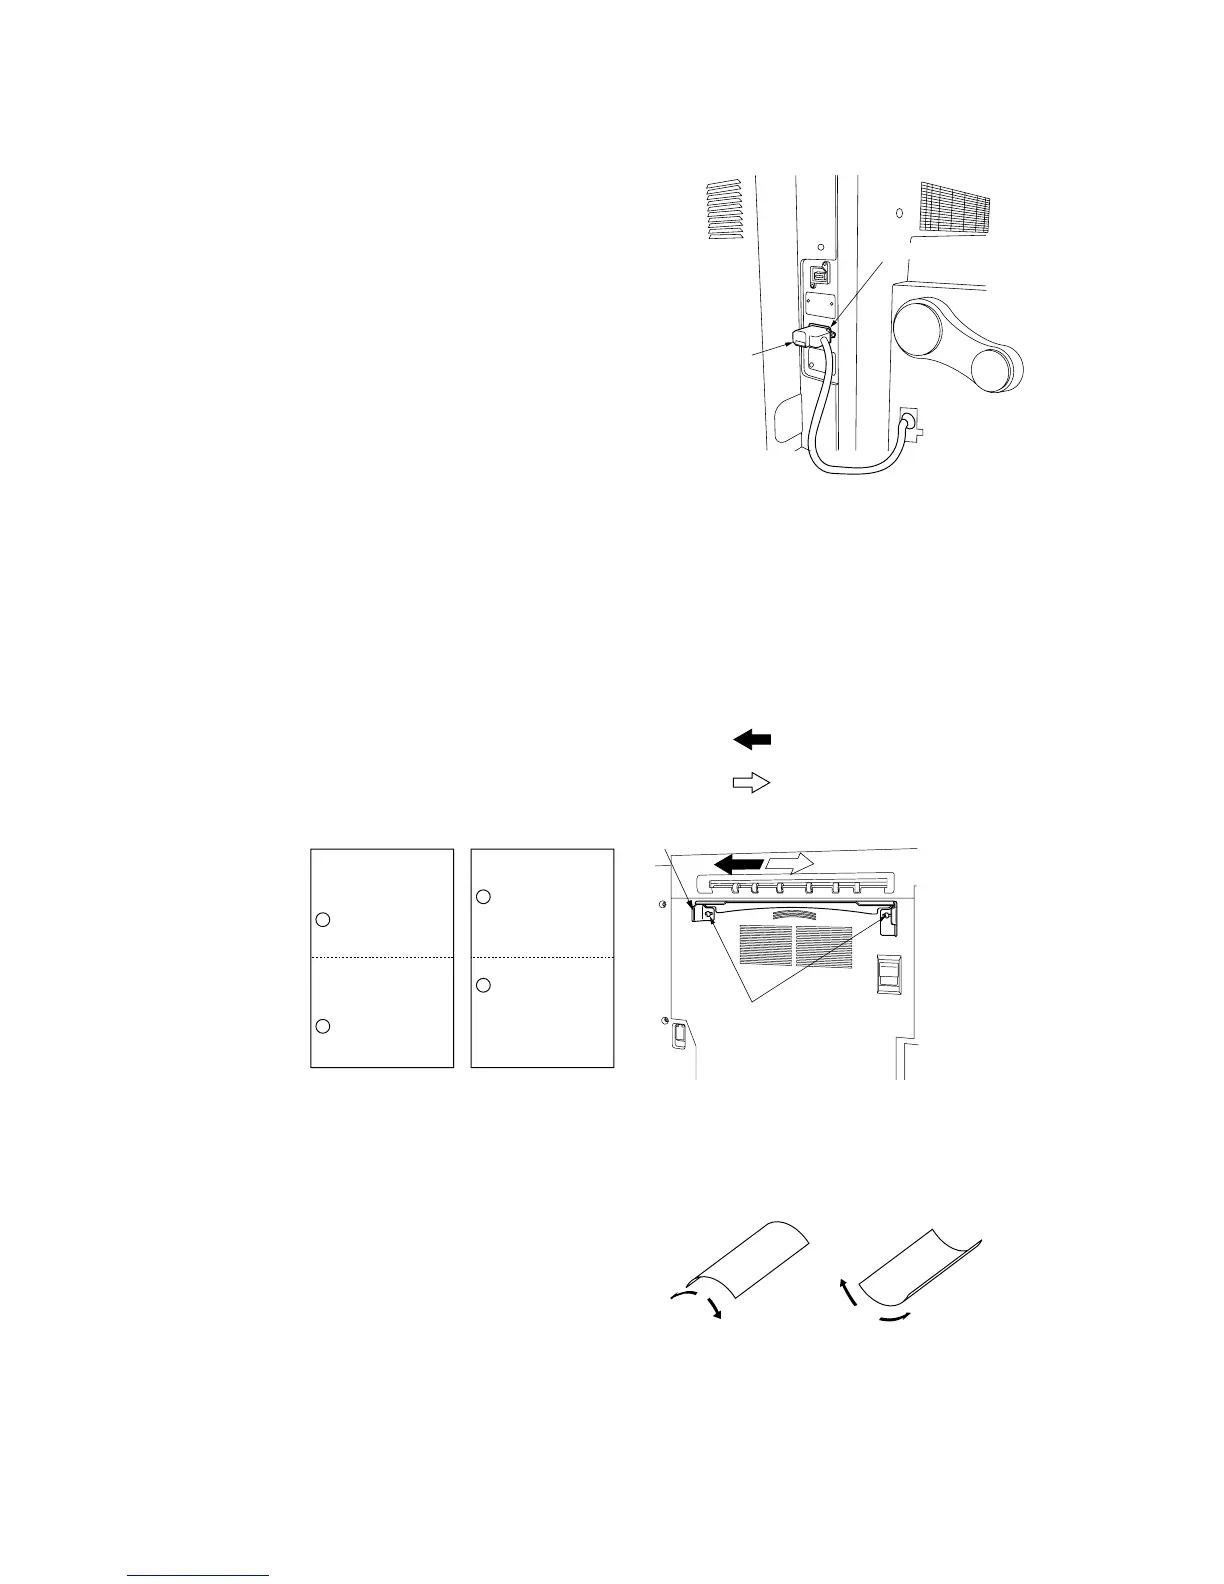
[Connecting the signal cable]
1. Connect the finisher’s signal cable to the
connector on the rear of the copier.
2. Plug the copier into a wall outlet, and turn its
power switch on.
[Adjust the punch-hole centering]
1. Set the machine into punch mode, and make a test copy using manual feed.
Note: Perform this check after checking that the center position of each drawer in the copier is correct.
2. Check the centering of the punch-holes on the test copy.
3. Loosen the two screws securing the retainer, move the retainer as necessary to adjust, and then retighten the
screws.
If holes are off-center toward the front of the copier (case [a] in illustration):
• Move the retainer toward the rear of the machine (in the direction of the
in the illustration.)
If holes are off-center toward the rear of the copier (case [b] in illustration):
• Move the retainer toward the rear of the machine (in the direction of the in the illustration).
[Adjust the paper curl]
1. Run paper through the machine.
2. Check the curl on the paper ejected onto the
finisher’s auxiliary tray.
Signal cable
Connector
ab
Retainer
Screws
cd
Figure 1-3-170
Figure 1-3-169
Figure 1-3-168

 Loading...


