2FD/2FF/2FG
1-3-56
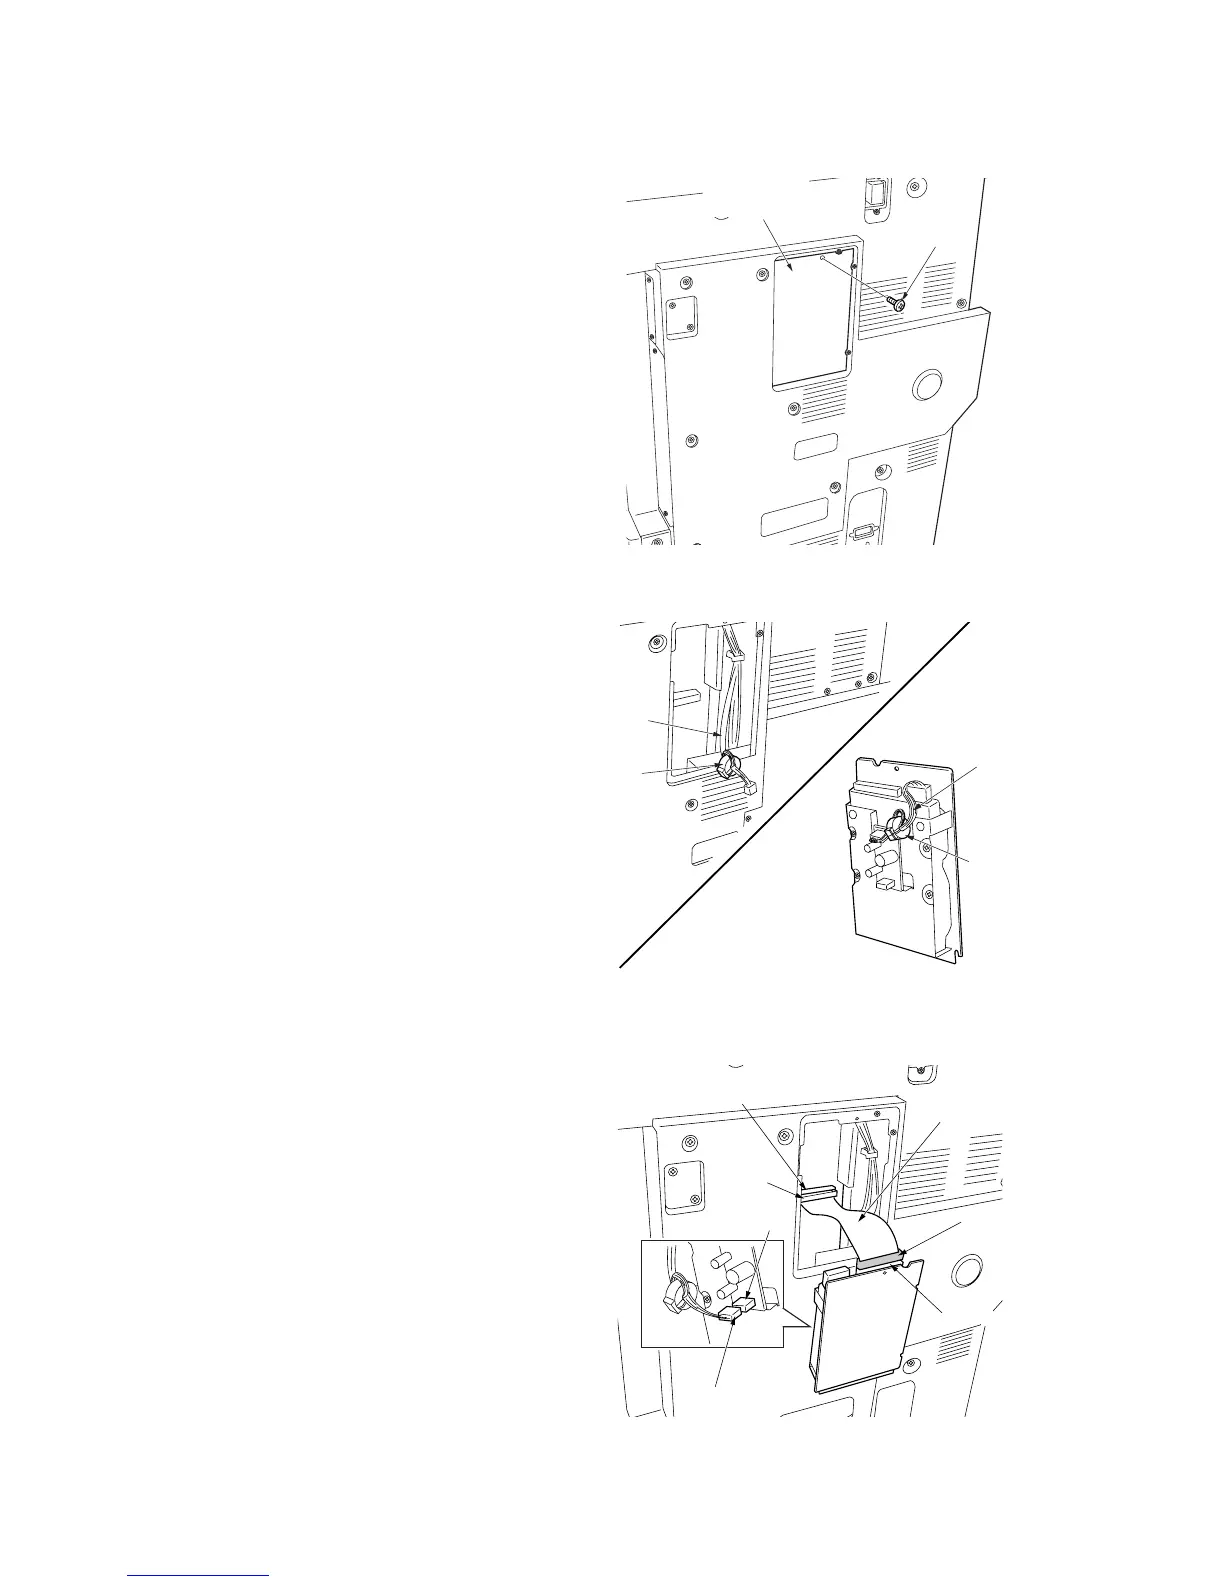
1-3-14 Installing the hard disk (option)
Procedure
1. Remove the screw and remove the cover for
the rear cover.
2. Attach the core to the wire of the hard disk by
winding it one turn around the core.
Attach the core to the 4-pin wire of the
machine by winding it one turn around the
core.
3. Connect the wire to the YC49 connector on
the main PCB and to the connector on the
hard disk.
Caution: Connect the blue connector of the
wire to the YC49 connector of the main PCB,
and connect the black connector of the wire
to the connector of the hard disk.
Connect the 4-pin connector of the machine
to the YC1 connector on the sub power
supply PCB of the hard disk.
Figure 1-3-132
Figure 1-3-133
Figure 1-3-134
Screw
Cover for
the rear cover
Wire
4-pin
wire
Core
Core
Wire
Black
connector
Blue
onnecor
Connector
YC49 connector
YC1
connector
4-Pin connector

 Loading...


