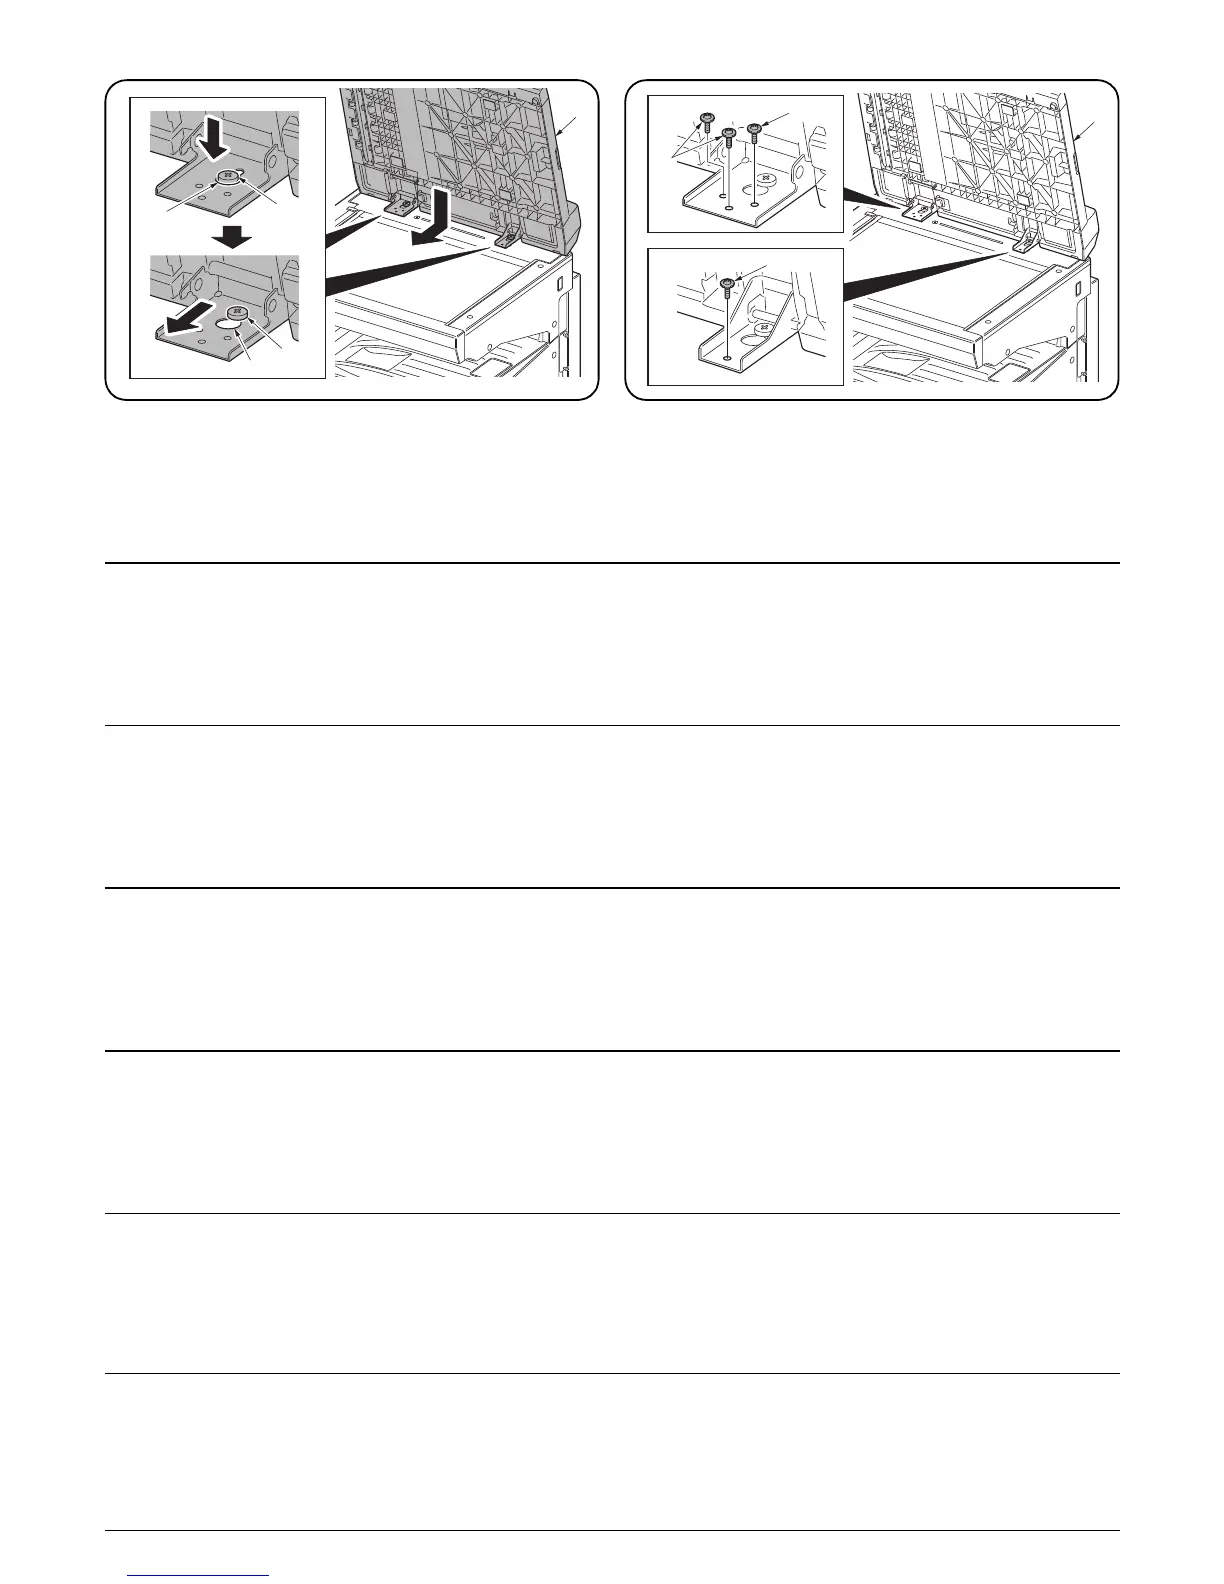
3. Insert the pins (D) into the hinge holes (2) of DP (A) and slide the DP
(A) toward the front side to install it.
4. Fix the DP (A) using four M4 × 14 screws (E).
Right: One
Left: Three
3. Insérez les goupilles (D) dans les orifices de charnière (2) du DP (A),
puis faites glisser le DP (A) vers l’avant pour l’installer.
4. Fixez le DP (A) à l’aide de quatre vis M4 × 14 (E).
Côté droit: Une
Côté gauche: Trois
3. Inserte los pasadores (D) en los orificios de bisagra (2) del DP (A) y
deslice el DP (A) hacia el lado frontal para instalar.
4. Fije el DP (A) utilizando cuatro tornillos M4 × 14 (E).
Derecho: Uno
Izquierdo: Tres
3. Die Rändelschrauben (D) in die Scharnierlöcher (2) des DP (A)
einführen, und den DP (A) zum Installieren nach vorn schieben.
4. Den DP (A) mit vier M4 × 14 Schrauben (E) befestigen.
Rechts: Eine
Links: Drei
3. Inserire i perni (D) nei fori della cerniera (2) del DP (A) e fare scorrere il
DP (A) verso il lato anteriore per installarlo.
4. Fissare il DP (A) utilizzando quattro viti M4 × 14 (E).
Destra: Una
Sinistra: Tre
3. 将卡销 (D) 插入 DP(A) 的铰链部孔 (2),向跟前滑动装上 DP(A)。 4. 用 4 个螺丝 M4 × 14(E) 固定 DP(A)。
右侧 :1 个
左侧 :3 个
3. DP 本体 (A) のヒンジ部の穴 (2) にピン (D) を挿入し、DP 本体(A)を手
前にスライドして取り付ける。
4. ビス M4 × 14(E)4 本で DP(A) を固定する。
右側:1 本
左側:3 本

 Loading...