Home
Kyocera
All in One Printer
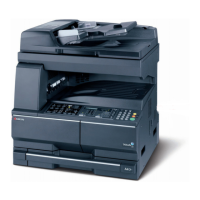
TASKalfa 181
Kyocera TASKalfa 181
355 pages
Manual
To Next Page
To Next Page
To Previous Page
To Previous Page
Loading...
Revision history
Revision
Date
Replaced pages
Remarks
1
August 31, 2009
1-2-1
1, 1-2-12, 1-2-
14, 1-3-2, 1-3-4,
1-3-16, 1-3-48,
1-3-49, 1-
5-2, 1-5-20
-
2
October 22, 2009
2-4-1 to 2-4-4
-
2
4
Table of Contents
Main Page
Default Chapter
1
Service Manual
1
Caution
2
Revision History
3
Safety Precautions
5
Safety Warnings and Precautions
6
Installation Precautions
7
Precautions for Maintenance
8
Miscellaneous
9
Table of Contents
11
1-1 Specifications
15
Specifications
15
Parts Names
18
Body
18
Operation Panel
19
Machine Cross Section
20
1-2 Installation
21
Installation Environment
21
Installation Dimensions
21
Unpacking and Installation
22
Installation Procedure
22
Setting Initial Copy Modes
31
Installing the Key Counter (Option)
32
Installing the Key Counter Requires the Following Component
32
Supplied Parts of Key Counter Set
32
Supplied Parts of Key Counter Wire Set
32
Installing the Cassette Heater (Option)
37
Installing the Cassette Heater for Paper Feeder (Option) (22 Ppm Model Only)
39
Maintenance Mode
41
Executing a Maintenance Item
41
Maintenance Modes Item List
42
Contents of the Maintenance Mode Items
45
Outputting an Own-Status Report
45
Exiting the Maintenance Mode
45
Setting the Factory Default Data
45
Setting the Service Telephone Number
46
Displaying the Machine Number
46
Copying Without Paper
47
Displaying the ROM Version
48
Initializing All Data
48
Initializing Counters and Mode Settings
49
Initializing Backup Memory
49
Evacuation of Backup Data
49
Return of Backup Data
50
Checking Motor Operation
50
Checking Switches for Paper Conveying
51
Checking Clutch Operation
51
Adjusting the Print Start Timing
52
Adjustment: Leading Edge Registration Adjustment
52
Adjustment: Center Line Adjustment
53
Adjustment: Trailing Edge Margin Adjustment
54
Setting the Printing Area for Folio Paper
54
Adjusting the Deflection in the Paper
55
Setting the Adjustment of the Motor Speed
56
Adjusting the Scanner Input Properties
57
Turning the Exposure Lamp on
57
Adjusting the Shading Position
57
Adjusting the Scanner Magnification
58
Adjustment: Main Scanning Direction
58
Adjustment: Auxiliary Scanning Direction
58
Adjusting the Scanner Leading Edge Registration
59
Adjusting the Scanner Center Line
60
Adjusting the Scanning Position for Originals from the DP
61
Adjusting the DP Magnification
62
Adjusting the DP Scanning Timing
63
Adjustment: Trailing Edge Registration
64
Adjusting the DP Center Line
65
Checking Scanner Operation
66
Adjusting the DP Input Light Luminosity
66
Executing DP Automatic Adjustment
67
Setting DP Reading Position Modification Operation
68
Outputting a MIP-PG Pattern
69
Adjusting the Scanner Automatically
70
Setting the Exposure Density Gradient
71
Setting: Density in Photo Mode
72
Setting: Density in Text in Fax Mode
72
Setting: Density in Photo in Fax Mode
72
Adjusting Original Size Detection
73
Method to Display the Data for the Sensor
73
Setting the Main High Voltage
74
Method for Main Charger Output
74
Setting the Grid Control Voltage
74
Setting the Main Charging Copy Quantity Correction
74
Setting the Other High Voltages
75
Setting the Developing Bias
75
Setting the Transfer Voltage
75
Setting the Separation Voltage
75
Checking the Drum Count
76
Initial Setting for the Developing Unit
76
Setting Toner Loading Operation
77
Checking Sensors for Toner
77
Checking/Clearing the Developing Drive Time
78
Checking the Developing Count
78
Setting the Fuser Control Temperature
78
Stabilizing Fixing Forcibly
79
Resetting the Fuser Problem Data
79
Checking/Clearing the Fuser Counts
79
Setting the Fuser Phase Control
80
Checking the Fuser Temperature
80
Turning All Leds on
80
Setting the KMAS Host Monitoring System
81
Checking DP Operation
81
Setting the Presence or Absence of a Key Card or Key Counter
81
Checking the Operation Panel Keys
82
Limiting Job Separator Output
82
Checking the Operation of the DP Motors
83
Checking the DP Switches
83
Checking Messages
84
Setting the Finisher
84
Method to Display the Messages
84
Method to Display the Graphics
84
Checking the Paper Ejection to Optional Devices
85
Setting the Maintenance Cycle
85
Checking/Clearing the Maintenance Count
85
Setting the Destination
86
Initial Setting According to the Destinations
86
Switching between Double and Single Counts
87
Turning Auto Start Function ON/OFF
87
Selecting the Timing for Copy Counting
88
Setting the Display Order of the Date
88
Setting Auto Application Change Time
89
Setting Service Status Page
89
Setting the Black Line Cleaning Indication
89
Setting the Size Conversion Factor
90
Specific Paper Feed Location Setting for Printing Function
90
Setting the Ejection Restriction
91
Switching between Duplex/Simplex Copy Mode
91
Setting the Low-Power Mode
92
Setting the Value for Maintenance Due Indication
92
Adjusting Margins of Image Printing
93
Adjusting Margins for Scanning an Original on the Platen
94
Adjusting Margins for Scanning an Original from the DP
95
Adjusting the Leading Edge Registration for Memory Image Printing
96
Initializing the Scanner NIC
97
Setting the Time out
97
Checking Copy Counts by Paper Feed Locations
98
Checking/Clearing the Paper Jam Counts
98
Checking/Clearing the Service Call Counts
99
Checking Counts by Optional Devices
99
Resetting Partial Operation Control
100
Checking the Total Counter Value
100
Clearing the Black Ratio Data
100
Checking/Clearing Copy Counts by Paper Sizes
100
Setting Backup Data Reading/Writing
101
Checking the Copy Counts
102
Checking/Clearing the System Error Counts
102
Rewriting FAX Program
103
Clearing the All Copy Counts and Machine Life Counts (One Time Only)
104
Checking Machine Life Counts
104
Setting the Automatic Toner Install
104
Setting the Default Magnification Ratio of the Default Cassette
105
Setting of Deflection for Feeding from DP
105
Checking of Toner Area Code
105
Checking/Clearing the Time for the Exposure Lamp to Light
106
Checking the Scanner Count
106
Outputting a VTC-PG Pattern
107
Management Mode
108
Using the Management Mode
108
Setting the Job Accounting
109
Deleting an Account
109
Changing Limit of Use
109
Individual Account Management
109
Copy Default
110
Density Mode
110
Original Image Quality
110
Eco Print Mode ON/OFF
110
Machine Default
111
Offset Copying
111
Auto Rotation Copy
111
Margin Width Default Value
111
Original Orientation
112
Auto Sleep Time
112
Auto Low Power Time
112
Copy Output Destination
112
MP Tray Setting
113
Checking the Total Counter and Printing out the Counter Report
113
Report Output
113
Language Setting
113
1-4 Troubleshooting
115
Paper Misfeed Detection
115
Paper Misfeed Indication
115
Paper Misfeed Detection Conditions
116
Paper Misfeeds
122
List of System Errors
130
Partial Operation Control
130
Measures against the Service Codes Detecting Fuser Problems
130
Self-Diagnostic Function
130
Self Diagnostic Codes
131
Image Formation Problems
139
No Image Appears (Entirely White)
139
No Image Appears (Entirely White)
140
No Image Appears (Entirely Black)
140
Image Is too Light
141
Background Is Visible
141
A White Line Appears Longitudinally
141
A Black Line Appears Longitudinally
142
A Black Line Appears Laterally
142
One Side of the Copy Image Is Darker than the Other
142
Black Dots Appear on the Image
142
Image Is Blurred
143
The Leading Edge of the Image Is Consistently Misaligned with the Original
143
The Leading Edge of the Image Is Sporadically Misaligned with the Original
143
Paper Creases
143
Offset Occurs
144
Image Is Partly Missing
144
Fusing Is Poor
144
Image Is out of Focus
144
Image Center Does Not Align with the Original Center
145
Electric Problems
146
Mechanical Problems
150
1-5 Assembly and Disassembly
153
Precautions for Assembly and Disassembly
153
Drum
153
Toner
153
How to Tell a Genuine Kyocera Mita Toner Container
154
Paper Feed Section
155
Detaching and Refitting the Separation Pulley
155
Detaching and Refitting the Forwarding Pulley and Paper Feed Pulley
158
Detaching and Refitting the Feed Roller (22 Ppm Model Only)
161
Detaching and Refitting the Cassette Separation Pulley (22 Ppm Model Only)
163
Detaching and Refitting the Cassette Forwarding Pulley and Cassette Paper Feed Pulley (22 Ppm Model Only)
165
Detaching and Refitting the Paper Conveying Unit
168
Detaching and Refitting the MP Paper Feed Pulley and MP Separation Pad
170
Detaching and Refitting the Left Registration Roller
173
Detaching and Refitting the Right Registration Roller
174
Optical Section
176
Detaching and Refitting the Exposure Lamp
176
Detaching and Refitting the Scanner Wires
178
Detaching the Scanner Wires
178
Fitting the Scanner Wires
181
Detaching and Refitting the ISU (Reference)
185
Detaching and Refitting the Laser Scanner Unit
187
Adjusting the Longitudinal Squareness (Reference)
192
Drum Section
193
Detaching and Refitting the Drum Unit
193
Detaching and Refitting the Drum Separation Claws
194
Detaching and Refitting the Main Charger Unit
195
Developing Section
196
Detaching and Refitting the Developing Unit
196
Transfer Section
197
Detaching and Refitting the Transfer Roller
197
Fuser Section
199
Detaching and Refitting the Fuser Unit
199
Detaching and Refitting the Press Roller
201
Detaching and Refitting the Fuser Heater
203
Detaching and Refitting the Heat Roller Separation Claws
206
Detaching and Refitting the Heat Roller
207
Detaching and Refitting the Fuser Thermistor
209
Detaching and Refitting the Fuser Thermostat
210
Adjusting Front Position of the Fuser Unit (Adjusting Lateral Squareness)
211
Others
212
Detaching and Refitting the Eject Unit
212
Direction of Installing the Principal Fan Motors
214
1-6 Requirements on PWB Replacement
215
Upgrading the Firmware
215
Firmware Upgrading Requires the Following Tools
215
Adjustment-Free Variable Resistors (VR)
216
Remarks on Main PWB and Engine PWB Replacement
216
2-1 Mechanical Construction
217
Paper Feed Section
217
Paper Feed Section Block Diagram
218
Image Scanner Section
219
Optical Section
219
Image Scanner Section Block Diagram
220
Laser Scanner Section
221
Laser Scanner Section Block Diagram
222
Drum Section
223
Drum Section Block Diagram
224
Developing Section
225
Developing Section Block Diagram
226
Single Component Developing System
227
Transfer and Separation Sections
228
Fuser Section
229
Fuser Section Block Diagram
230
Eject and Switchback Sections
231
Eject and Switchback Sections Block Diagram
232
Duplex Section
233
Duplex Section Block Diagram
234
Electrical Parts Layout
235
Pwbs
235
List of Correspondences of PWB Names
236
Switches and Sensors
237
Motors
239
Other Electrical Components
240
2-3 Operation of the Pwbs
241
Power Source PWB
241
Main PWB
243
Engine PWB
247
Cassette PWB
253
Cassette PWB Silk-Screen Diagram
253
Operation PWB
256
Cassette Main PWB (22 Ppm Model Only)
258
2-4 Appendixes
261
Maintenance Parts List
261
Periodic Maintenance Procedures
262
Chart of Image Adjustment Procedures
265
Image Quality
266
Wiring Diagram
267
Paper Feeder Wiring Diagram (22 Ppm Model Only)
268
Installation Guide for Document Processor
269
Supplied Parts
270
Installing the DP
271
Adhering the Film
273
Attaching the Original Mat
273
Connecting the Signal Cable
274
Adhering the Labels
274
Checking the Operation
275
Checking Image from the DP
276
Checking the Angle of Leading Edge
277
Adjusting the DP
278
Checking the Angle of Trailing Edge
280
Automatic Adjustment Using the Original for Adjustment
290
Adjusting the DP Open/Close Angle
291
Installation Guide for Paper Feeder
292
Additional Step During PF-420 Installation
293
Procedure
294
Adjusting the Leading Edge Timing
302
Adjusting the Center Line
303
Installation Guide for Duplex Unit
306
Installation Guide for Built-In Finisher
315
Installation Guide for Job Separator
327
Installation Guide for FAX System (R)
336
Attach the Approval Label
350
Installation Guide for Scan System (F)B
351
Other manuals for Kyocera TASKalfa 181
Operation Guide
276 pages
User Guide
93 pages
Installation Guide
20 pages
Related product manuals
Kyocera TASKalfa 180
164 pages
Kyocera TASKalfa 1800
213 pages
Kyocera TASKalfa 1801
268 pages
Kyocera TASKALFA FS-1100
109 pages
Kyocera Taskalfa Pro 15000c
576 pages
Kyocera TASKalfa 221
149 pages
Kyocera TASKalfa 2201
268 pages
Kyocera TASKalfa 420i
508 pages
Kyocera TASKALFA 300I
426 pages
Kyocera TASKalfa 250ci
488 pages
Kyocera TASKalfa 3501i
113 pages