Repair GL16
7-8
NOTE: The new doffer roll cover
should be spiral-wound at about a
45° angle. A steeper angle will use
more cover material. A shallower
angle will use less cover material.
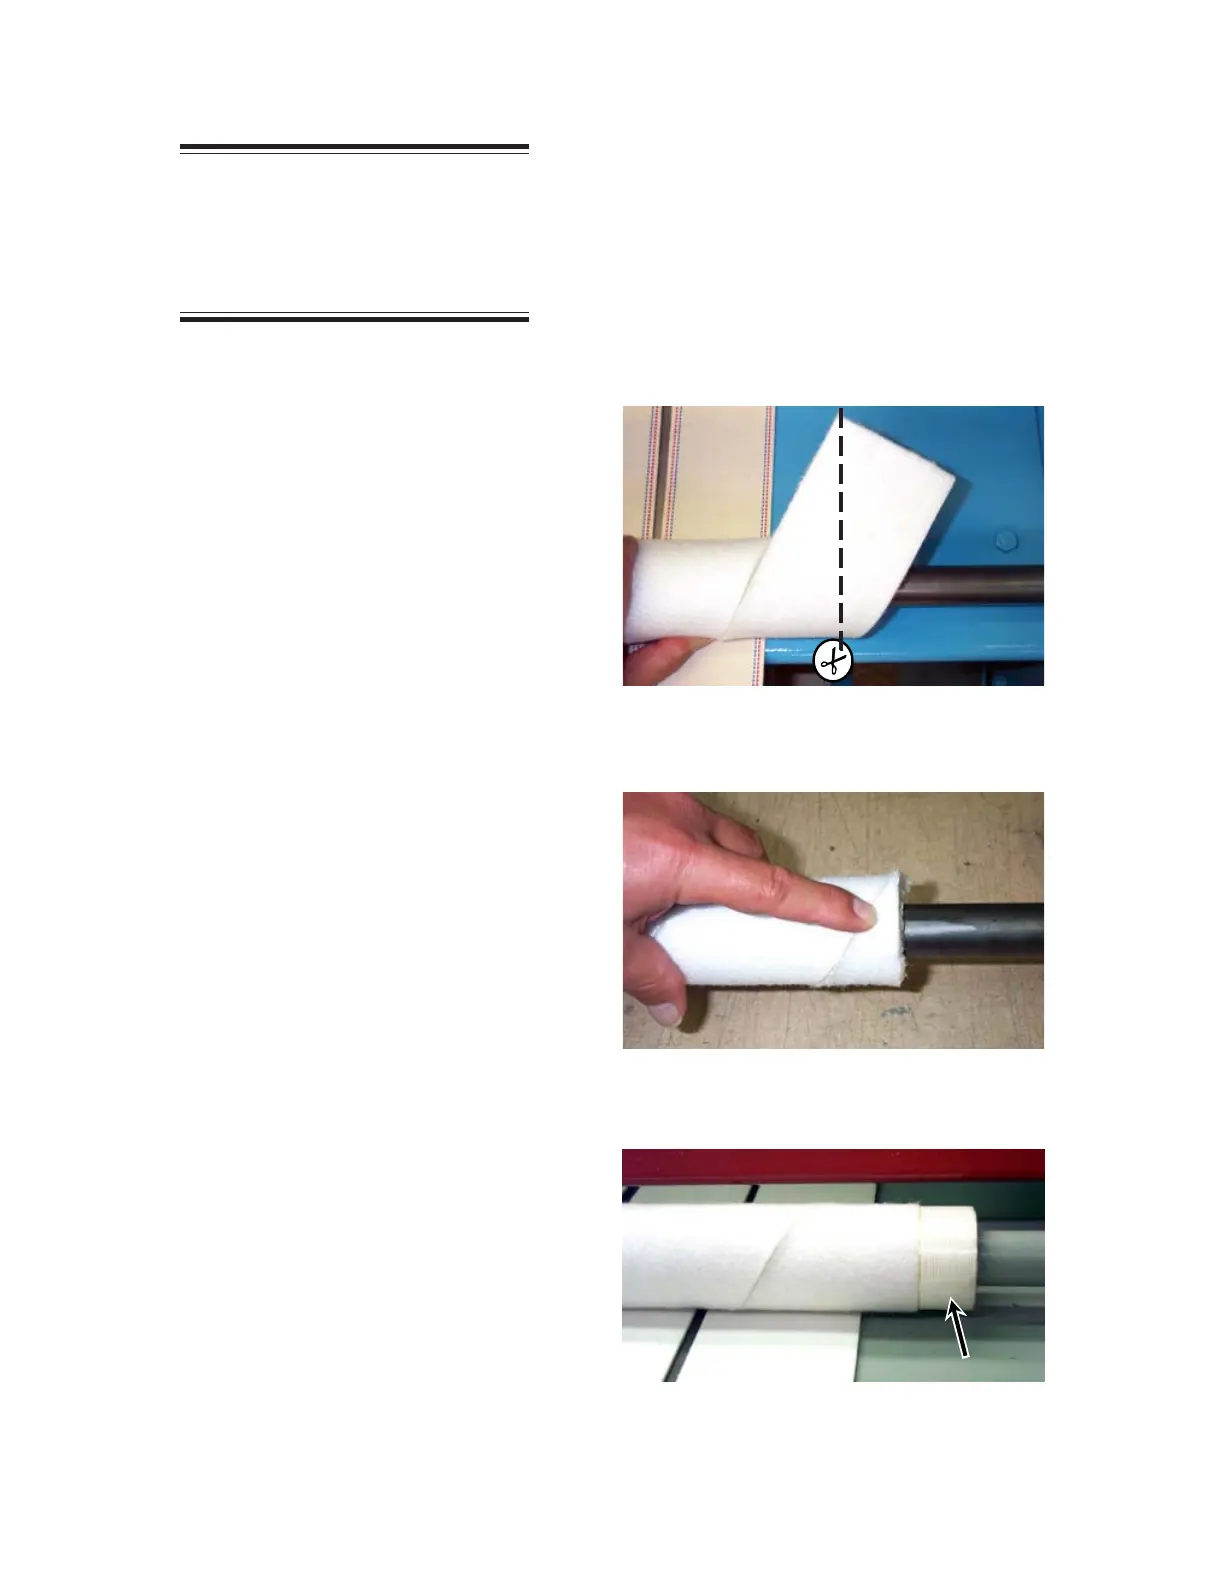
9. Once the angle has been determined, mark
and cut the cover at the start of the wind-
ing, parallel to the end of the roll (Figures
7-5 and 7-6).
10. In a strip along the full length of the doffer
roll, apply the cement evenly on 1/4 to 1/3
of the cylindrical surface. Smooth cement
with a putty knife.
11. Position the starting edge at the end of
the roll and secure it with several wraps
of filament tape (Figure 7-7).
12. Carefully spiral-wind the cover onto the
roll, making sure that it goes on smoothly
without any gaps.
13. Trim off any excess cover material from
the end of the doffer roll. Secure the end
of the cover to the doffer roll with several
wraps of filament tape.
14. Remove the temporary protective cover-
ing from the feed ribbons and clean up
the area.
15. Align and overlap the ends of the first
guide tape. Be sure the trailing edge of
the guide tape is on top and the leading
edge is on the bottom (Figure 7-9). Staple
the ends together, placing a staple near
each end of the tape with one to three
additional staples spaced evenly between.
Repeat for the remaining guide tapes.
16. Remove the wooden wedges from the
slots, allowing the doffer roll to rest on
the feed ribbons.
17. Turn the power ON at the main discon-
nect switch.
Figure 7-6: When properly cut and positioned, the
cover should be flush with the end of
the doffer roll.
Figure 7-5: Mark and cut the cover at the start of
the winding, parallel to the end of the
roll.
18. Start the unit to make sure the cover is
secure and smooth against the doffer roll.
19. If any adjustment to the cover is neces-
sary, stop the unit and turn the power OFF
at the main disconnect switch before mak-
ing the adjustment.
Figure 7-7: Secure the end of the doffer roll cover
with several wraps of filament tape.
 Loading...