Preventive Maintenance GL16
4-6
Grease “Weekly” Bearings
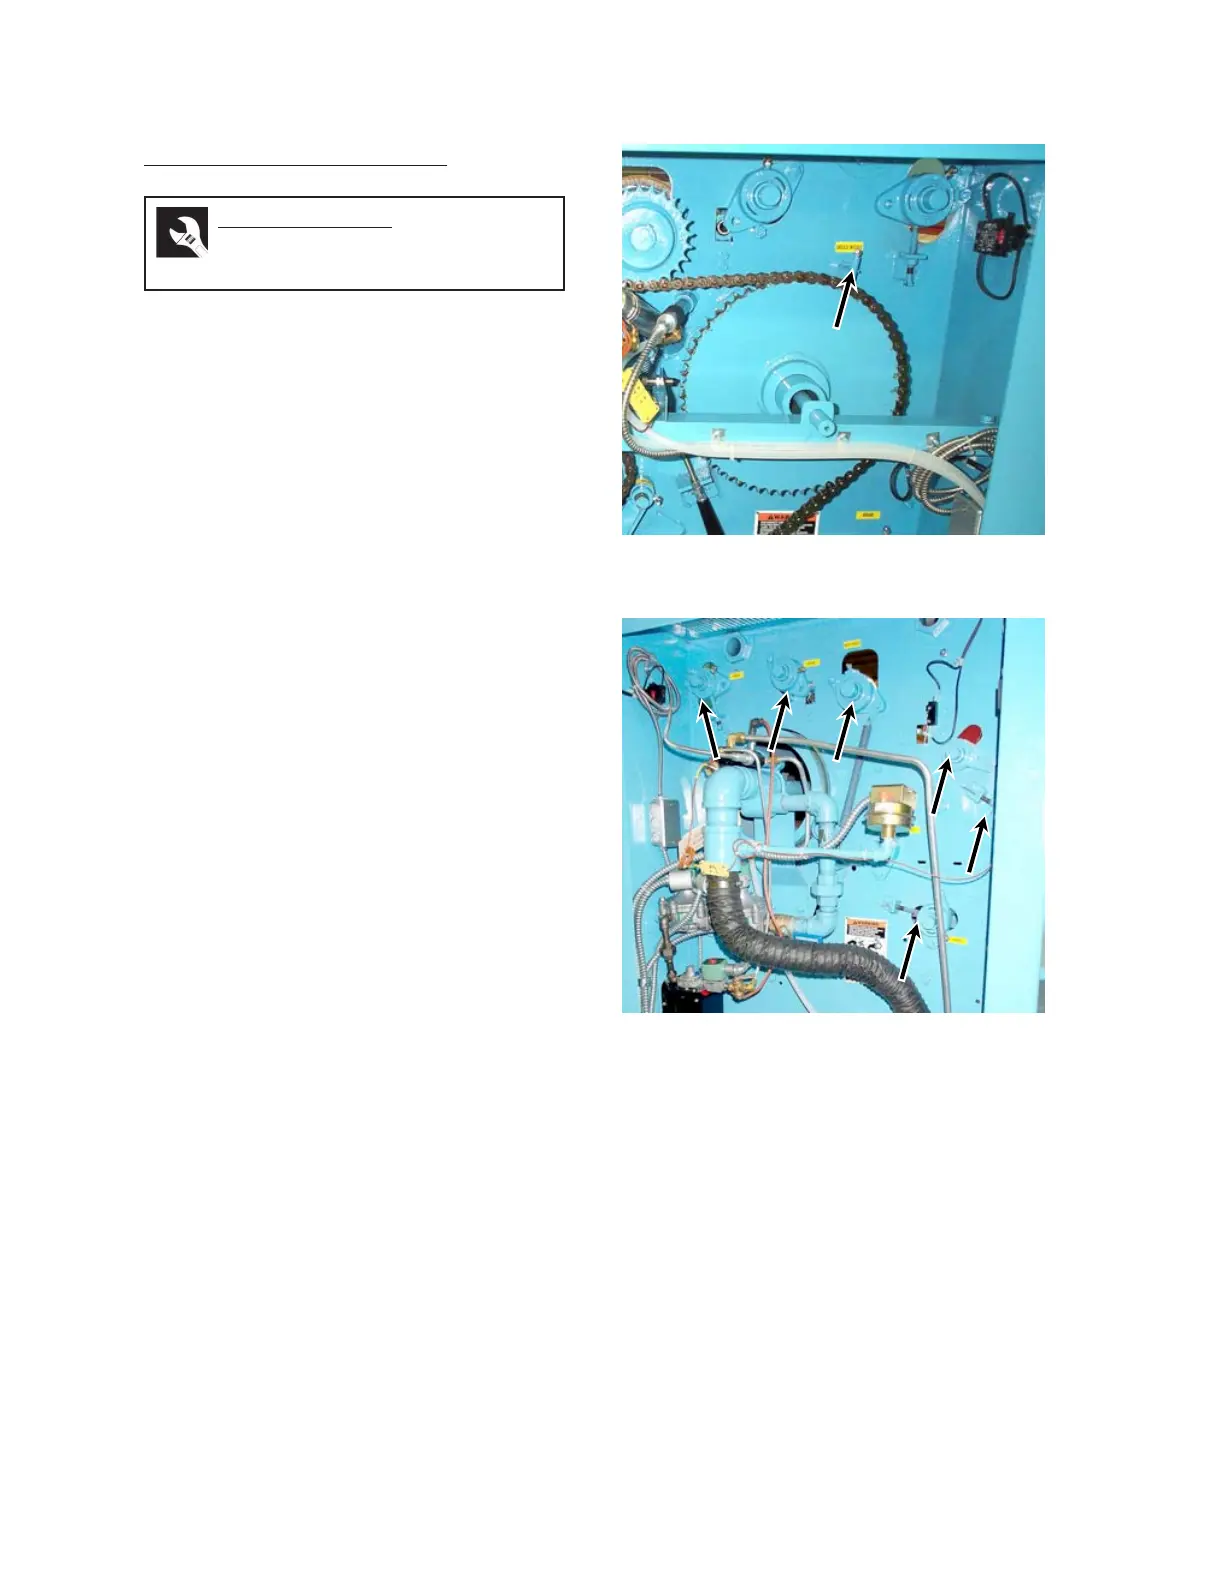
The grease fittings for the ironing cylinder
bearing (Figure 4-3), cam follower bearings, and
compression roll bearings (Figure 4-4) are marked
with yellow “GREASE WEEKLY” tags and need
to be greased weekly. Other bearings that are
identified with the yellow “GREASE” tags should
also be greased weekly if the unit is continuously
run for long periods.
A special high temperature lubricant is required
to properly grease all bearings. A cartridge and
grease gun are initially supplied with the unit
(Figure 4-5). It is important that only this grease,
or equivalent, be used. Use of unsuitable grease
can cause bearing lockup, failure due to the heat
from the ironing section, or problems if the grease
used is incompatible with the grease that is already
in the bearings. Failure to use correct high
temperature lubricant will void the factory
warranty.
If any other grease is being considered:
1. Check with the Chicago Dryer Company
factory Service Department to verify the
grease meets specifications and is com-
patible with the grease already in the bear-
ings.
2. Follow directions on the grease gun pack-
aging for other filling methods such as dis-
penser or suction.
To fill the grease gun:
1. Remove the barrel from the end cap by
twisting it counterclockwise.
2. Hold the barrel. Pull the plunger rod handle
all the way back and lock it in the keyhole
slot at the end of the barrel.
3. Remove the plastic cap from the grease
cartridge and smooth the inside edge for
easy entry of the plunger.
Required Tools
grease gun, high temperature
lubricant
Figure 4-4: Properly greased bearings extend the
useful life of the unit.
Figure 4-3: Ironing cylinder bearing grease fitting.
4. Insert the opened edge of the cartridge
completely into the barrel. Remove the
flip-top seal from the exposed cartridge
end.
5. Screw the end cap onto the barrel by
twisting it clockwise.
6. Release the plunger rod from the keyhole
slot and push it into the cartridge.
7. To vent air pockets, loosen the end cap
a 1/2 turn and tighten.
 Loading...